visionOS 2 PortalComponent
Recently, I used the portal feature while developing and noticed that the portal in visionOS2.0 introduced two additional options compared to 1.0, which can achieve a more seamless extension into reality. I tried these features and now share my findings with you.
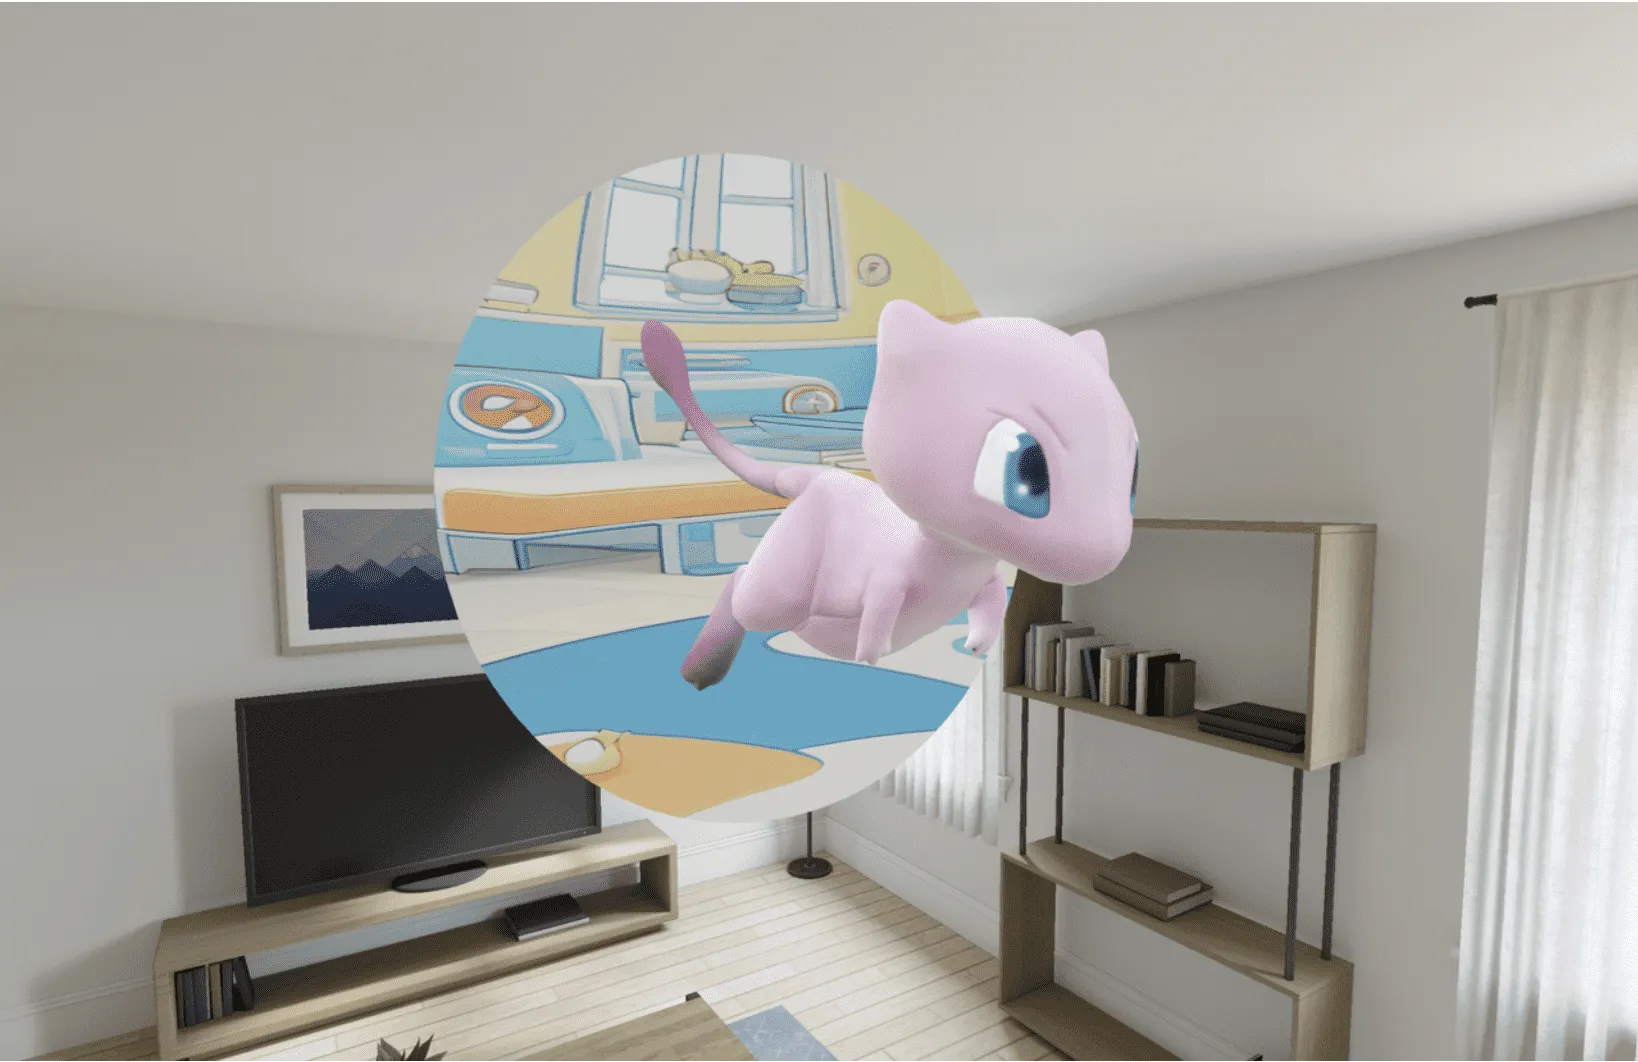
Let’s first examine the 1.0 version of the portal, where the content is primarily confined within the portal itself, leading to a rather abrupt and odd sensation when changing perspectives.
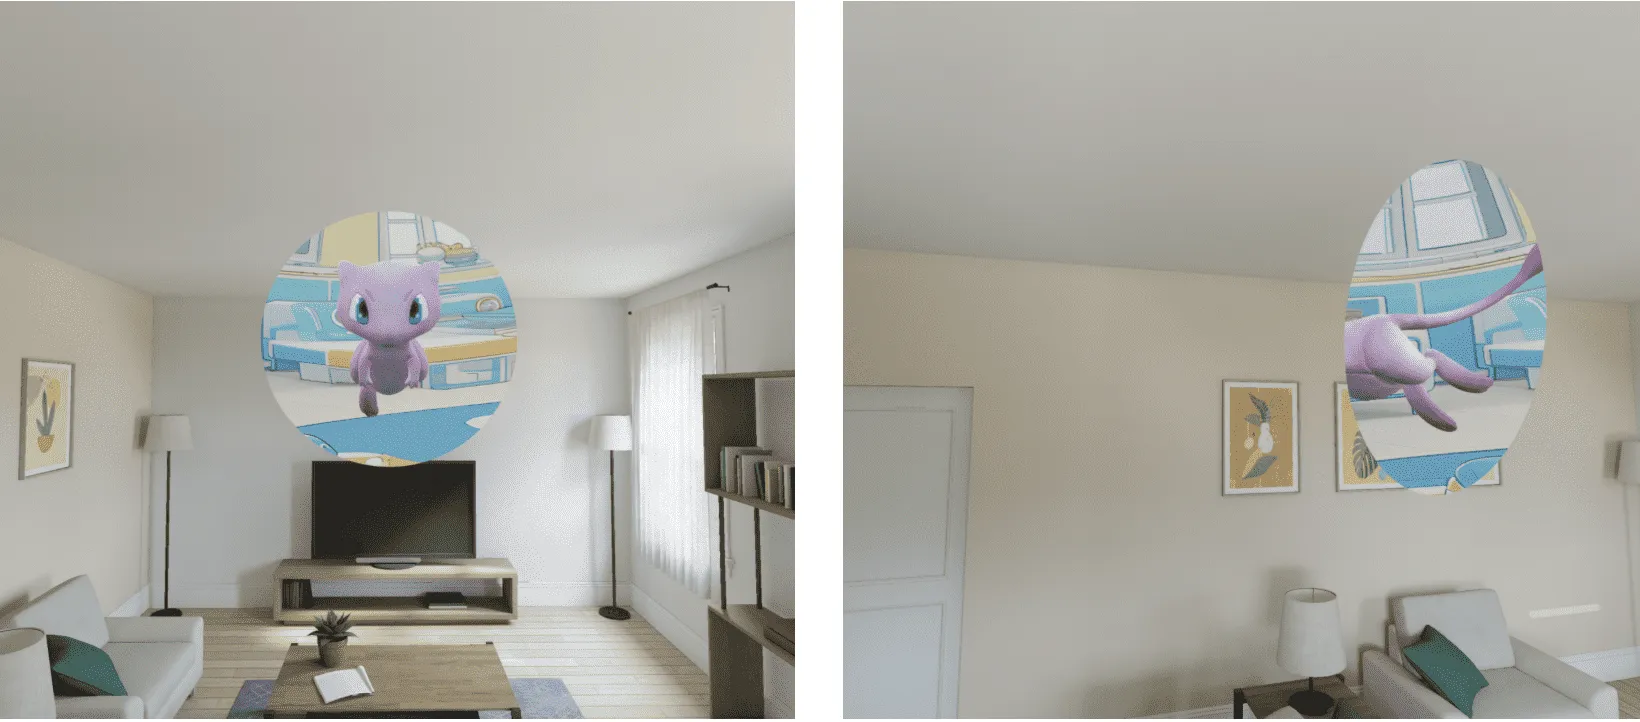
In visionOS 2.0, PortalComponent, added two new modes, clipping and crossing. These can help achieve effects that allow models within the portal to extend into the external world for a more natural interaction.

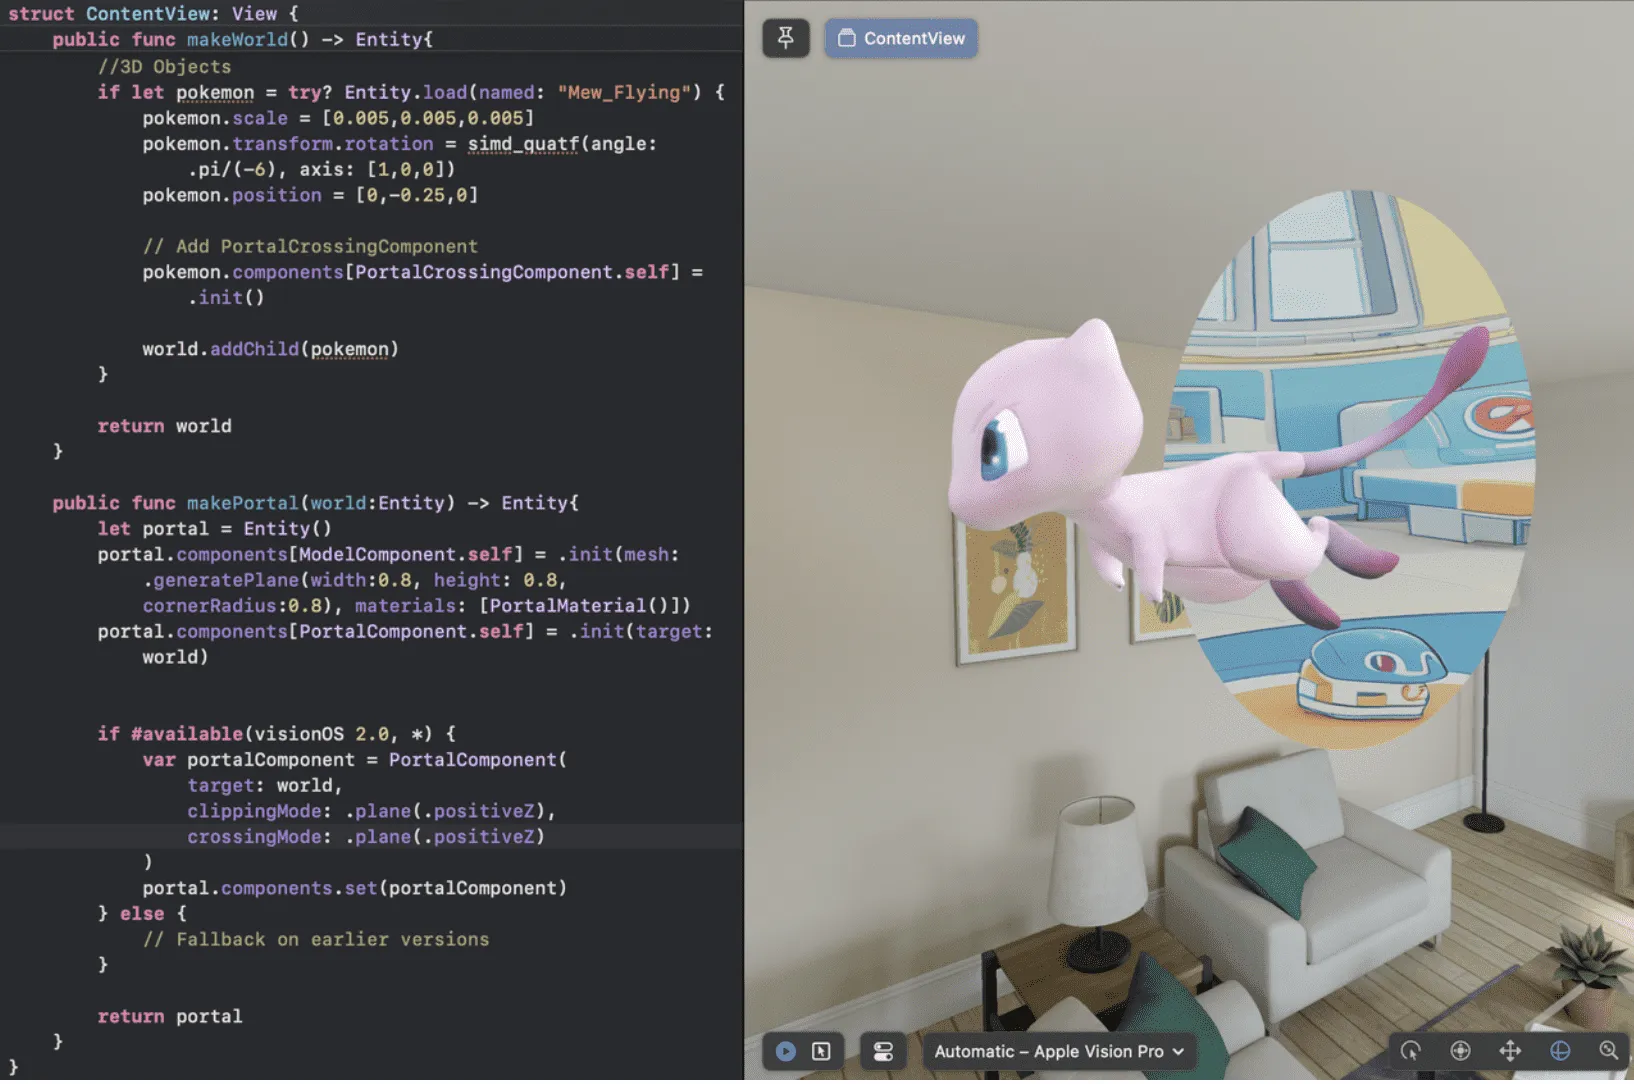
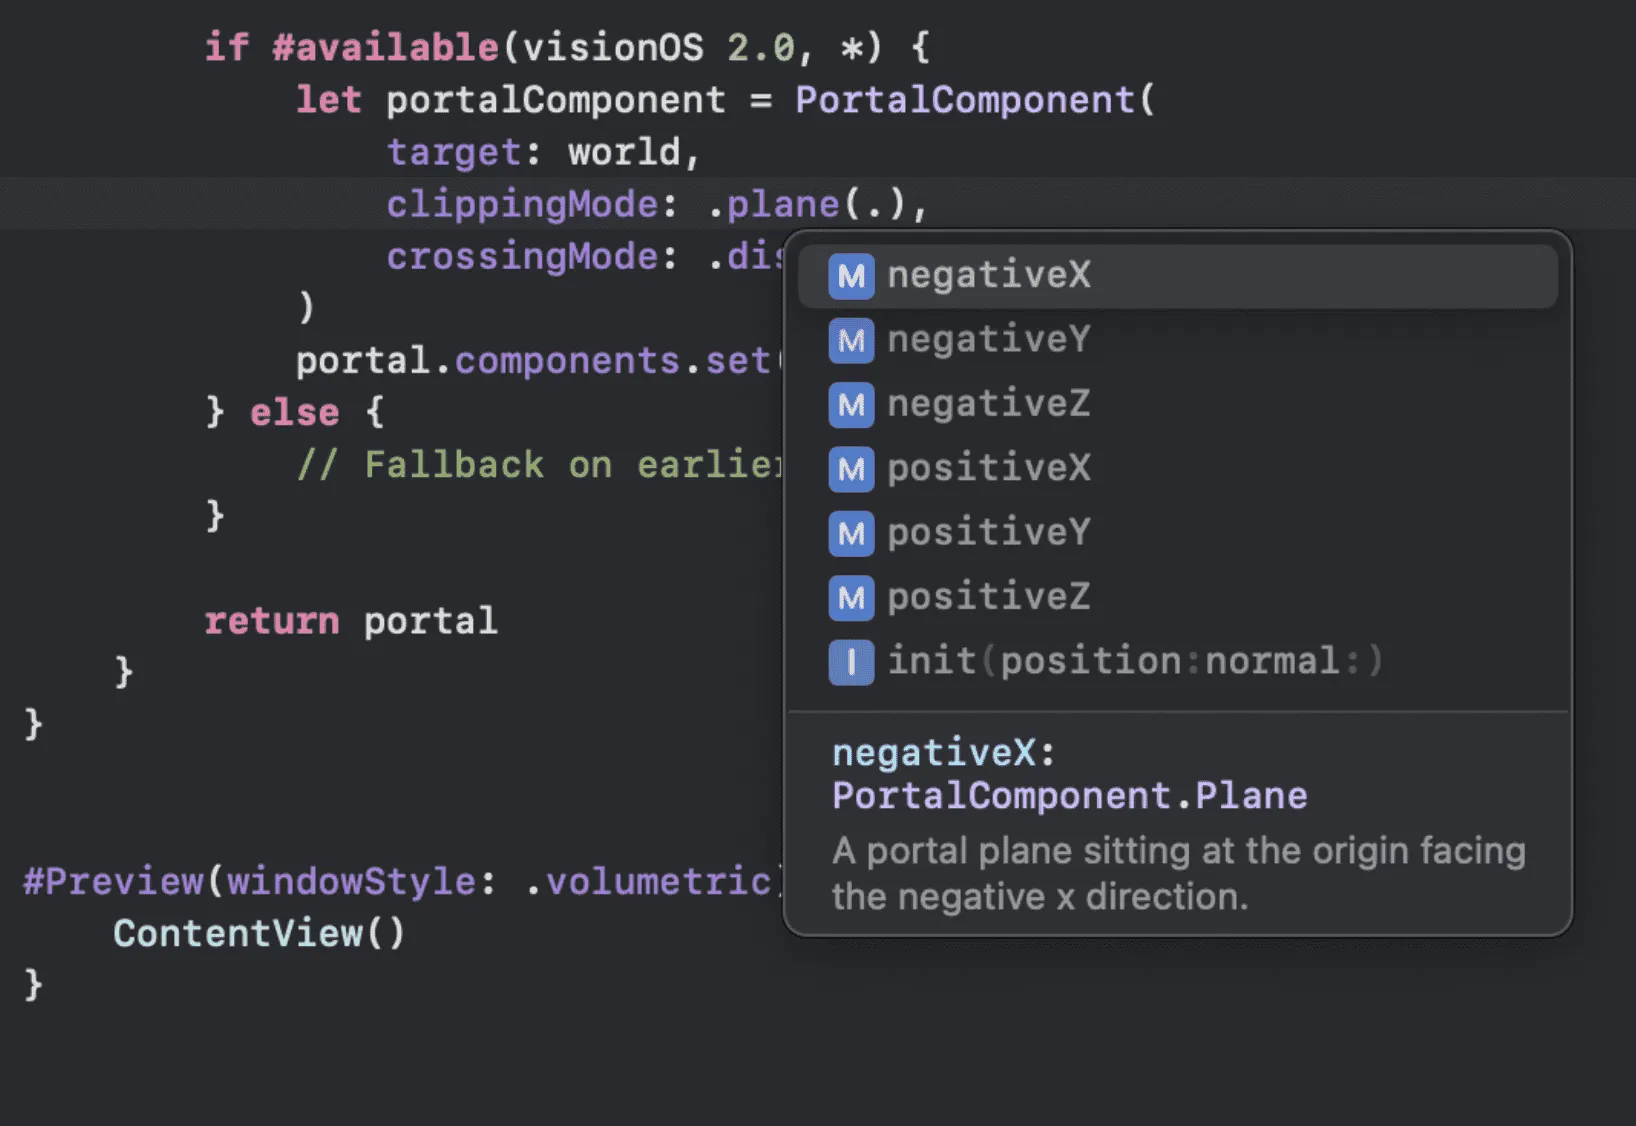
After adding the portal and the world, you can first add a portal component to invoke the aforementioned modes, in conjunction with the positive and negative x, y, and z six directional planes.
// style 1
if #available(visionOS 2.0, *) {
    let portalComponent = PortalComponent(
        target: world,
        clippingMode: .disabled, //模式调用与平面选取
        crossingMode: .disabled  //模式调用与平面选取
    )
    portal.components.set(portalComponent)
} else {
    // Fallback on earlier versions
}
// style 2
let portal = Entity()
portal.components.set(
   ModelComponent(
       mesh: .generatePlane(width: 0.5, height: 0.5, cornerRadius: 0.1),
       materials: [PortalMaterial()]
   )
)
var portalComp = PortalComponent(target: world)
portalComp.clippingMode = .plane(.positiveZ)
portalComp.crossingMode = .plane(.positiveZ)
portal.components.set(portalComp)
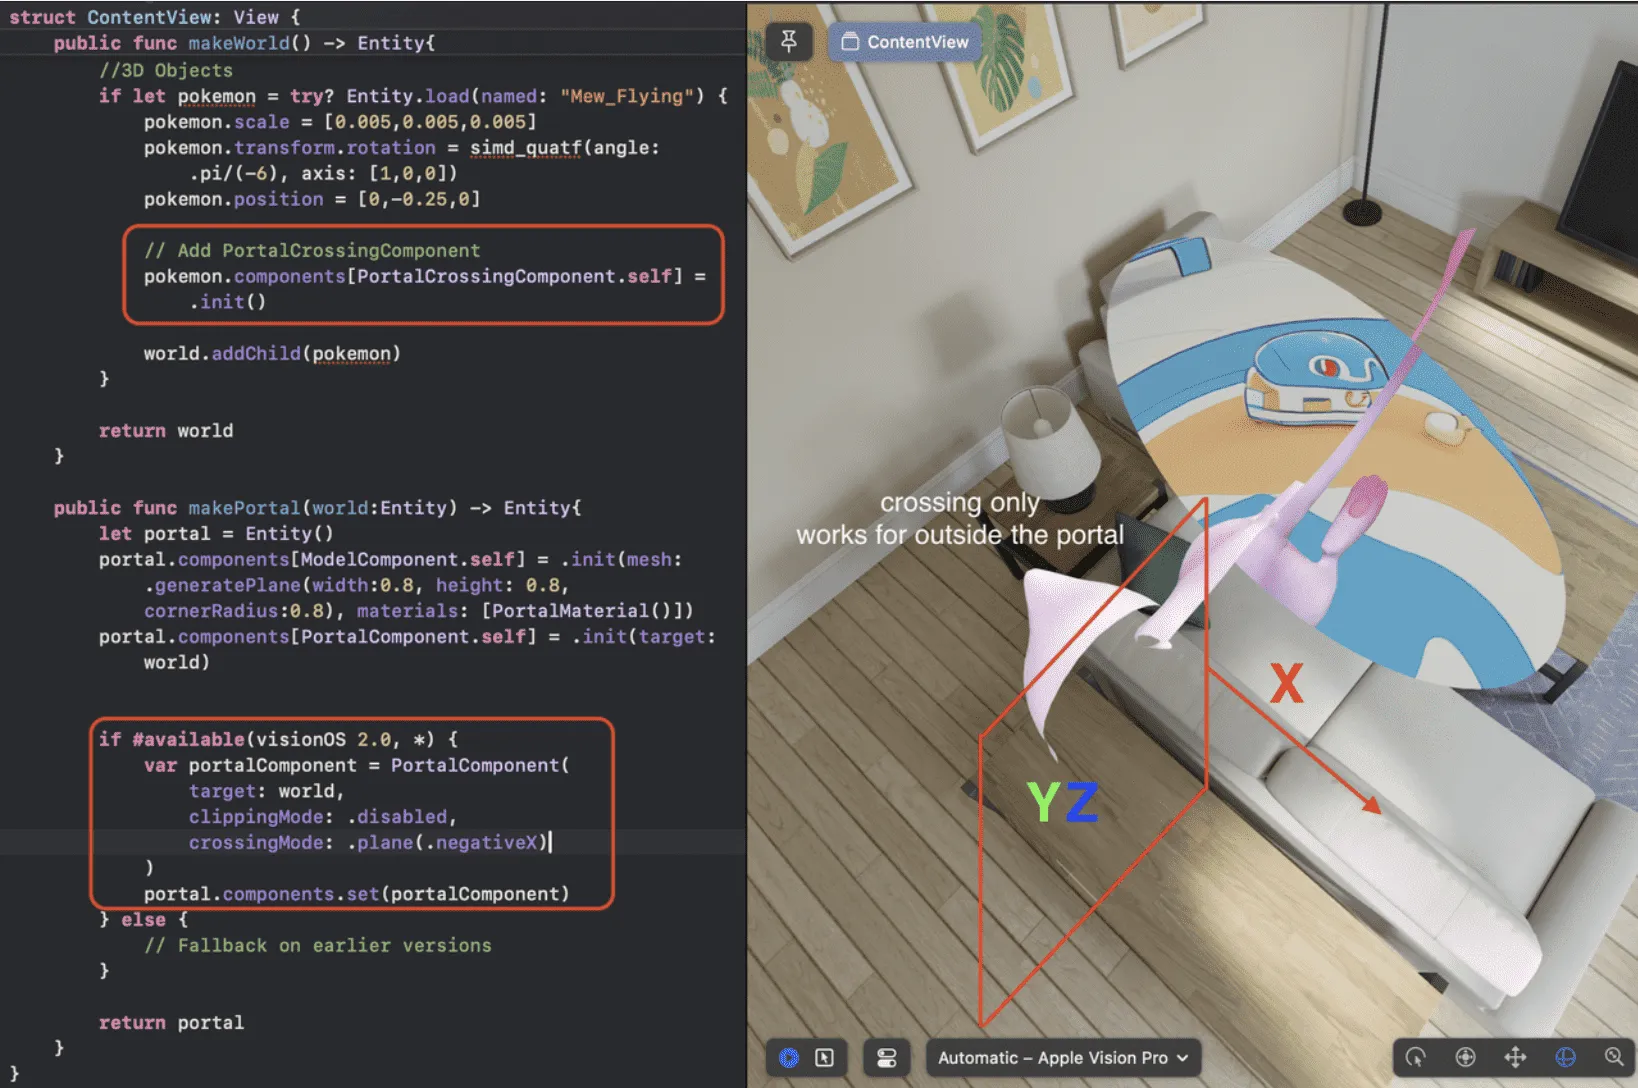
It is particularly important to note that for the CrossingMode, in addition to setting up the PortalComponent, you also need to apply the PortalCrossingComponent to the model entity or the sub-entity of the world for the CrossingMode to take effect.
// Add PortalCrossingComponent
entity.components[PortalCrossingComponent.self] = .init()
So, what can these two modes do, respectively?
From my experiments, I found that:
- CrossingMode is responsible for the “outside” part of the portal, with plane settings that retain the corresponding part of the model extending out of the portal. For example, .positiveZ creates an XY plane, retaining the positive Z-axis part (the part extending outward, facing the user).
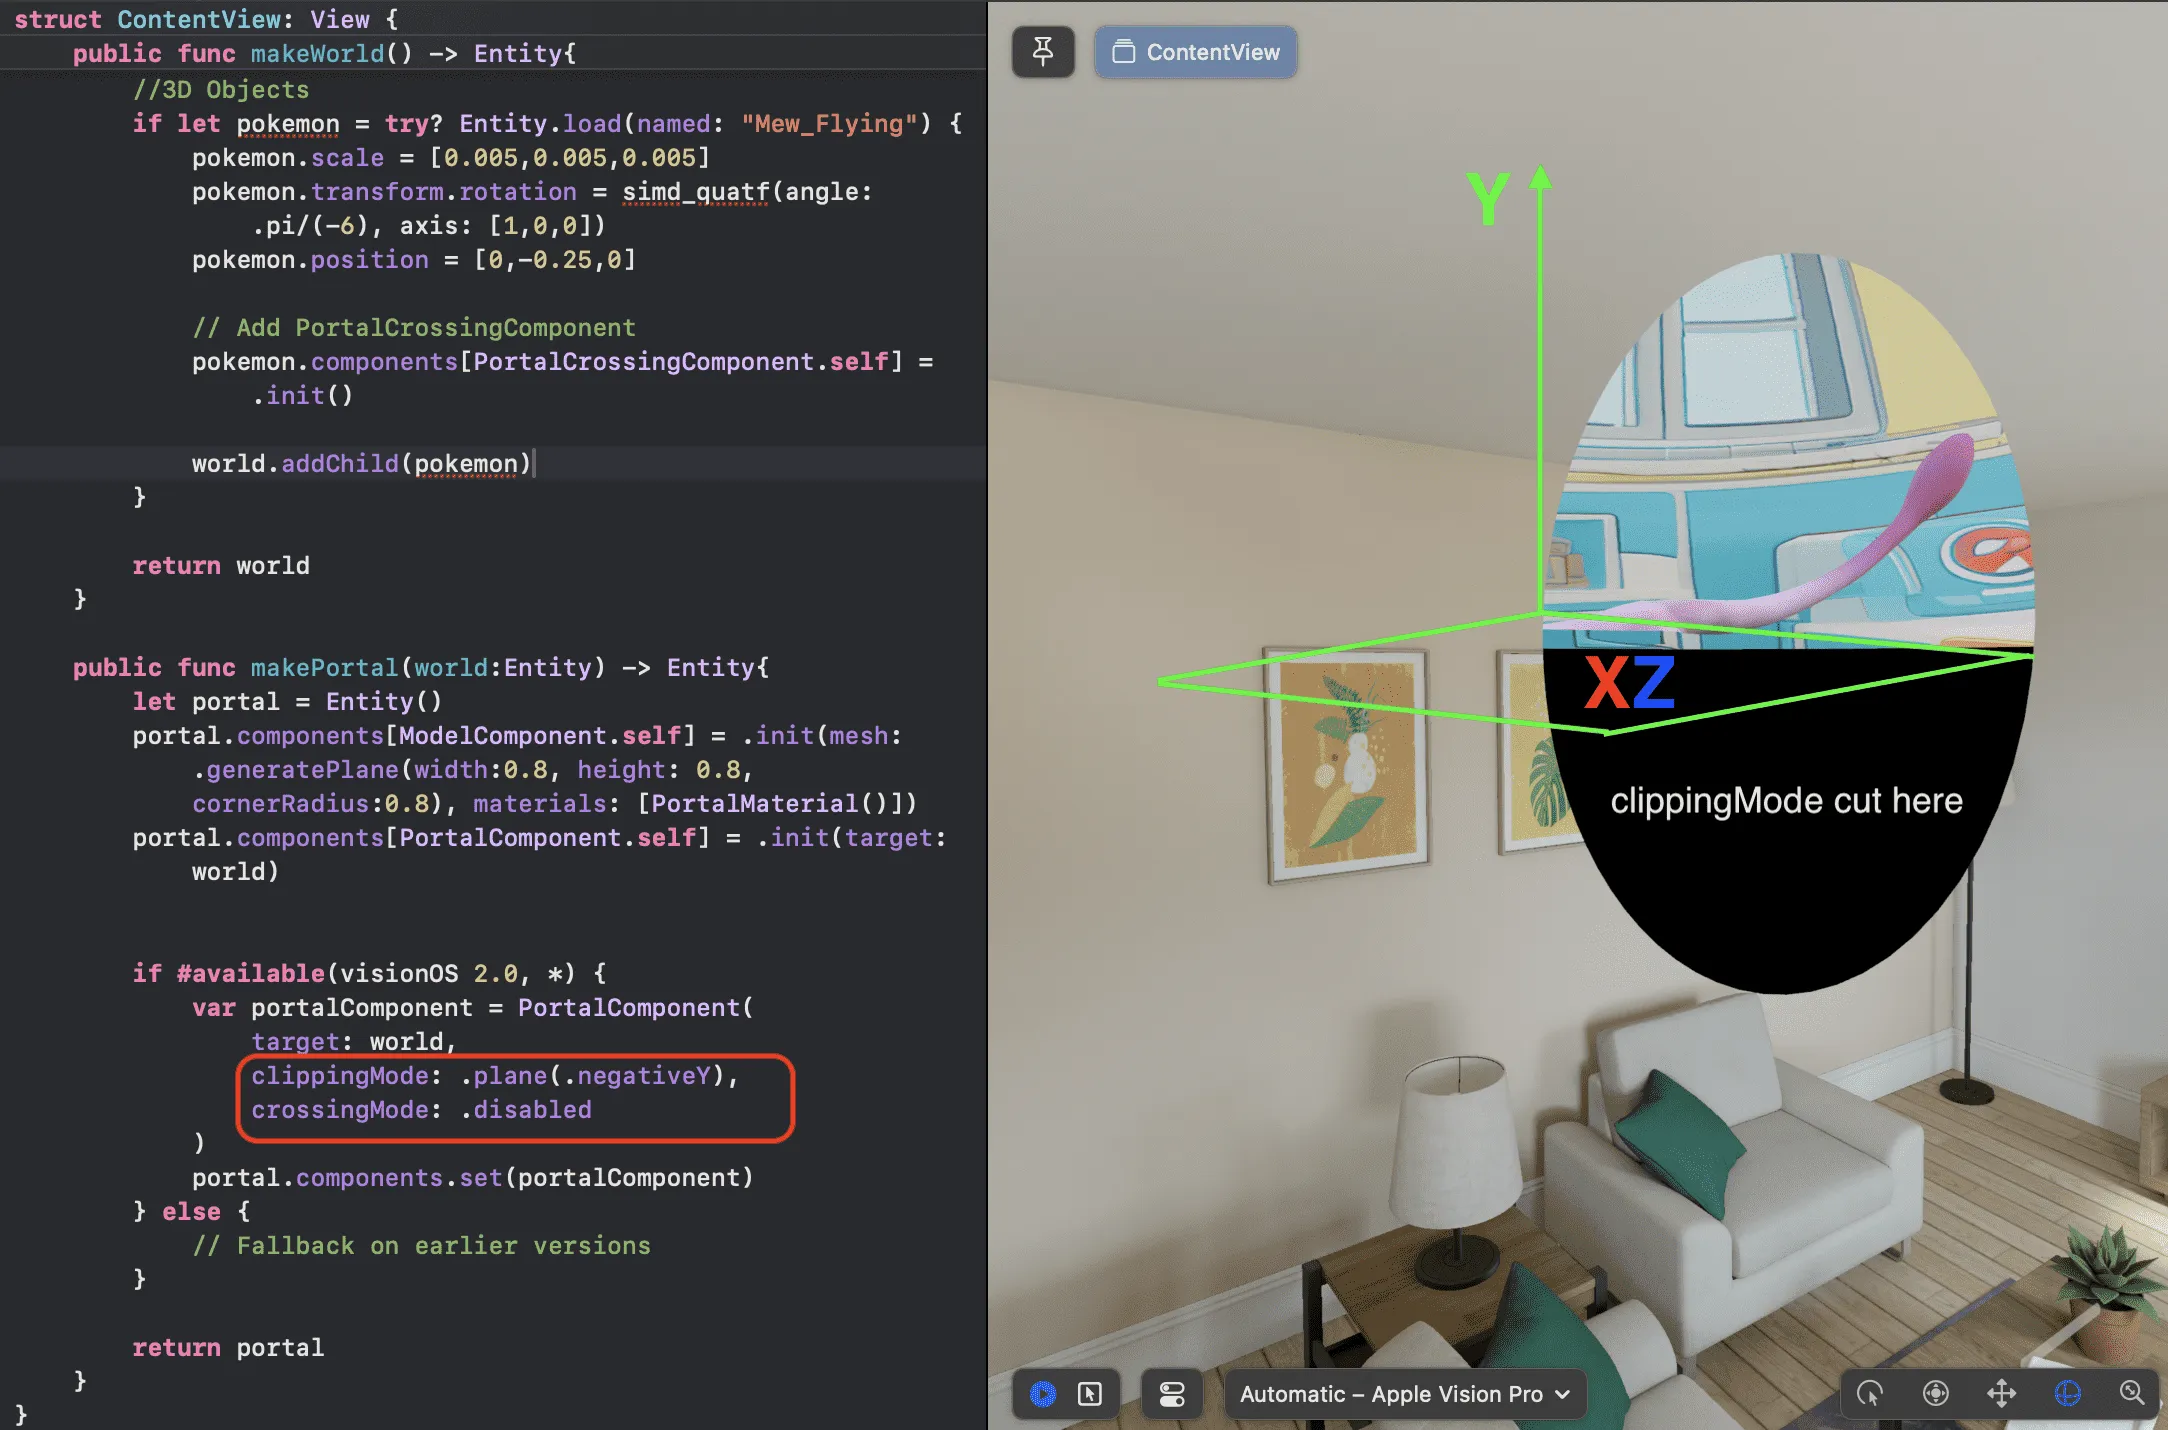
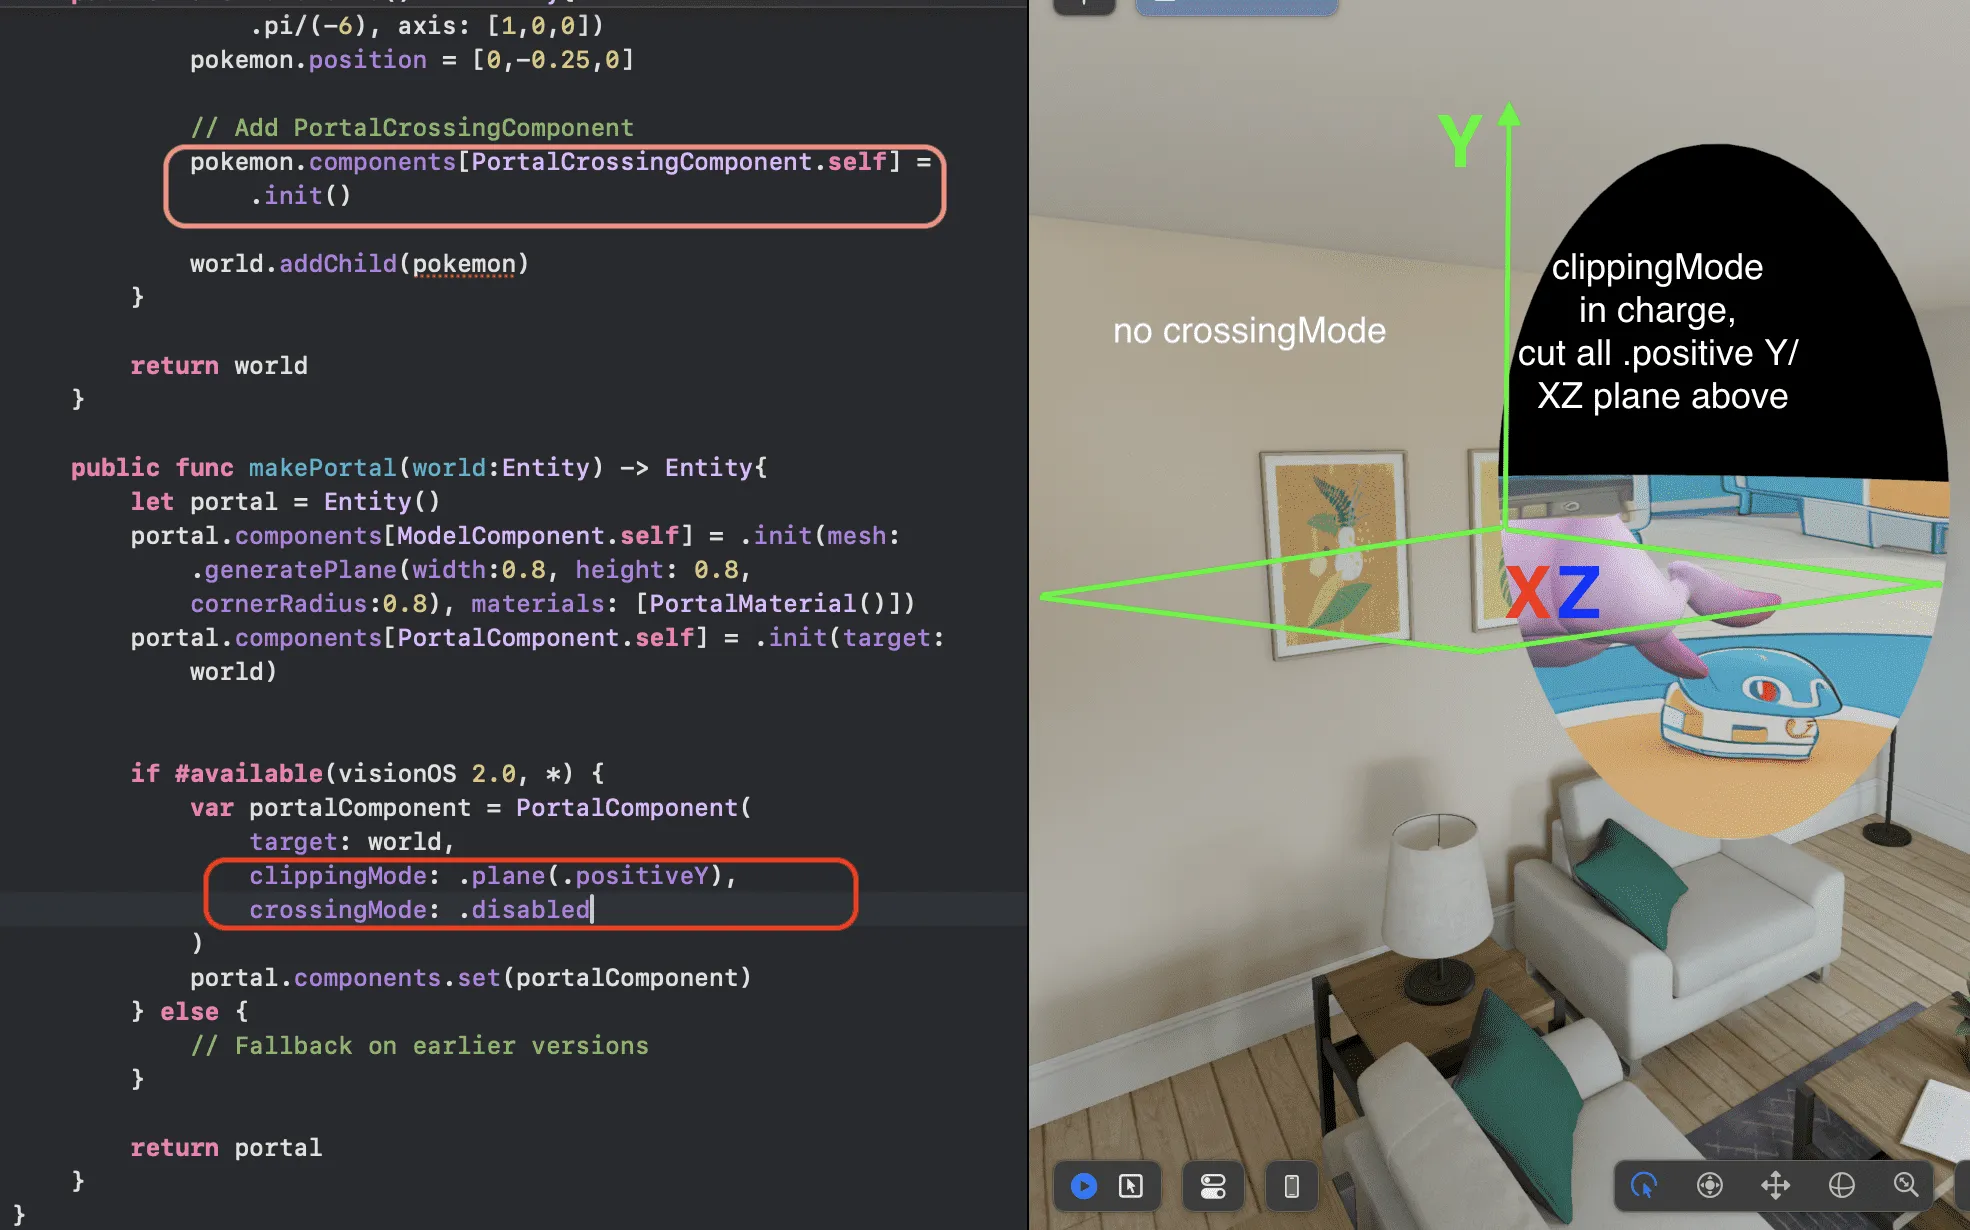
- ClippingMode is responsible for both inside and outside the portal, with plane settings that cut off everything facing the set plane direction, which can be understood as the opposite action of CrossingMode. For instance, .positiveZ creates an XY plane, cutting off the positive Z-axis part (the part extending outward, facing the user).
- CrossingMode has a higher priority than ClippingMode.
The official illustration is here (the model has added PortalCrossingComponent).
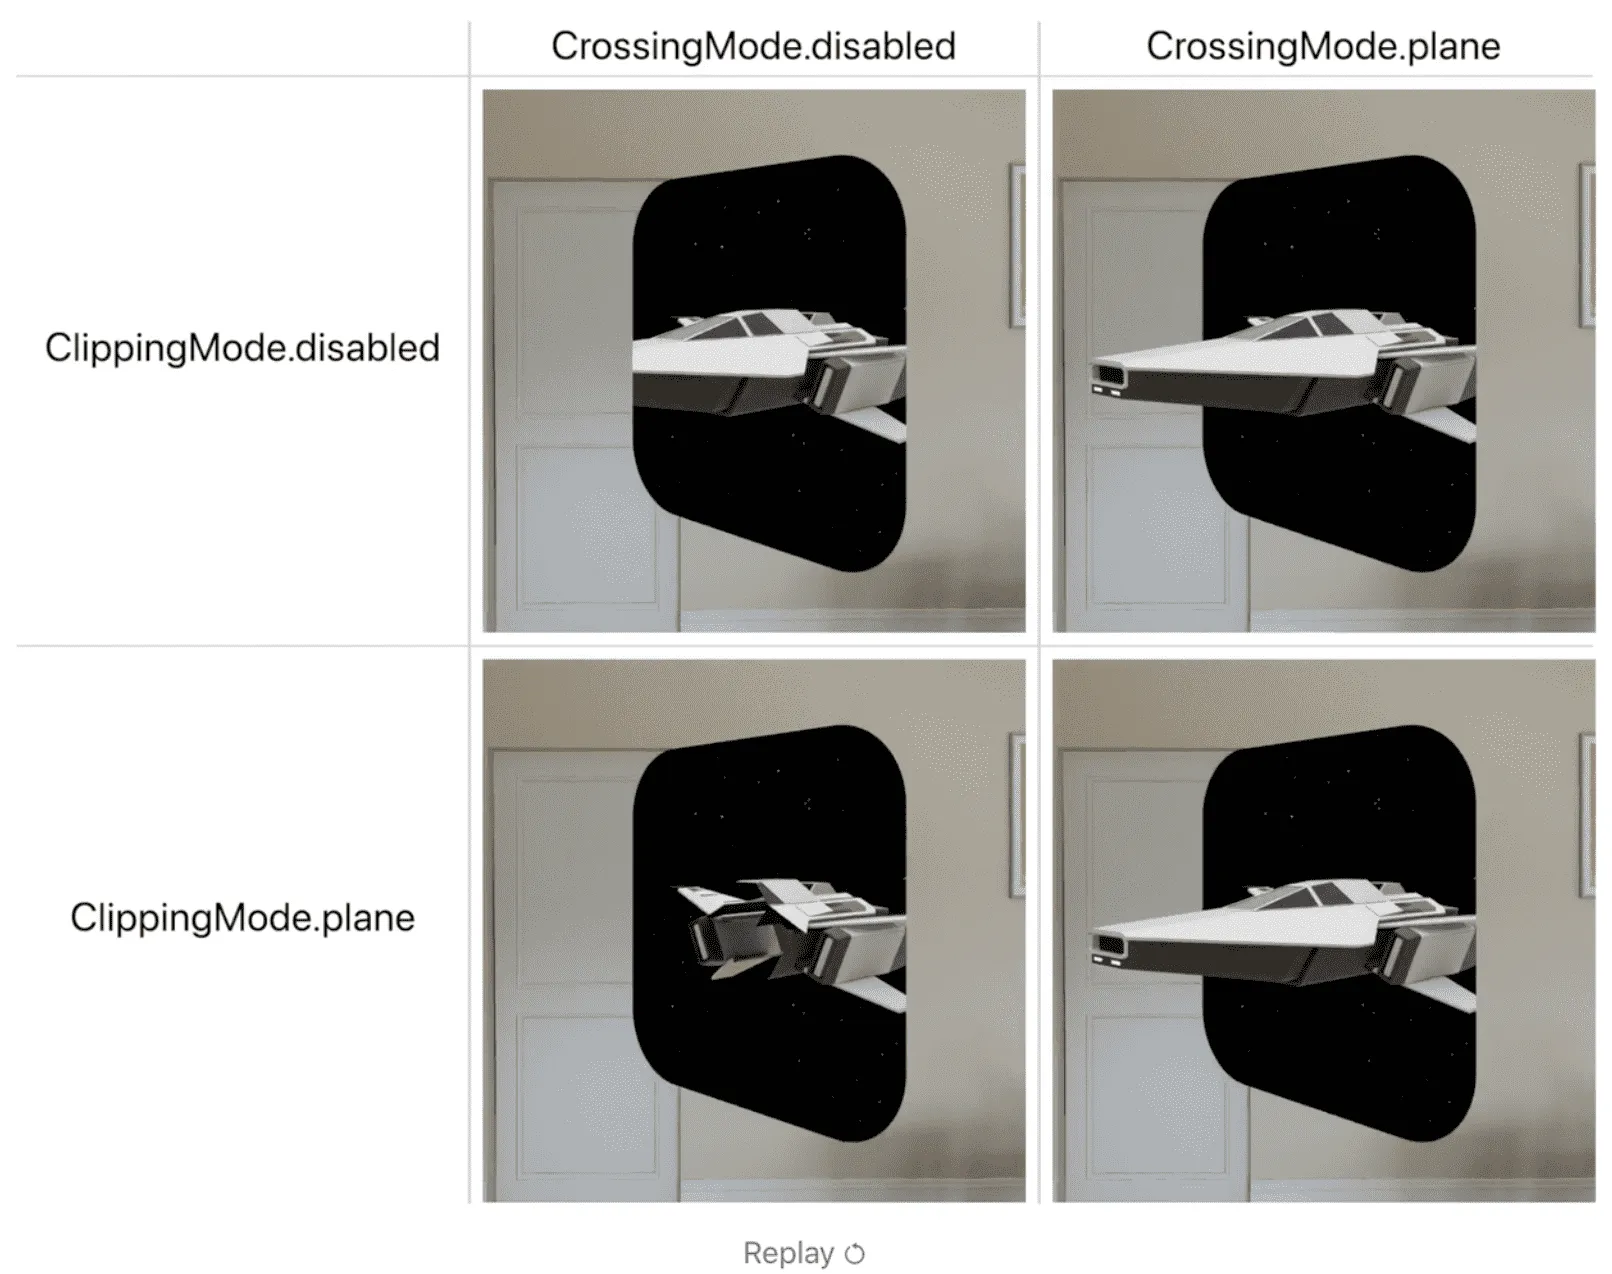
Since the official plane demonstrations typically use .positiveZ, which is generally the part facing the user, and the portal itself is usually set back in the negativeZ direction, unaffected, the difference between ClippingMode and CrossingMode may not be very clear in this diagram. You can look further at more examples I provide below.
ClippingMode: Manages both inside and outside the portal. As the name suggests, it performs clipping. The plane direction is the set ClippingPlane, which will cut off/remove everything facing that plane.
CrossingMode: Only responsible for outside the portal, with the set plane and direction indicating the part to be retained outside the portal.
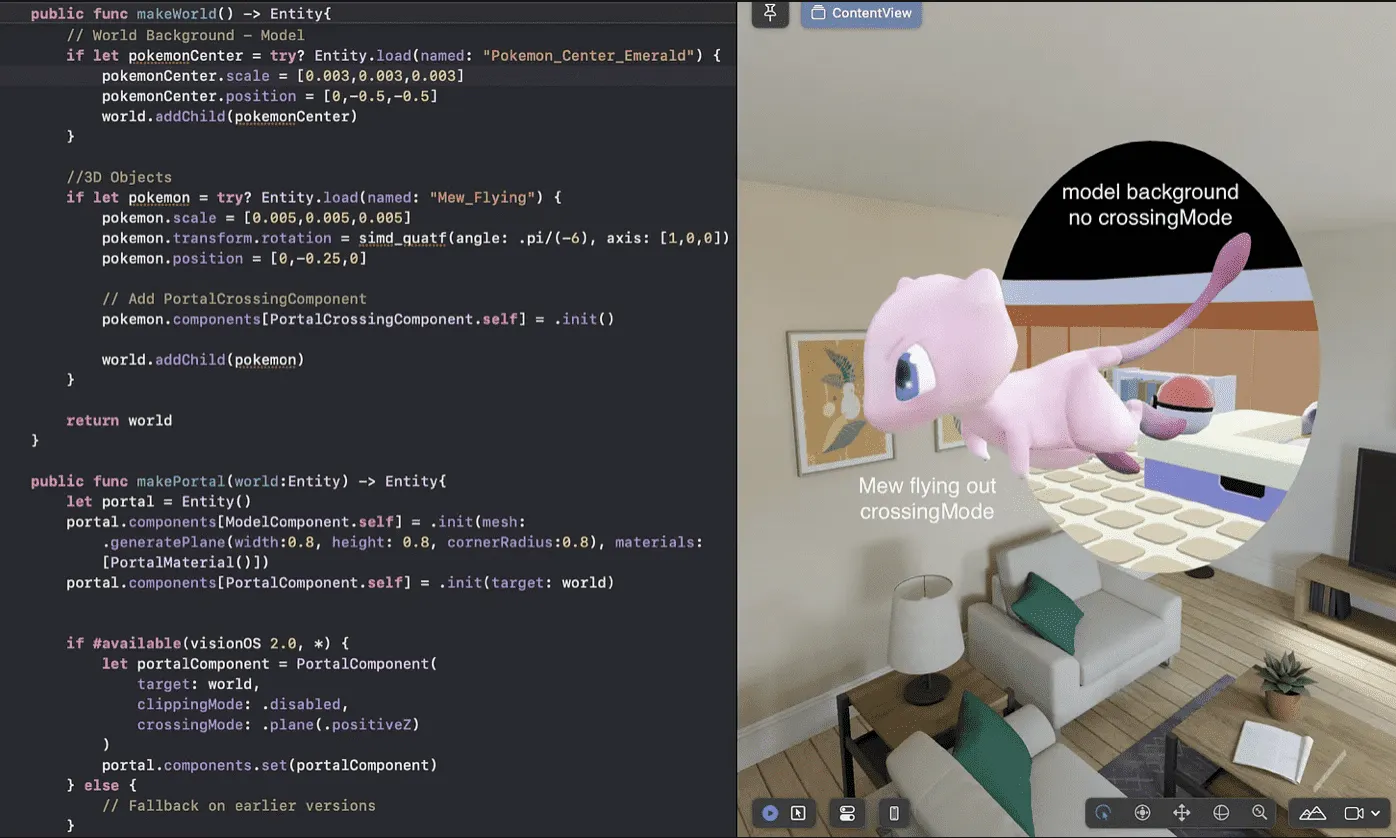
In combination of different settings for models, we can get really interesting portal effect with the CrossingMode. For example, put a background model in the portal with other models sticking/ flying out.
CrossingMode has a higher priority than ClippingMode. For objects that have applied CrossingMode, ClippingMode will no longer cut inside the portal.
That concludes the update on the portal component in visionOS 2.0. I hope everyone can leverage these new features to create more interesting applications (perhaps you can try developing the official example Encounter Dinosaurs more easily).
Finally, let’s wrap up the demonstration, show Mew as its original, and say goodbye to everyone, wishing you all the best on developing.
Reference
- Official Document:https://developer.apple.com/documentation/realitykit/portalcomponent
- Code: https://github.com/Clarepuffinwalker/visionOS-2.0-Portal-Features/tree/main
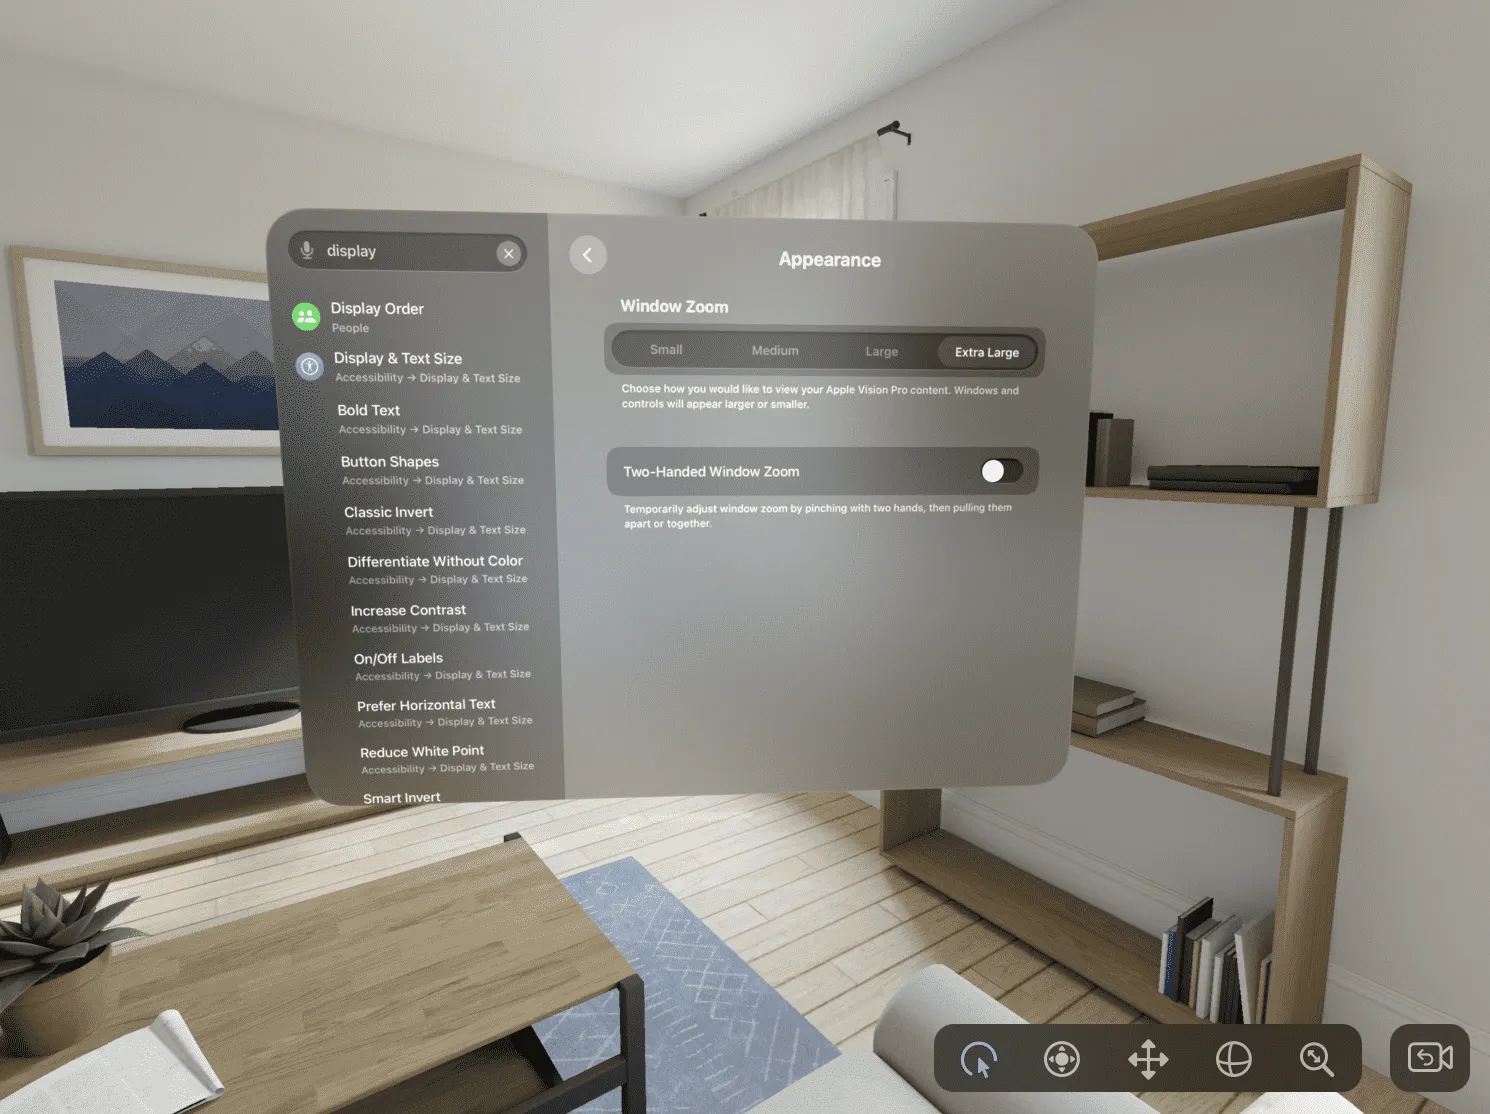
- (to show the model successfully, remember to set the settings on simulator as below (Settings - Appearance - Display - Appearance - Window Zoom - ExtraLarge):
For more info:
- https://puffinwalker.substack.com/p/xr-and-ai-portal-vol24-portal-in
- Portal Background: by Dreamina AI
- Models: From sketchfab (Mew, PokemonCenter)
Disclaimer: No Mew gets hurt in the writing of this article, everything just for test and preview.
Author of this Article

Recommended Reading
- Magical! Using Opaque Objects in RealityKit Looks More Like Glass? - Quickly Implement Glass Effects in visionOS
- Open Source Framework RealityShaderExtension: Transfer Shaders from Unity and Unreal to visionOS - Writing Shaders on visionOS Made Easy
- Solving Nested Transparent Objects in RealityKit with Rendering Ordering - Part 2
- How to Play Spatial Video On iOS 17.2
- Solving Nested Transparent Objects in RealityKit with Rendering Ordering - Part 1
- Far More Than Games: Review the Exciting MR Capabilities in PICO 4 Ultra
- What Is Spatial Video On iPhone 15 Pro And Vision Pro