Beginner's guide to AR: Exploring Augmented Reality With Apple AR Tools

AR, a wonderful magic that integrates technology with the real world, is quietly changing the way we interact with the world. It brings the virtual world into real life and seamlessly connects digital information with the physical world.
The brand new experience brought by AR stimulates people’s imagination, reshapes the interaction mode between people and environmental information, and opens up a new dimension of human beings and the world. As a product of expanding the limits of human reality experience, AR is deeply integrated into people’s daily life with the development of science and technology, and people can explore new possibilities between reality and virtual reality with the help of AR.
This article will lead readers to explore Apple’s AR ecology and tools, and learn how to use Apple’s AR tools to build AR experience. We will see the powerful performance of AR in Apple’s ecosystem.
At the recent WWDC 2023 conference, Apple released a new head-mounted display product, Apple Vision Pro, and greatly improved the experience of developers developing augmented reality applications on the device. Although we are currently unable to develop based on the real device of Apple Vision Pro, the core concepts of AR technology and basic development process have not changed. Reading this article can allow you to take the lead in experiencing Apple’s AR ecosystem on the iOS platform, which is beneficial to your future development of Apple Vision Pro.
The Evolution of AR
Augmented reality (AR) is an interactive experience that combines the real world and computer-generated content. - Wikipedia
Like many emerging technologies, AR was inspired by science fiction, and in 1901, American author Lyman Frank Baum depicted a scene in his novel The Master Key in which a young boy named Robert accidentally touches the Electric Master Key and is given three gifts, one of which is a pair of magical glasses. One of them is a pair of magic glasses. When he puts on the glasses, he sees markers on people’s foreheads that indicate their personalities. This scenario mirrors the definition of AR today: recognizing objects in an image and superimposing information on reality.
In 1992, American Boeing researcher T.P Caudell and his colleagues first proposed the term “Augmented Reality”. In their paper “Augmented Reality: An Application of Heads-Up Display Technology to Manual Manufacturing Processes”, they used the term “Augmented Reality” to describe the technology of projecting computer-generated elements onto the real world. This is also the first time in human history that someone has proposed the concept of AR.
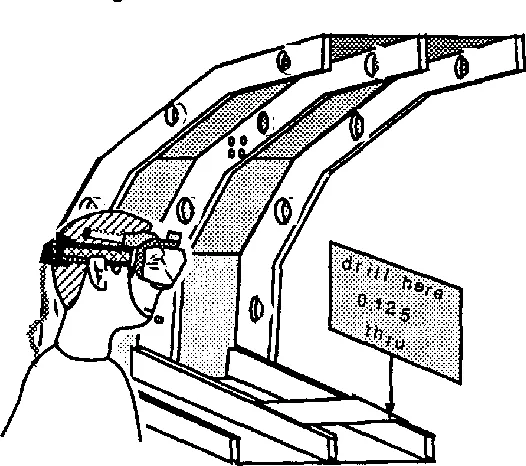
This paper describes how to use head-mounted displays to apply augmented reality technology to manual processes in manufacturing. This allows operators to obtain additional information generated by the computer, thereby improving work efficiency and quality.
In 1997, Professor Ronald Azuma of the University of North Carolina published a paper entitled “A Survey of Augmented Reality”, which gave the first widely accepted definition of AR technology. This definition proposes three main features of AR: the combination of virtual and real worlds, real-time interaction, and three-dimensional positioning. This definition not only clearly outlines the development blueprint of AR technology, but also lays the foundation for the long-term and stable development of AR technology.
But, because of various limitations, AR technology was far from mainstream at that time, ordinary people not only did not touch, the name may not have heard of. In 1999, Hirokazu Kato of Nara Institute of Advanced Science and Technology developed the AR Toolkit project, which finally let AR technology out of the laboratory cage and gave ordinary people the first chance to experience AR applications.
AR Toolkit project uses two-dimensional markers to realize real-time tracking and superposition of virtual objects and real objects. The emergence of the AR Toolkit project opened the door for AR technology and turned AR theory into reality. It accelerated the development of AR technology, greatly promoted the AR concept, and laid the foundation for the ultimate entry of AR technology into people’s lives.

However, it was the AR mobile game “Pokémon GO” licensed by Nintendo and developed and operated by Niantic Labs that really made most people understand and recognize AR technology. The game was released in 2016. The game allows users around the world to experience the unique charm of AR technology.
Pokémon GO is a game that lets players explore, catch, battle and swap Pokémon in the real world. Players can discover sprites in the real world, catch and battle them through their smartphones. The more sprites a player catches, the more powerful they become and the more chances they have to catch even more powerful and rare sprites. Upon its release, the game became a phenomenal AR handheld game in the limelight. Data released by market research firm App Annie showed that Pokémon GO earned $500 million worldwide through the iOS and Google Play app stores in just 63 days, making it one of the fastest money-making handheld games ever. Perhaps influenced by the success of Pokémon GO, the following year Apple officially stepped into the AR space.

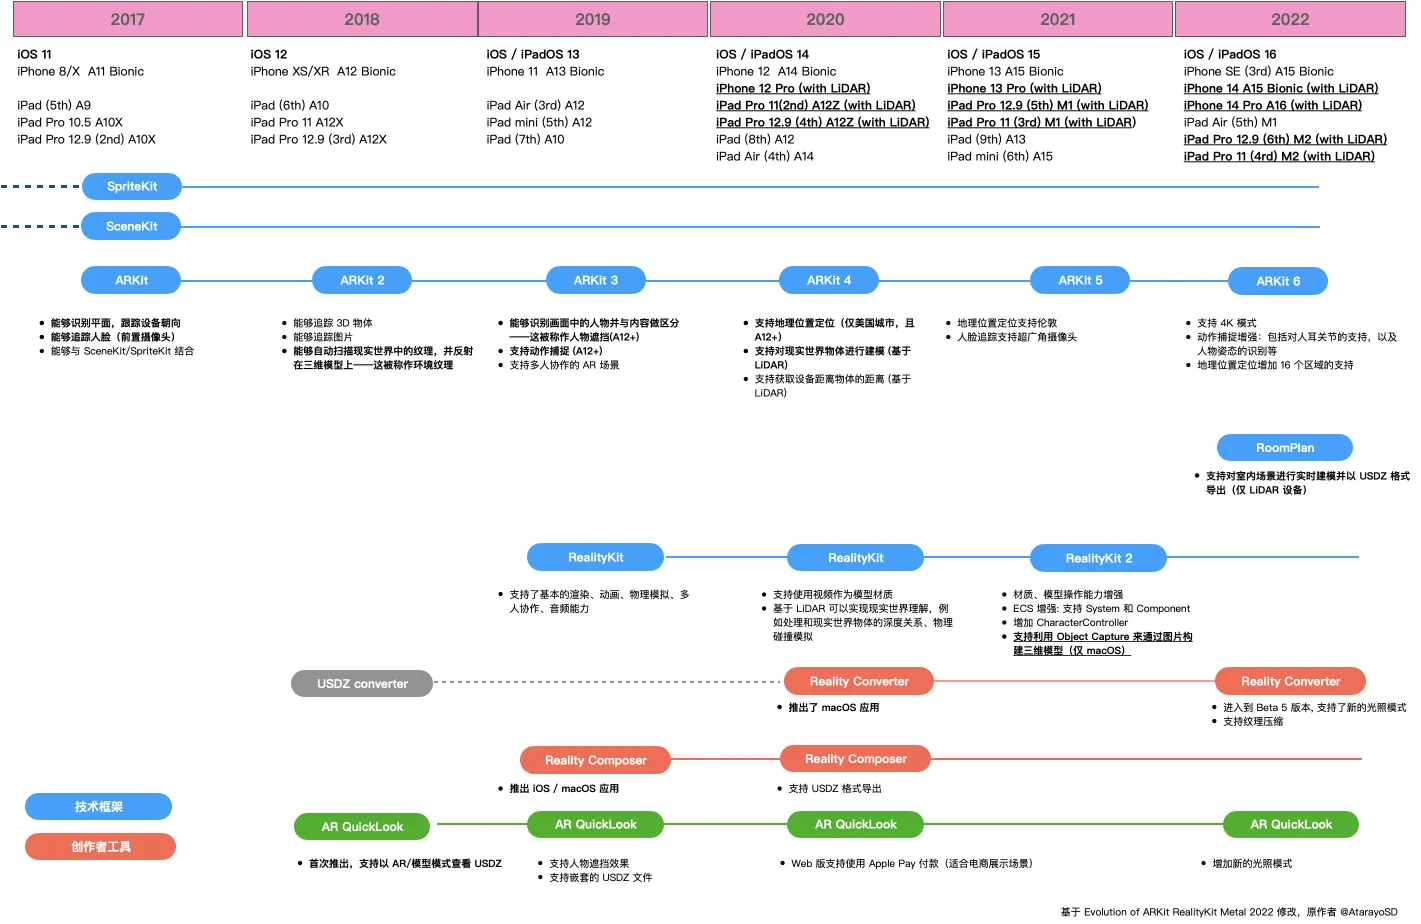
2017 is known as the “first year” of Apple AR. At WWDC that year, Apple released the ARKit framework to help developers develop AR applications in the Apple ecosystem. At the time of its release, ARKit provided the ability to recognize planes and track device movement. These two capabilities are based on the computer vision framework Vision for camera data and iOS device gyroscope sensors. Although basic, these two features have laid a solid foundation for the development of AR applications.
Besides, the true depth camera on the iPhone X provides hardware support for face recognition technology. Based on this, ARKit can accurately identify facial expressions, not only can identify the user’s face, but also can accurately correspond the user’s expression to the facial 3D model.

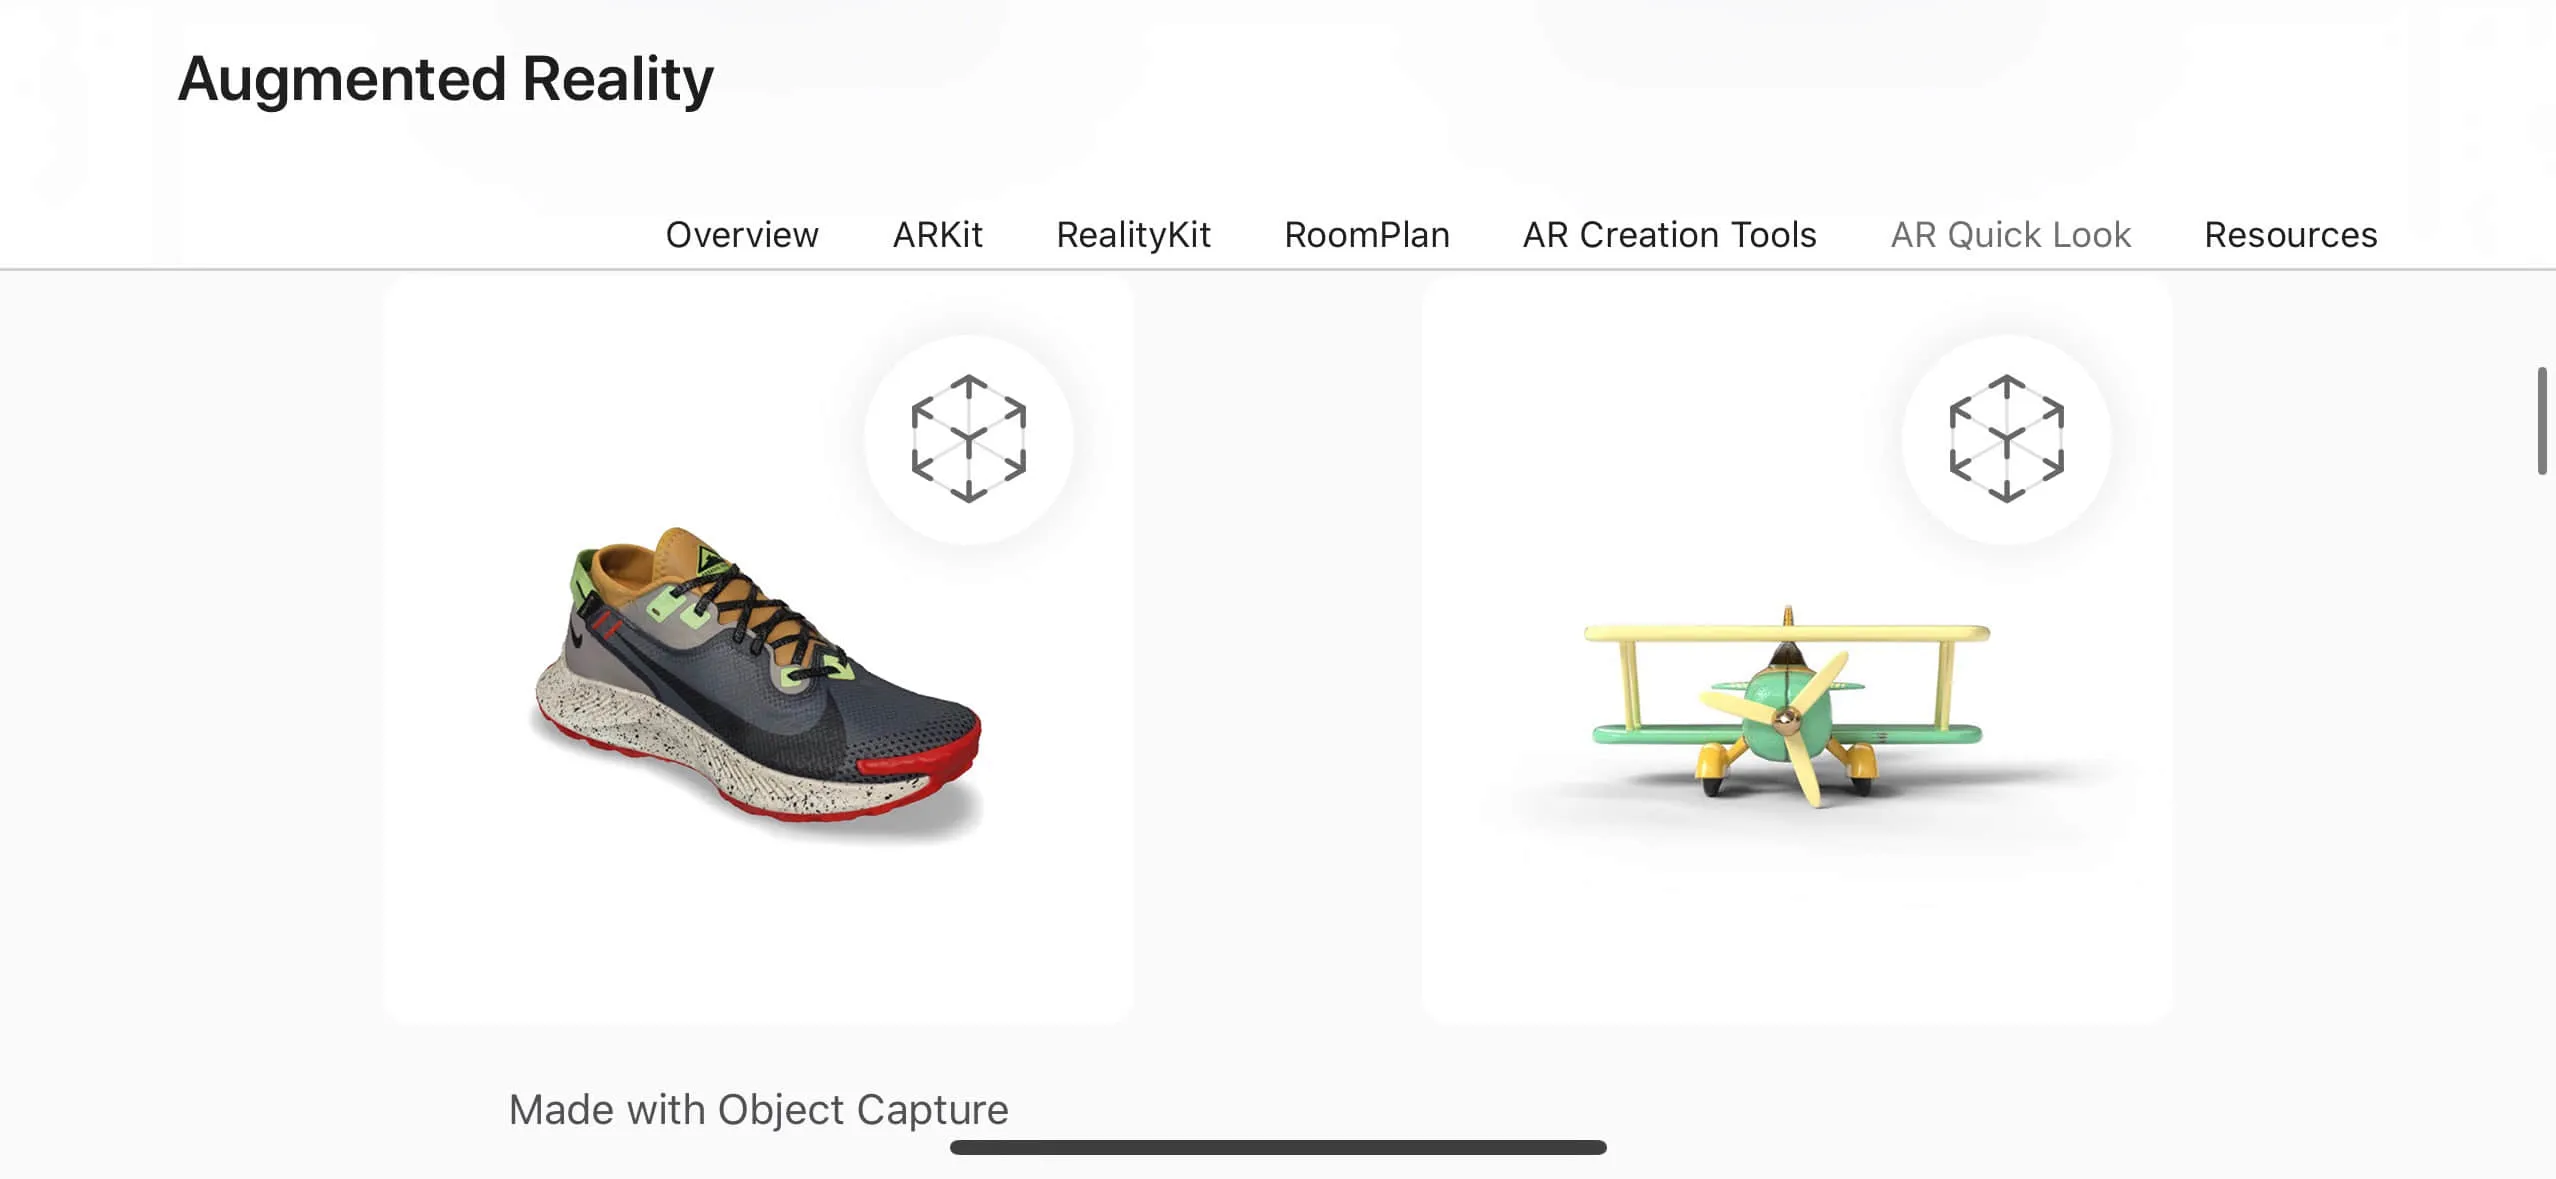
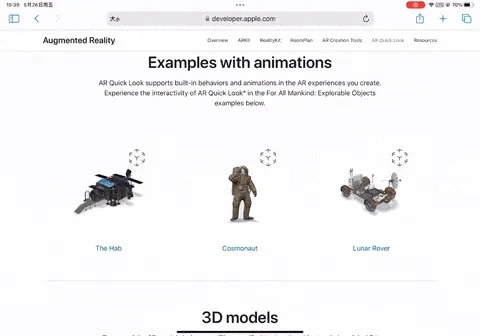
In 2018, Apple released the AR QuickLook on the basis of the original QuickLook. Users can now preview 3D models in AR through the system’s built-in file application. In addition, ARKit has been further enhanced to add the ability to track and recognize images and 3D objects in the real world. Users can even “screenshot” the real world while scanning it, and then reflect it on a 3D object with reflective effect.
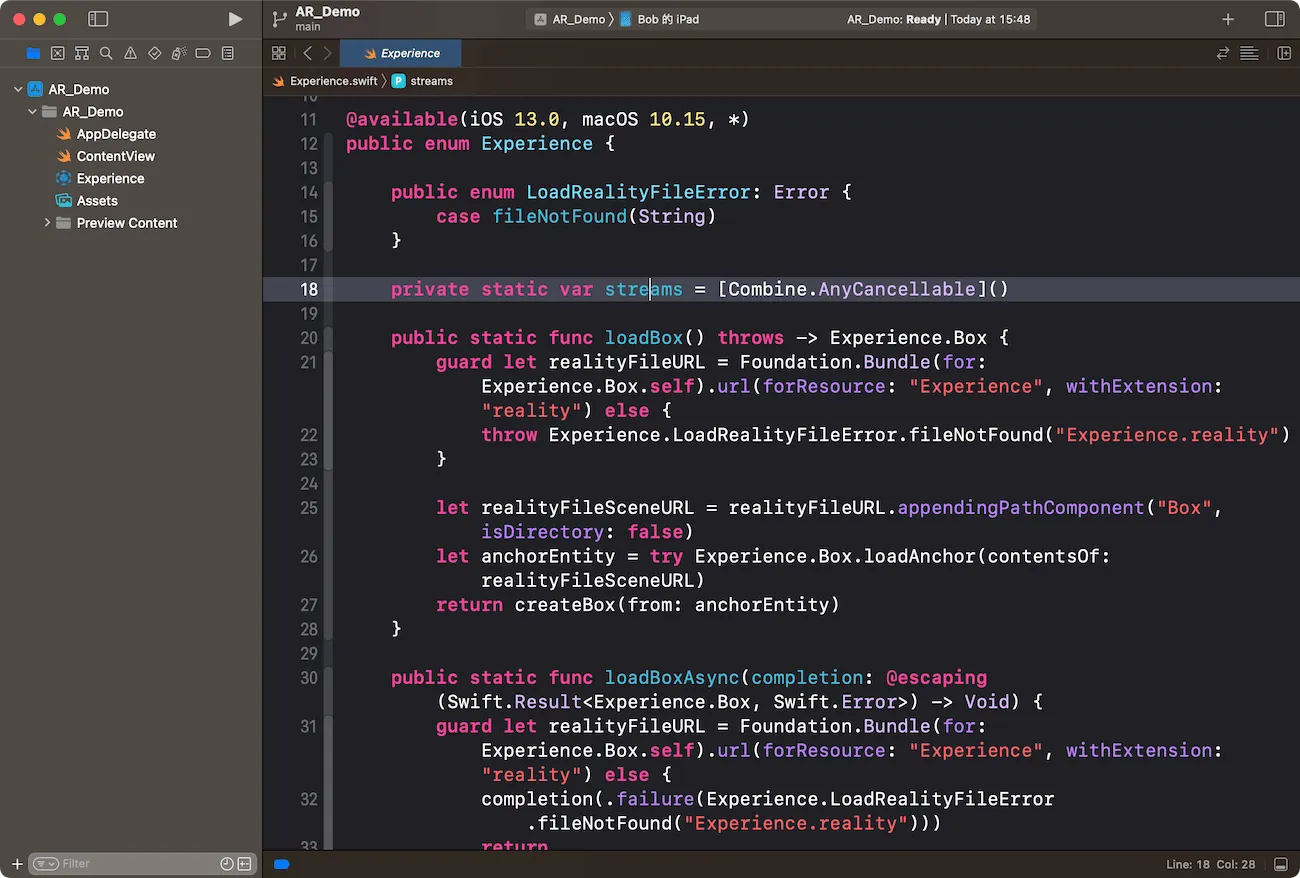
In 2019, Apple released RealityKit, a rendering engine specifically for AR scenes, and Reality Composer, a creation tool that goes with it. With Reality Composer, you can easily build a complete AR scene even if you don’t know how to develop. Whether you use a Mac, iPad or iPhone, you can use Reality Composer to build your scene.
Before 2020, if developers wanted to convert 3D models into USDZ format supported by RealityKit or SceneKit, they could only use a command-line tool called USDZ Converter. However, in some scenarios where fine-tuning of the model is required, this approach is not very convenient. Therefore, Apple launched Reality Converter in 2020 to fill a gap in the creator tool.
In 2021, Apple provided the Object Capture API in RealityKit, which allows developers to directly generate high-quality 3D models by shooting objects.
In 2022, Apple launched the RoomPlan framework. This framework allows developers to model houses using devices equipped with LiDAR.
After continuous efforts and investment, coupled with the advantage of a large number of hardware devices, Apple has become the leader in the field of AR today.
So, what kind of technical principles are used to support the magical effect of AR?
How does AR work?
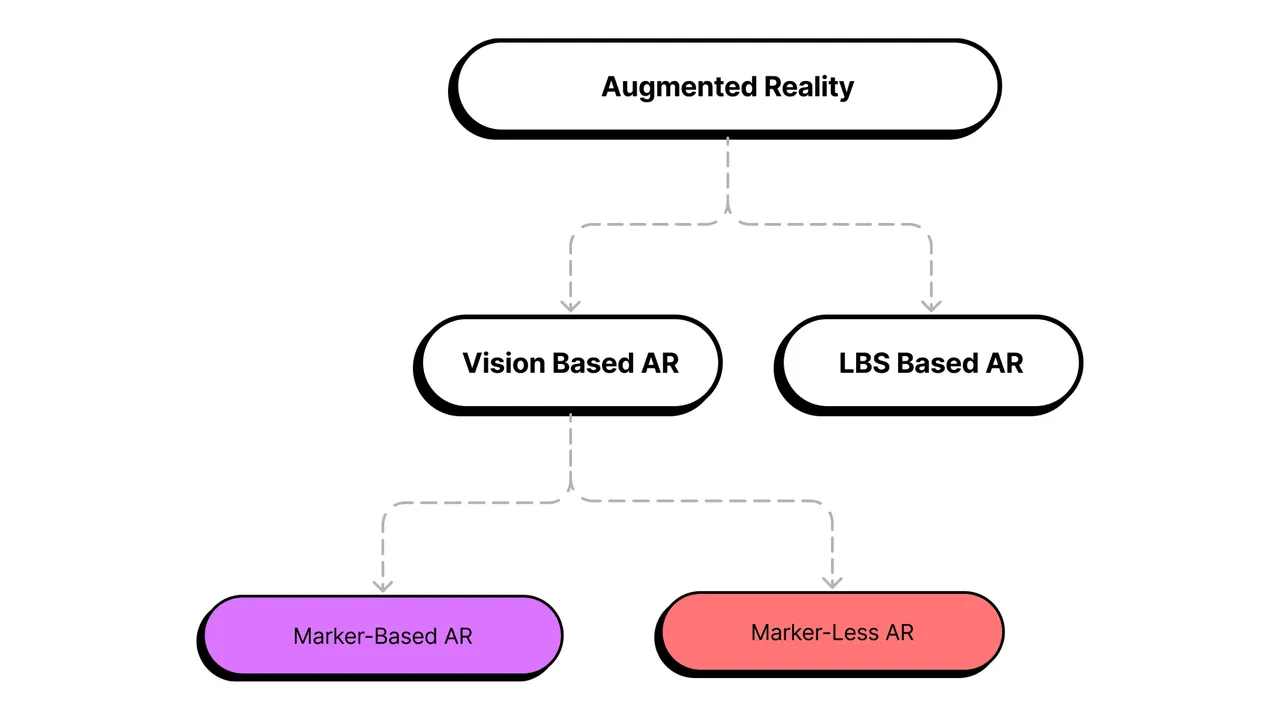
From a technical point of view, AR can be roughly divided into two categories.
The first category is AR that scans and understands the surrounding environment through computer vision technology, which is called Vision Based AR. It scans your surroundings through cameras and sensors.
Vision Based AR is divided into Marker-based AR and Marker-less AR. Marker-based AR is simple to implement, has a slightly lower sense of reality, and is limited by those small markers. For example, the video of Hatsune Miku shown earlier is based on the principle of Marker-based AR. The other Marker-less AR requires the support of computer vision and machine learning technology. It builds a super detailed 3D environment model, and then locates, tracks and displays content based on this model. By comparison, Marker-less AR can achieve higher realism and more refined content.
The second category of AR is LBS Based AR, which is based on location services. It obtains your location and direction through GPS and compass, so as to realize positioning, tracking and display content. LBS Based AR does not need an environment model or tag, and displays content directly based on the device’s location. It has the lowest development difficulty, but the worst sense of reality, and the displayed content cannot be highly matched with the real environment. The phenomenon-level mobile game “Pokémon GO” is the representative of LBS Based AR.
In recent years, with the continuous enrichment of street view data by some large companies, it is now possible to accurately match virtual objects with the surrounding environment only by relying on location information in some areas. This technology is called VPS (Virtual Position System), such as Geospatial related technologies in Google Maps Platform.
Compare the two categories of AR, Vision Based AR is more refined and can achieve higher realism, but it is more difficult to develop. LBS Based AR is simpler, with slightly worse realism, but easier to develop. These two forms of AR have their own advantages and can also be integrated with each other to give full play to their respective strengths. For example, use LBS Based AR to determine the approximate location and direction, and then use Vision Based AR to accurately scan the environment and display content. In this way, we can make up for each other’s shortcomings and achieve a high-performance AR system.
No matter which principle of AR is adopted, Apple has provided developers with simple and mature solutions. Developers only need to focus on the application creativity of AR, choose the appropriate AR form and tools, and easily bring the AR experience to the end users without worrying about the complex underlying technology implementation. Apple makes AR development so simple that developers can create AR applications freely.
5 minutes to experience the charm of AR
In the previous content, we introduced AR to you through text, pictures and images. But only when you experience the magic of AR yourself, you will truly feel the charm of AR, which is far more shocking than any language can describe. Let’s take a look at how the AR QuickLook technology framework brings us the shocking experience of AR.
QuickLook is a framework that can be used on iOS, macOS and iPadOS. Any application that integrates this framework can quickly view many common file types, such as PDF, TXT, Pages, etc. Many of Apple’s first-party applications, such as Mail, Notes, Files, and Messages, have built-in QuickLook. This means that if a file format is supported by QuickLook, it can be quickly previewed on many Apple devices.
In 2018, Apple added support for AR file types such as USDZ and Reality to QuickLook. As long as you have an Apple device with iOS 12+, you can experience the charm of AR immediately.
For now, QuickLook is no longer just a tool for browsing documents or images. It has undergone a transformation. QuickLook with AR content has entered a whole new dimension, so we call it “AR QuickLook”. With AR QuickLook, we can naturally view and experience various AR scenes and effects in the real environment, which is the best way to experience AR.
Find a device that meets the requirements (iPhone, iPad) around you, and use Safari to visit this URL: https://developer.apple.com/augmented-reality/quick-look/
Then you will see a 3D model with a small cube icon in the upper right corner. Select one of them (the complete demonstration effect can be seen in the gif below).
If you visit this URL on macOS, there will be no small cube icon in the upper right corner of the 3D model (indicating that AR QuikckLook cannot be enabled), and clicking it will only get the 3D file (USDZ format) of the model.
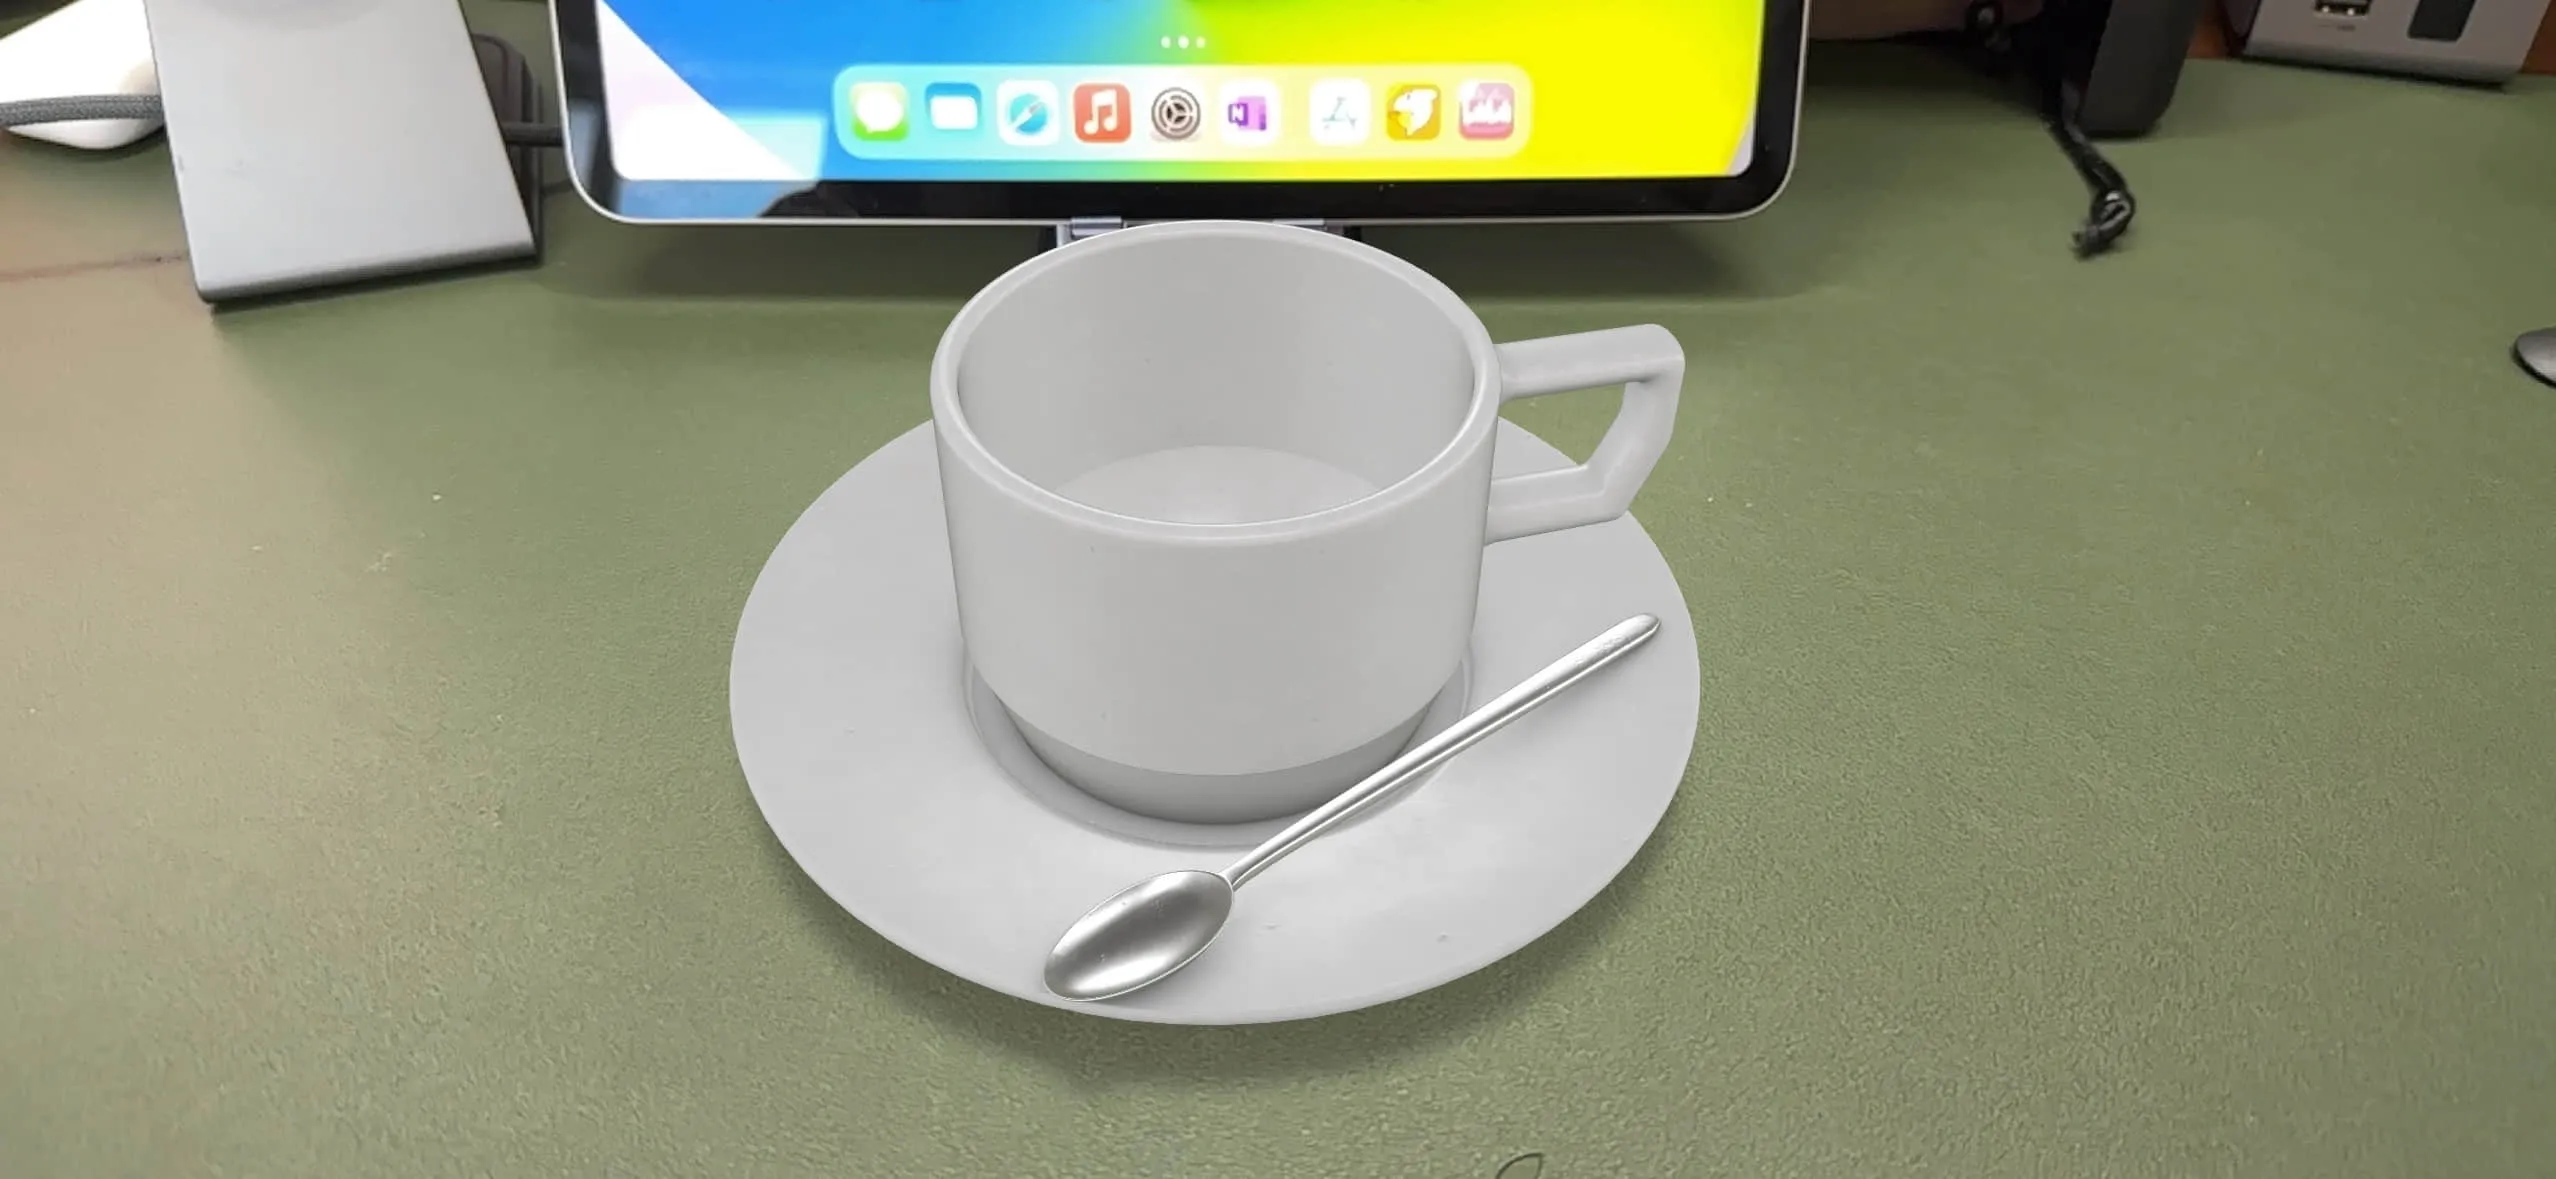
Click on any 3D model, the Safari browser will start AR QuickLook and load the model. Once the system detects a suitable plane, AR QuickLook will automatically place the 3D model on the corresponding plane. This seamless experience is satisfying, and the 3D model also looks very natural in the real environment, which is amazing!
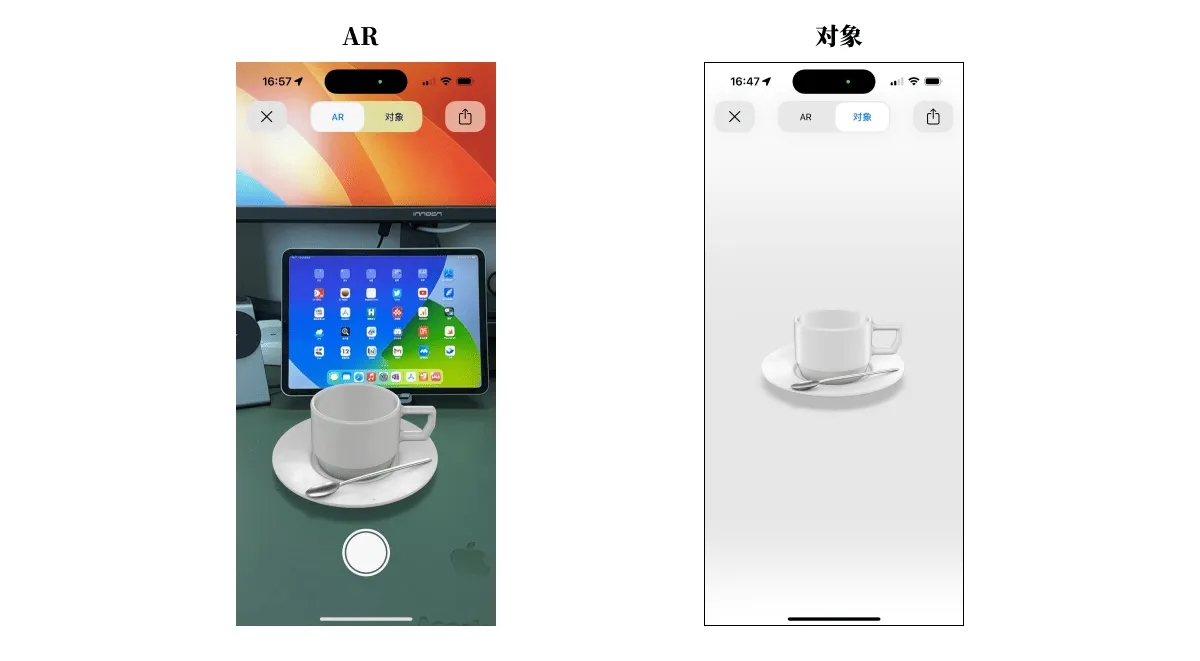
Now, let’s turn our attention to the AR QuickLook interface. In the center of the interface is a switch button with “AR” and “Object” written on it. What do they represent?
In fact, AR QuickLook provides two ways to display 3D models. “AR mode” places virtual objects in the real environment, allowing users to intuitively feel the effect of virtual objects in the real world. “Object mode” focuses more on the 3D model itself, making it easy for users to view model details. This switching mechanism allows users to switch flexibly between the two modes to meet different browsing and experience needs, and also enhances the ease of use and fun of AR QuickLook.
No matter which mode, users can easily perform some basic operations. Here are some common operations:
- Positioning: By clicking (tap), holding (hold) and dragging (drag) gestures, we can easily locate the position of the 3D model, so that the model can be placed where we want to display it. Moreover, AR QuickLook can recognize horizontal and vertical planes, which makes the placement of the model more natural.
- Scale: Use pinch-in or pinch-out gestures to enlarge or shrink the 3D model. Another operation related to scaling is double-clicking, which will reset the scale of the 3D model to 100% by double-clicking the 3D model.
- Rotate: Rotate the 3D model by placing two fingers on the screen and moving them in a circular motion. Similarly, the double-click gesture will reset the rotation.
- Levitation: Drag the 3D model up with two fingers, and you will be surprised to find that it seems to have escaped the shackles of gravity!
- Take photos/videos: Quickly click the shutter button on the screen to take photos, and long press the shutter button to trigger the video recording function (once you release it, the video recording will be terminated).
Now that you have mastered the basic operations of AR QuickLook, take some time to play with the different models on the web page carefully!
Don’t get too caught up in it, remember to come back and continue reading later!
I don’t know if you noticed the following details in the just now:
- 3D Model can be placed in daily environments such as living rooms, and it blends in naturally with the surrounding ordinary furniture.
- 3D Model can be placed in the real environment, and the light and shadow of the real environment will be reflected on the model, which makes the model more realistic.
- If someone passes by from the front or back of the model, an accurate occlusion effect will be generated, making people feel that they are really in the same space as the 3D model.
All of this requires sophisticated algorithms and perfect coordination between software and hardware to achieve, but Apple has done everything for us. AR QuickLook allows us to witness the perfect integration of the virtual world and the real world with our own eyes, which is the charm of AR. If you didn’t pay attention to the above details just now, you can experience it again, and I believe you will have a new understanding.
If you have your own 3D model that needs to be viewed through AR QuickLook, you can use Apple’s Reality Converter tool to convert the 3D model into USDZ format. In this way, AR QuickLook can directly recognize and display your model.
AR QuickLook allows us to experience the infinite possibilities of AR. But if you want to build your own AR scene or effect, where should you start? Don’t worry, Apple also provides us with a solution in this regard. With Reality Composer, you can easily create custom AR scenes and effects without writing any code.
No programming, you can also create AR scenes
Until a few years ago, creating immersive AR experiences was a fairly difficult task. AR developers needed a lot of skills and a wide range of knowledge of various technologies to make a small cube appear in AR. Everything changed when Apple released Reality Composer.
Reality Composer is a visual editing tool released by Apple at WWDC in 2019. It can help people create, test and optimize AR experiences on Mac, iPhone and iPad. You can complete your own AR creation without any programming knowledge or 3D development background.
You can download Reality Composer directly in the App Store, including iPhone and iPad versions. The following figure shows the running state of Reality Composer on iPad.
In macOS, Reality Composer is integrated in Xcode. As long as you have installed Xcode, you can search and open it directly in Spotlight.
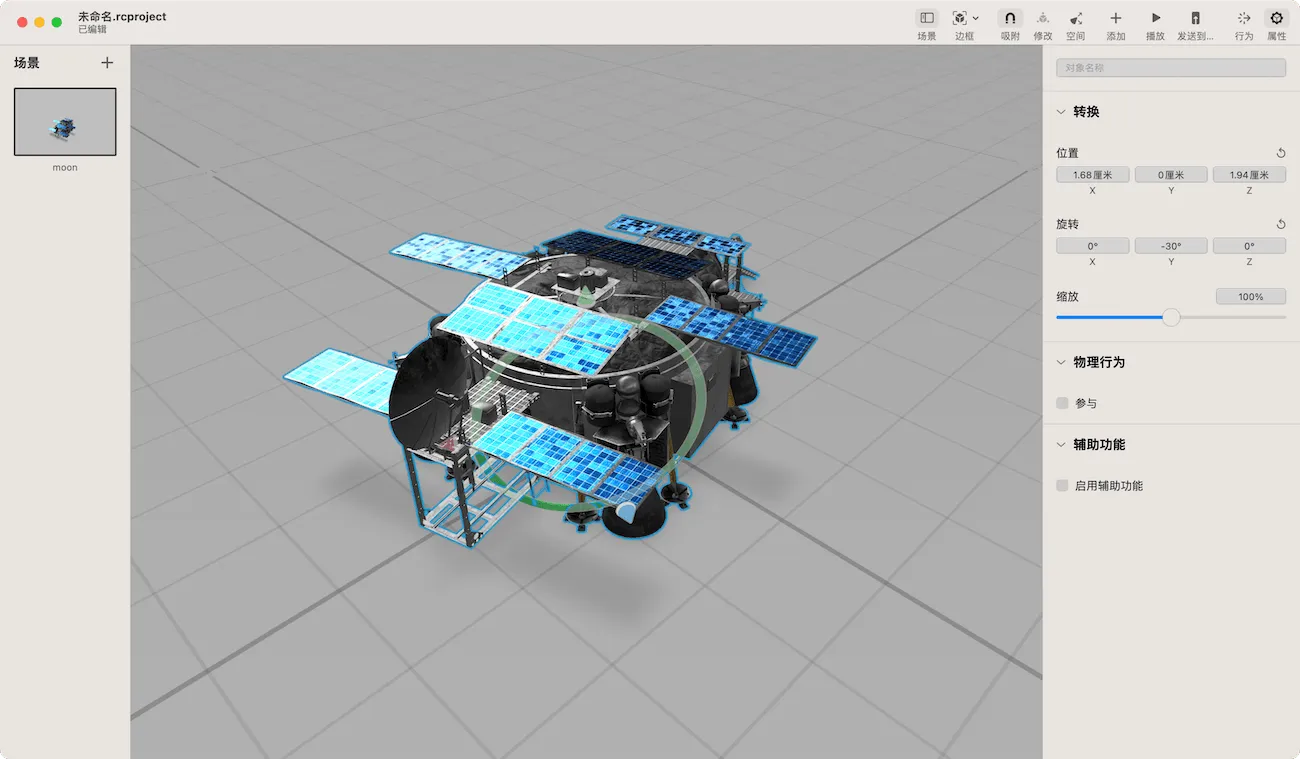
Because of the lack of a rear camera, the Mac version of Reality Composer lacks an AR mode and cannot directly enter the AR state preview. You need to transfer the project to iPhone or iPad through sharing or storage to see the final effect. You can choose which version of Reality Composer to use for learning according to your personal situation. The following figure shows the running state of Reality Composer on Mac.
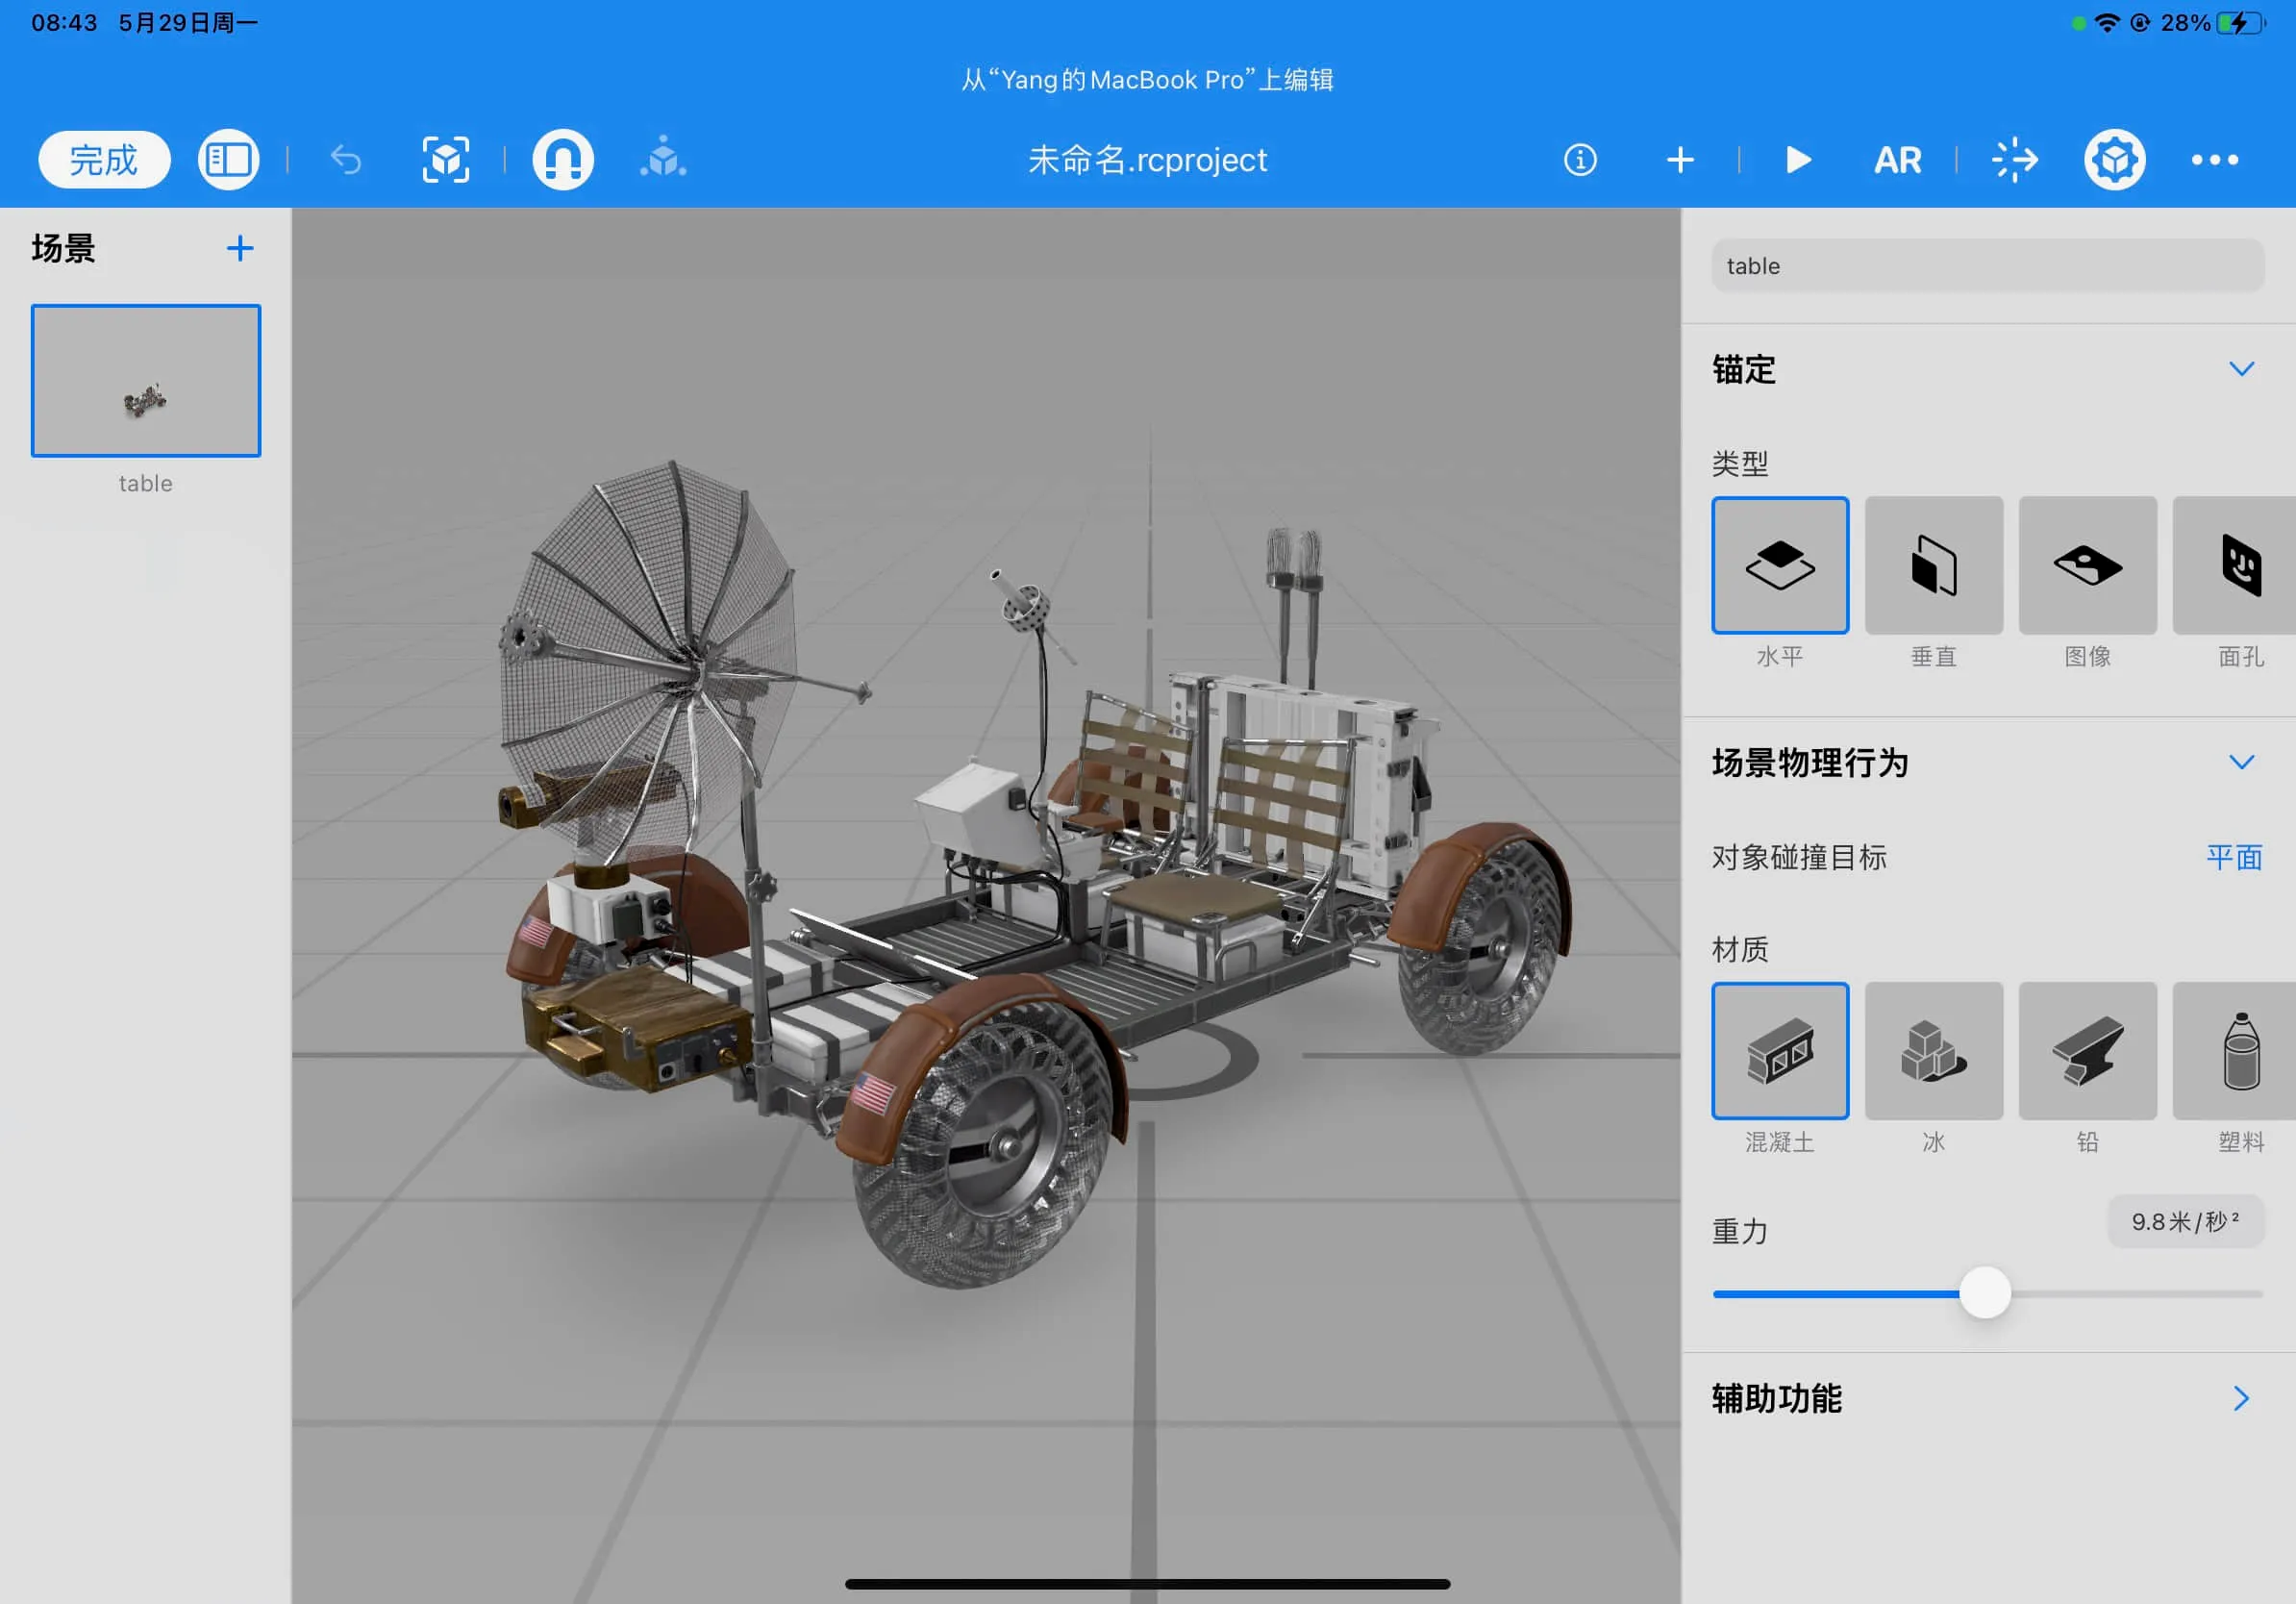
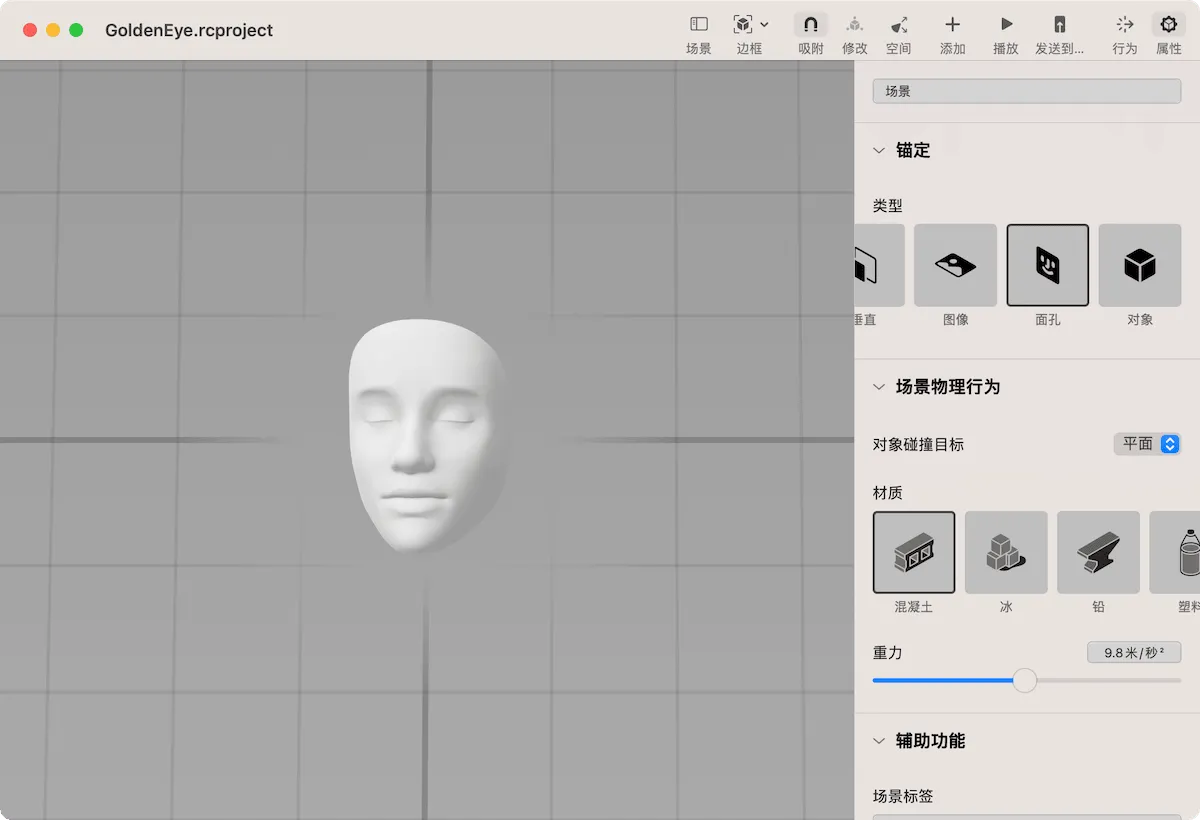
When creating a new Reality Composer project, the application will ask us to select the anchor type (Anchor) for the first scene.
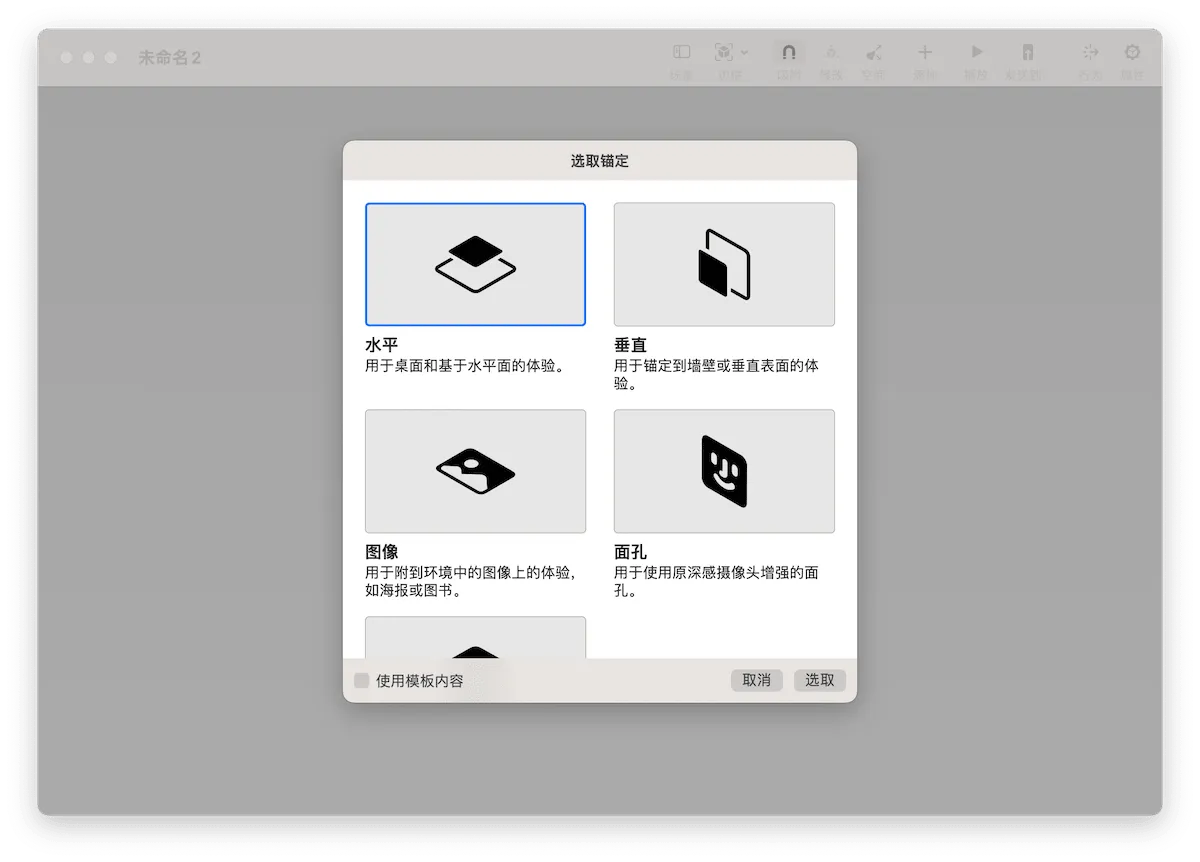
Different anchor types correspond to different AR algorithms and different lenses on the device. Only one anchor type can be selected for a scene.
- Horizontal
Horizontal anchor is the default option for creating a new document or scene. It is usually used to place 3D objects on tables, floors or other planes. When you choose a horizontal anchor for a scene, Reality Composer will display a guide grid to represent the real world surface where your scene will be placed.
- Vertical
Used for scenes that need to place objects on walls, pillars, or other vertical surfaces. When you choose this anchor type, Reality Composer will display a vertical grid.
We use AR QuickLook to preview the 3D models on the Apple AR website, most of which use horizontal or vertical anchor types.
- Image
Image anchor allows you to place AR scenes on 2D images (or nearby) in the real world, such as posters, paintings or photos. When you choose this anchor type, Reality Composer will display a white square guide to indicate the image detected in the real world, so that you can place the content to be placed nearby.
Can you still remember the dancing Hatsune Miku generated by AR ToolKit? That’s the anchor type used.
- Face
Face anchor type allows you to place content on or near the detected face. When you choose this anchor type, Reality Composer will display a 3D face to replace the face detected by ARKit in the real world.
In ARKit, the face anchor type requires a device with a TrueDepth front camera. As long as your device supports Face ID, you can use this anchor type.
- Object
By using this anchor type, you can place the scene on or near a scanned version of an object. When ARKit detects the corresponding real object in the real world, the content in the scene will be placed according to their position relative to the substitute object. For example, you can use Apple’s 3D scanning app to get the scan data of a model vehicle. When the AR application detects the model vehicle in the real world, it can add various information around it.
Reality Composer provides several anchor types that cover most of the mainstream Vision Based AR types and can meet the development needs of most AR scenes.
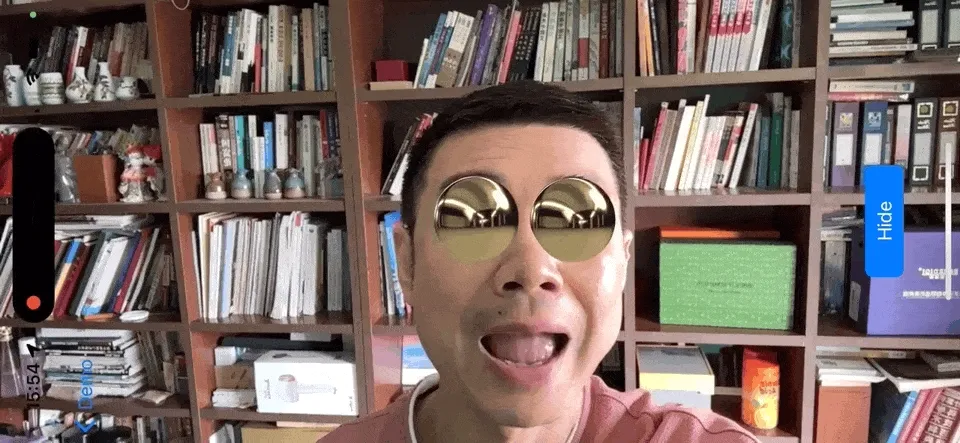
I believe many readers have seen or used the function of adding special effects to the face provided by TikTok (or other similar products). Next, we will use Reality Composer to achieve this function, and further understand Reality Composer in this process.
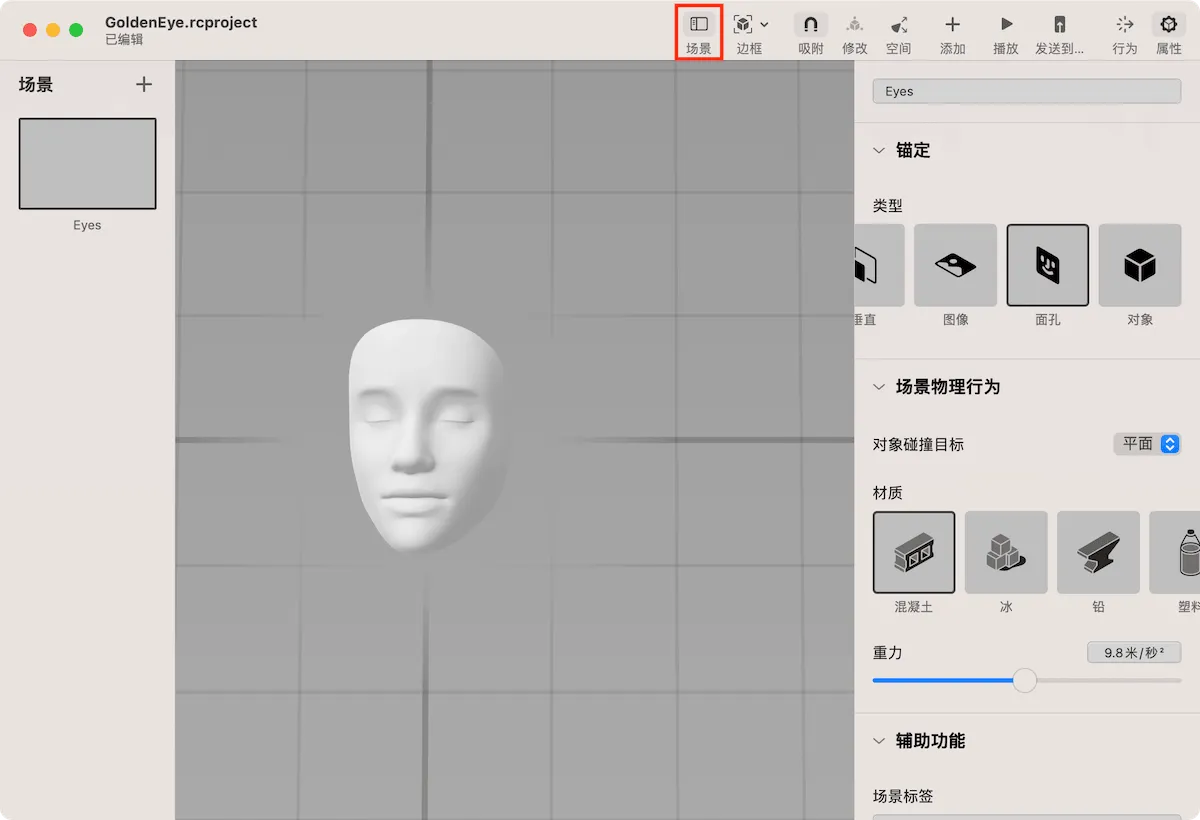
First, create a scene with the “Face” anchor type in a new project, and then name the project GoldenEye.
Click the “Scene” button above and name the scene “Eyes”.
From the outside, Reality Composer looks similar to many 3D editing software, but in fact it is more like a PowerPoint for editing AR scenes. And many similar concepts can be found between the two.
For now, you can think of the scene as a page in PowerPoint, and the anchor type used in the scene is the corresponding template in the page. Next, we will add some content to be displayed to this scene.
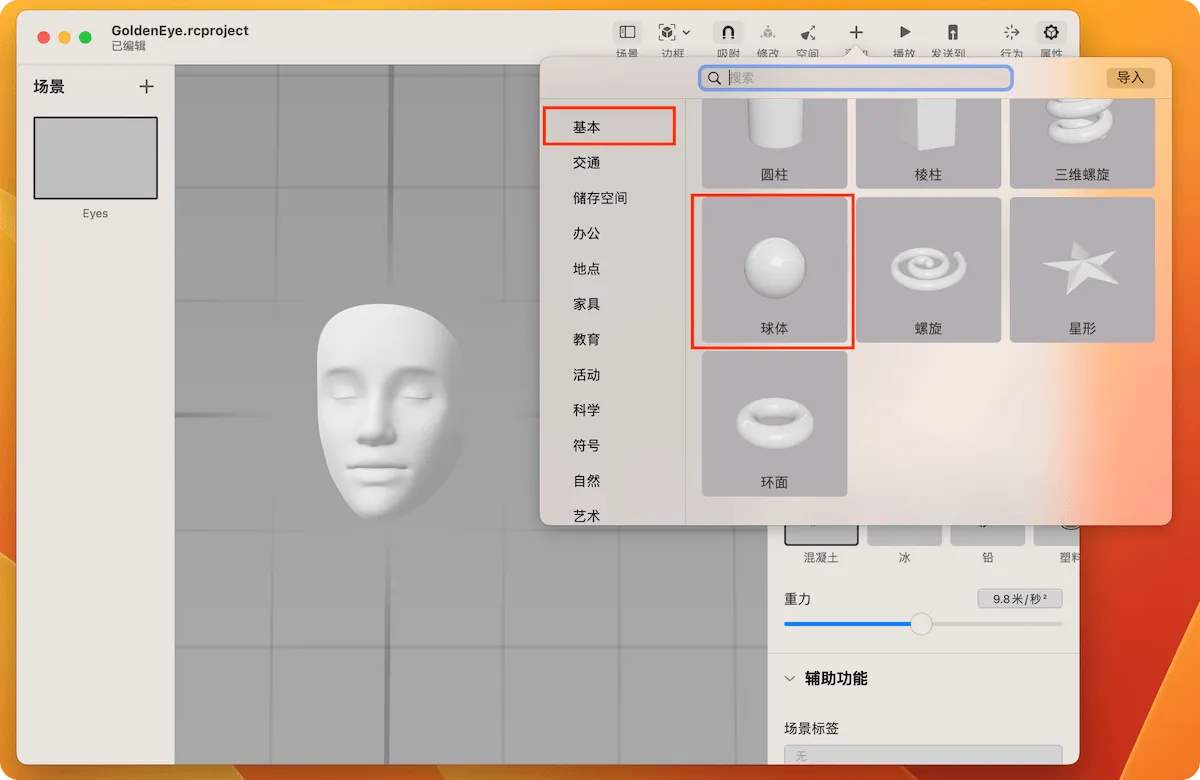
Click the add (+) button above and select Sphere in the list.
You can zoom in and place the sphere near the right eye by mouse or gesture, or set the specific position and size information for the sphere in the attribute bar on the right. Don’t forget to name the sphere “Eye_R”.
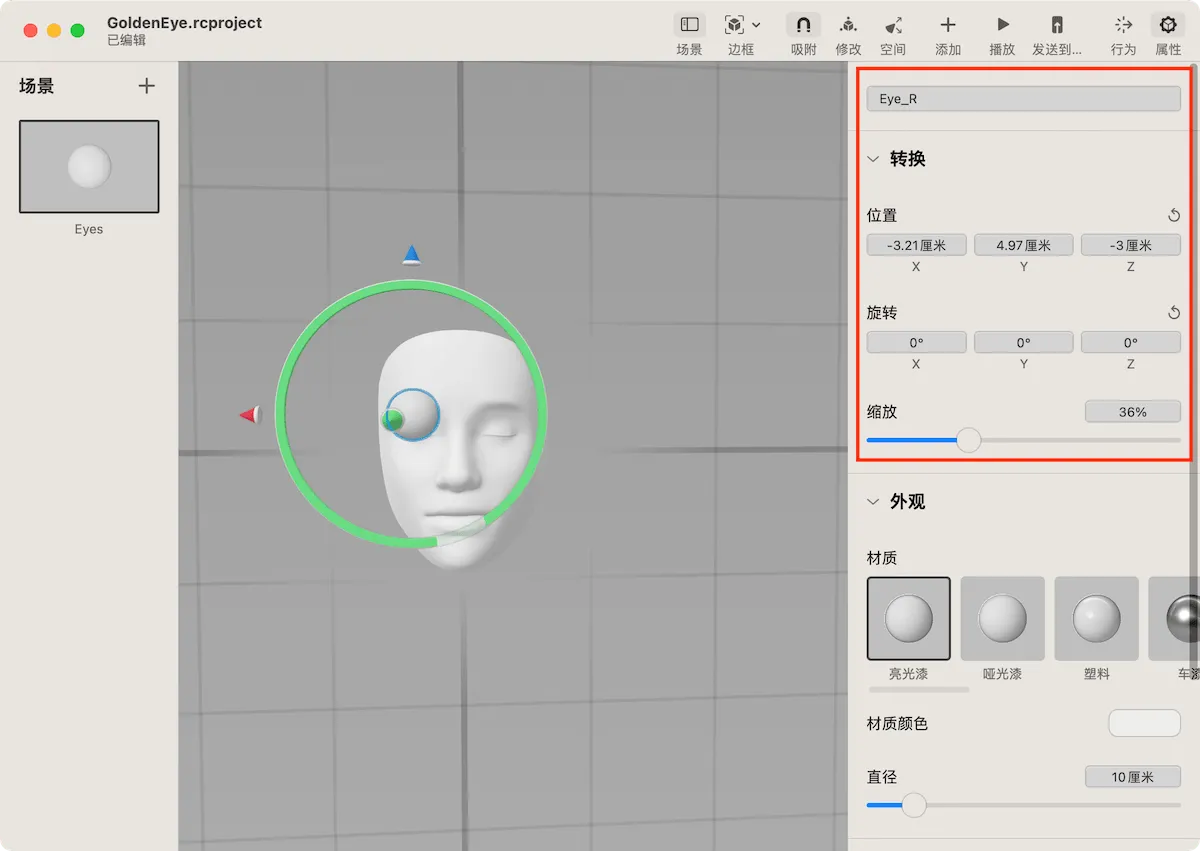
When the sphere (Eye_R) is selected, switch to the material bar and select the gold material.
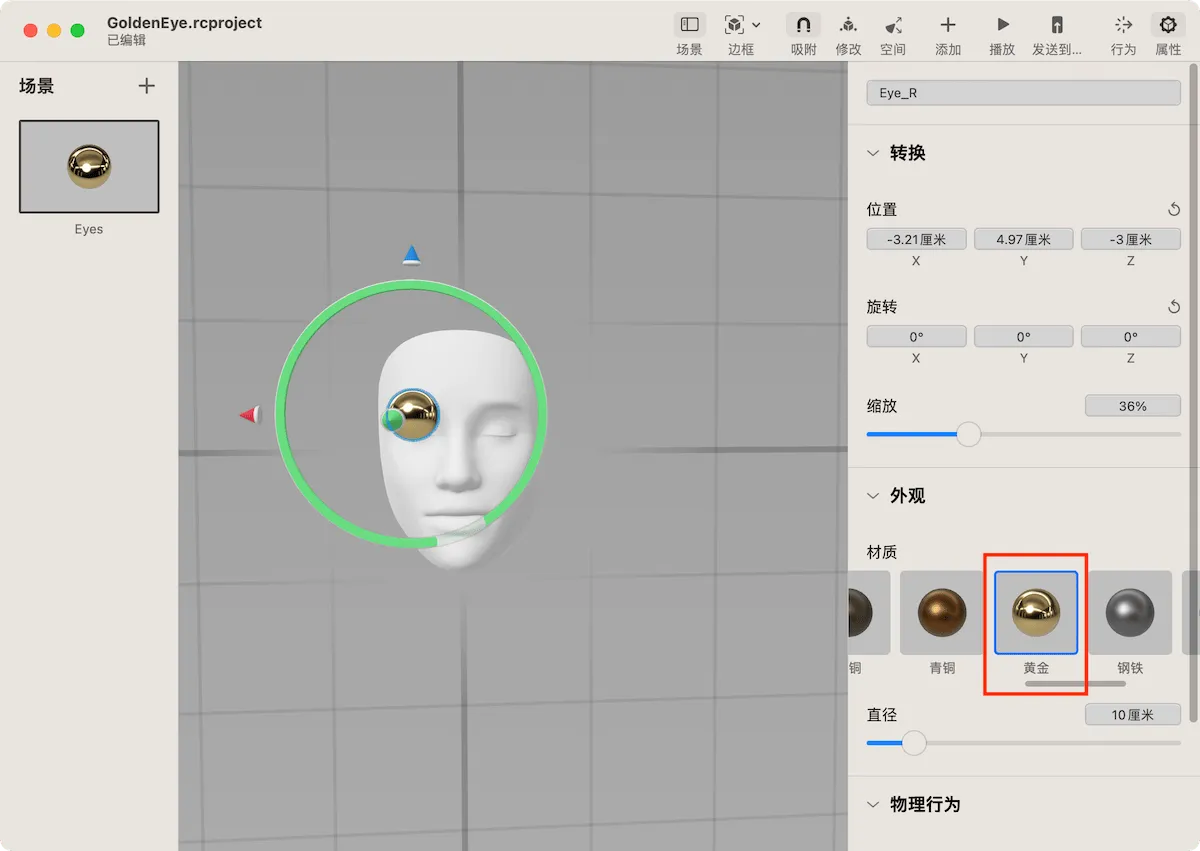
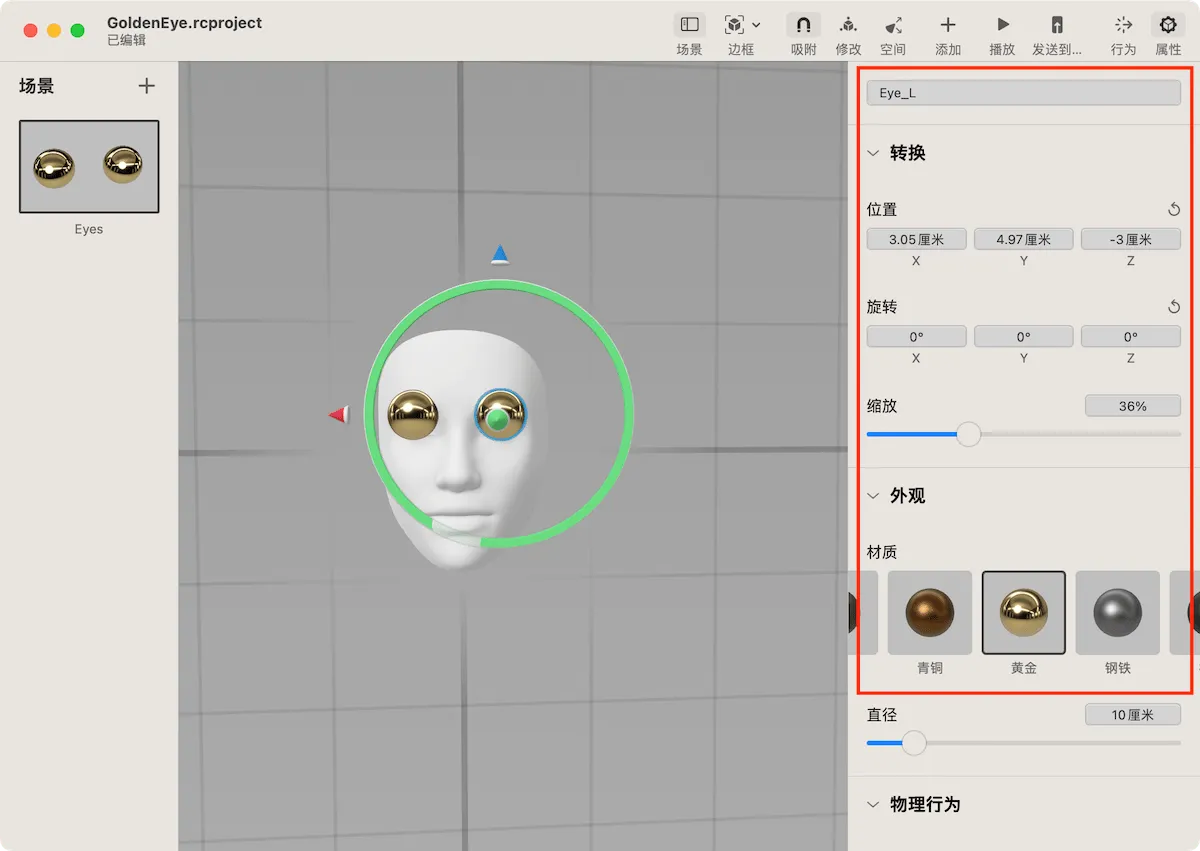
Use the same method to create a sphere corresponding to the left eye and name it “Eye_L”.
Congratulations! You have successfully created your first AR scene using Reality Composer.
If you created the scene on an iPhone or iPad Pro with Face ID, just click the “AR” button above to see the effect immediately. If it is created on a Mac, you need to click the “Send to” button in the toolbar above to send it to a device that meets the conditions (Reality Composer is installed) for preview.
When sending from Mac to iPhone or iPad, you need to run Reality Composer on the device first.

It’s surprisingly easy! Isn’t it?
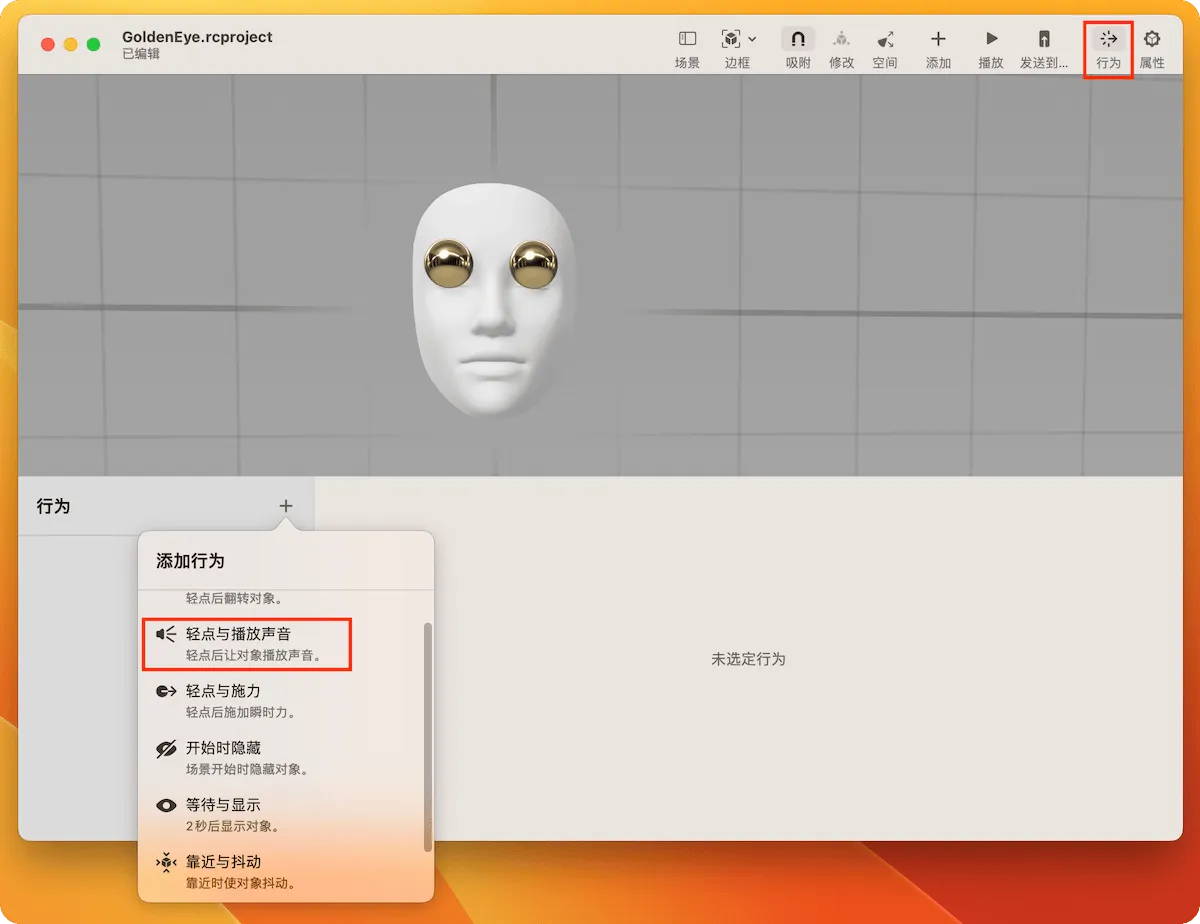
Now, we can add some interactive capabilities to the AR scene to make the experience more interesting.
We can add “behavior” to the objects in the scene in a similar way to the user adding “action” to the objects (text, pictures) in PowerPoint.
Click the “Behavior” button in the toolbar, and add “Tap to Play Sound” in the behavior panel below.
Please name the newly added behavior “Play Sound”. In the “Trigger” column, click the “Select” button and select the two golden spheres. In the “Play Sound” column, click the “Select” button and also set the two spheres as the affected objects. Finally, select your favorite audio clip.
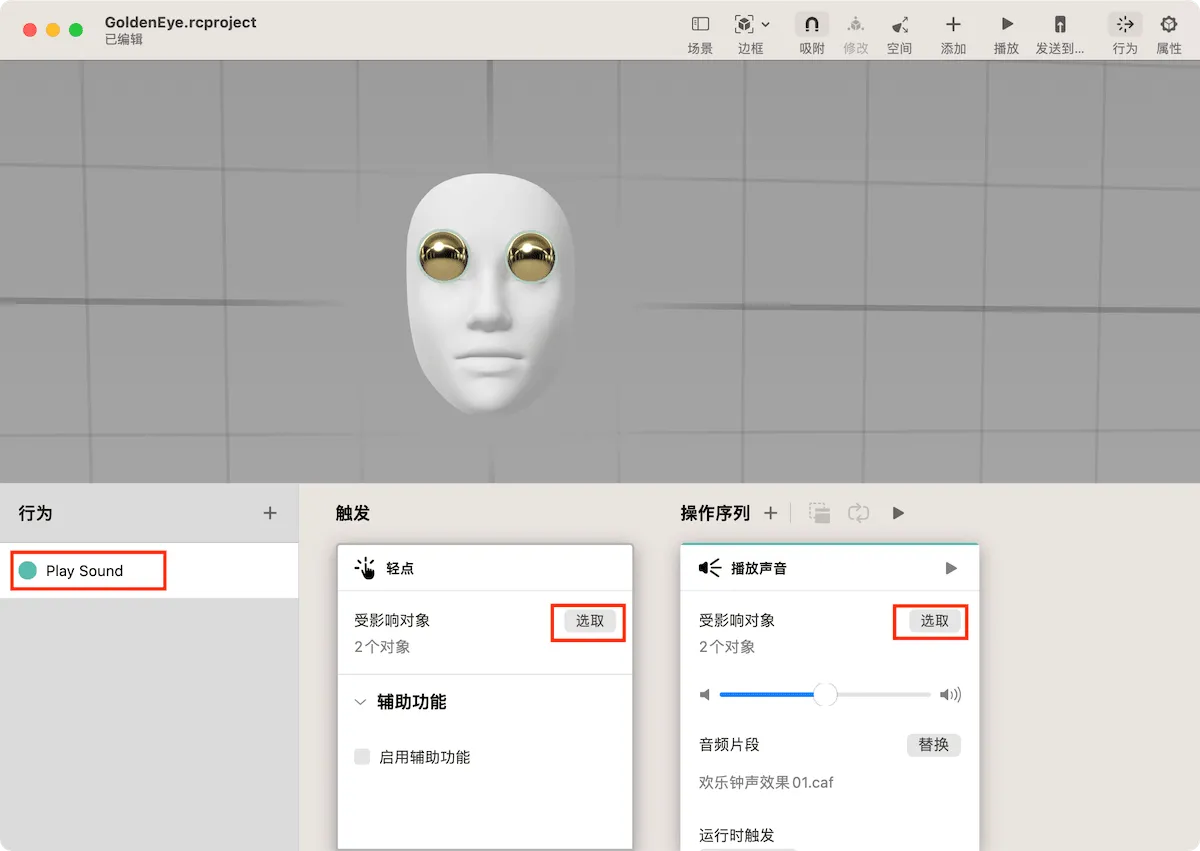
Click the “Play” button in the toolbar above, select any golden sphere, and the system will immediately play the selected audio clip.
Switch to AR mode (click the AR button on iPhone or iPad) and click the “Play” button. You can repeat this operation on the device screen to make the AR scene interactive. In this way, users can interact with the added virtual objects in the actual image.
If you can’t hear the sound on your iPhone or iPad, it’s probably because you selected audio material that hasn’t been downloaded yet. You can click the “☁️” in the sound list on the device to download the material, or replace it with audio that has been downloaded on the device.
Of course, the functions of Reality Composer are far more than that. We can add physical behavior to objects, let different objects interact with each other, create scenes with different anchor types, import other 3D models (USDZ), etc. In most cases, Reality Composer can convert creativity into AR scenes very well.
Now, you can share the project file (rcproject file) you created with other iPhone or iPad users, and experience the fun of AR together and show your creativity.
Interact with AR scenes with code and create independent applications
As you become more familiar with Reality Composer, you may find that the features it provides cannot fully meet your constantly emerging creative ideas. In addition, you may also want to share the AR scene you have carefully created with more people through the App Store, or add AR functions to other applications. So how can we achieve these goals?
We can use Reality Composer to create a complete AR scene, and then integrate it into the application project through Xcode. In this way, we can not only preview the project file created by Reality Composer on different devices through Reality Composer, but also integrate it into the application project as a resource.
This approach is very common in Apple’s ecosystem, such as using Scene Editor to create 3D scenes, Sprite Editor to create 2D game levels, or using Data Model Editor to define Core Data data models, etc. In the end, these files will be integrated into the development project of the application. Xcode will automatically generate the corresponding code based on the content of the file, so that we can directly access these resources and objects in other code of the project.
In the next two chapters, you need to install Xcode and have a developer account to fully experience the final development effect. But even if you don’t have these conditions yet, I encourage you to continue reading. I will use very simple examples and language to give you an understanding of the development process.
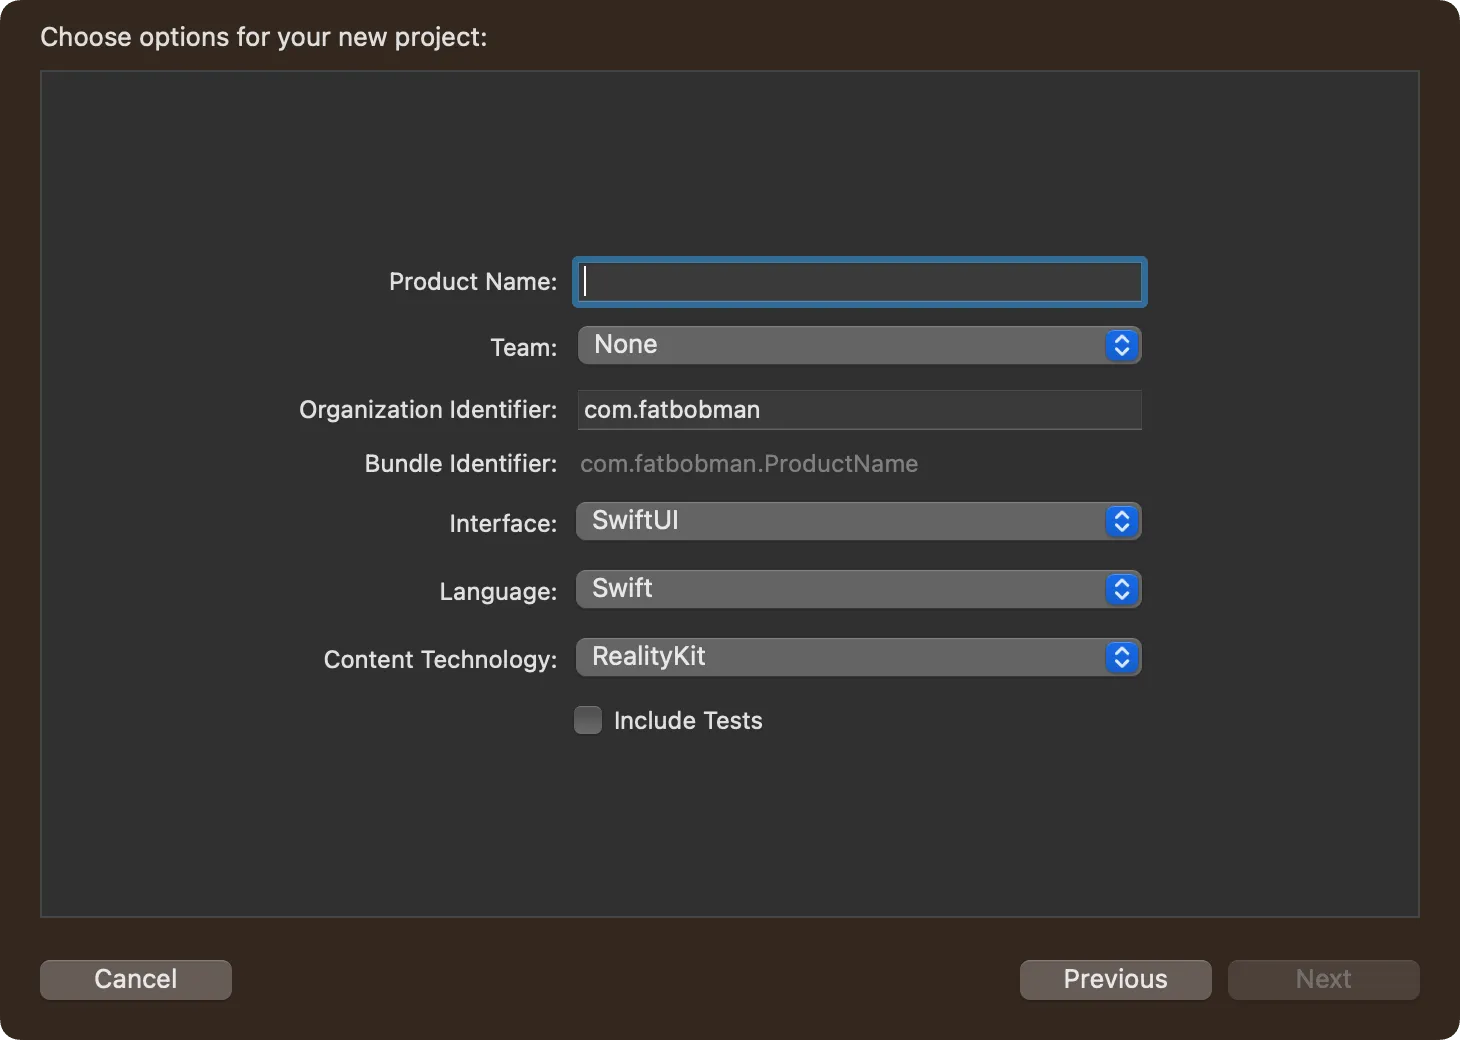
First, let’s create a new AR application project in Xcode. This way, Xcode will generate the corresponding template for us to simplify the development difficulty.
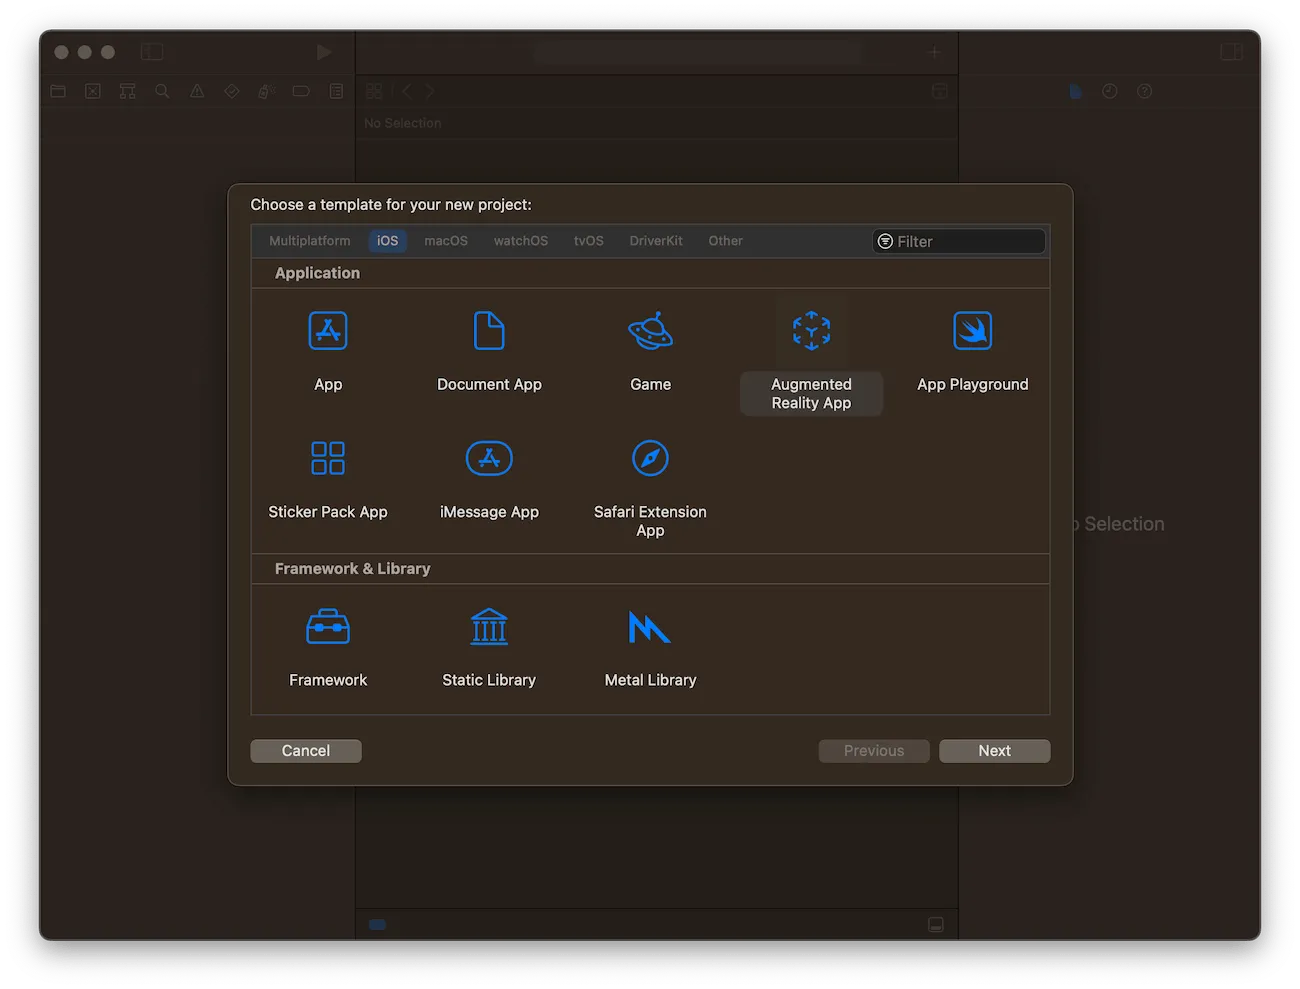
Here we use the default project configuration, select SwiftUI for Interface, and RealityKit for Content Technology.
The project structure is as follows:
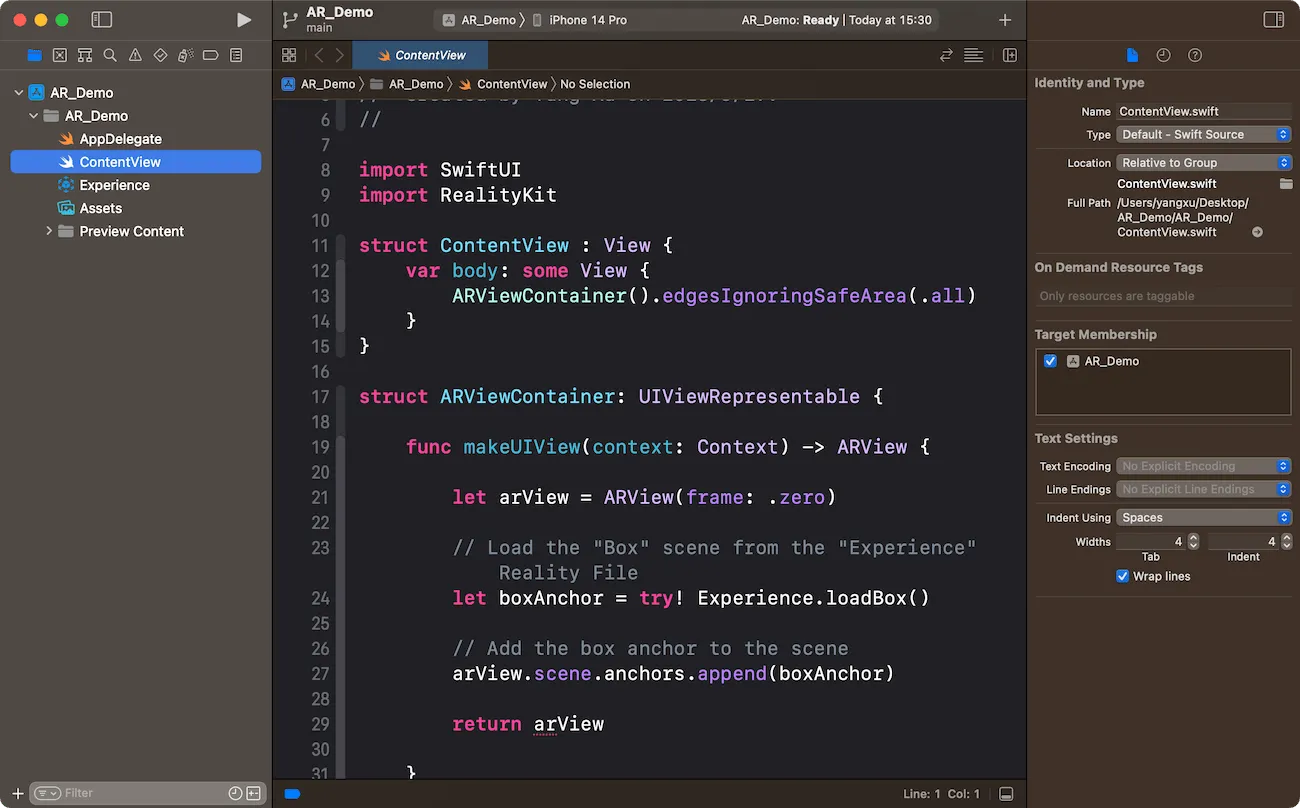
Among them, ContentView contains view definitions, AR scene loading, etc., which is the part we will focus on later.
Experience is the Reality Composer project file we created earlier. It is automatically generated by Xcode based on the rcproject file we created earlier. It contains the code corresponding to the AR scene we created earlier.
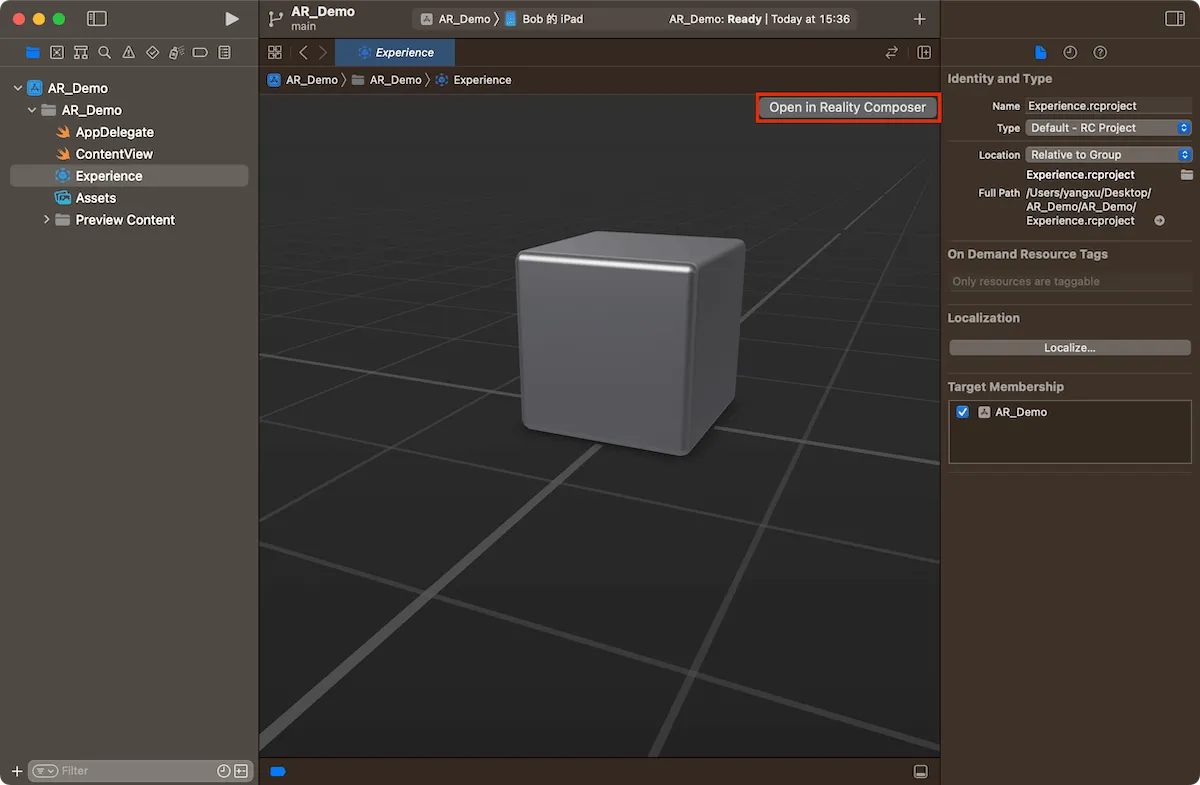
Click “Open in Reality Composer” in the upper right corner to edit the scene in Reality Composer. Please note that the name of the scene at this time is “Box”, and the name of the cube is also “Box”.

Let’s take a look at what’s in the code in ContentView at this time.
// SwiftUI ContentView
struct ContentView : View {
    var body: some View {
        ARViewContainer().edgesIgnoringSafeArea(.all)
    }
}

// By using UIViewRepresentable, create an AR view that can be used in SwiftUI (because the current AR view is based on UIKit)
struct ARViewContainer: UIViewRepresentable {

    func makeUIView(context: Context) -> ARView {
        // Create an AR view
        let arView = ARView(frame: .zero)

        // Load the "Box" scene from the "Experience" Reality file
        let boxAnchor = try! Experience.loadBox()

        // Add the anchor of Box to the scene
        arView.scene.anchors.append(boxAnchor)

        return arView

    }

    func updateUIView(_ uiView: ARView, context: Context) {}

}
Do you notice that Experience and Box correspond to the project name and scene name of the Reality file respectively? This means that the naming of projects, scenes and objects will be automatically generated by Xcode as objects with the same name. Through the definition jump operation of Xcode, we can view the content of these automatically generated code.
Next, we will add a new function to the “Golden Eye” project created earlier: let the two golden eyeballs grow bigger as the mouth opens.
Remove the Experience file in the current project, and drag the GoldenEye file created in Reality Composer in the previous chapter to the current Xcode project (be sure to select Copy items if needed).
And adjust makeUIView to the following code.
import ARKit // Import ARKit Framework

func makeUIView(context: Context) -> ARView {
    // Create ARView
    let arView = ARView(frame: .zero)

    // Create ARConfiguration, which can be understood as setting the anchor type of the scene
    let arConfiguration = ARFaceTrackingConfiguration()

    // Using Configuration, create and start AR session
    arView.session.run(arConfiguration, options: [.resetTracking, .removeExistingAnchors])

    // Load the eye scene
    let arAnchor = try! GoldenEye.loadEyes()

    // Add the anchor of Eyes to the scene
    arView.scene.anchors.append(arAnchor)
    return arView
}
In this code, we use ARFaceTrackingConfiguration to create an AR configuration object corresponding to the face anchor type, and create an AR session based on this. In ARKit, the following anchor types can be created using code:
- AROrientationTrackingConfiguration: Basic three degrees of freedom (3DOF) tracking.
- ARWorldTrackingConfiguration: Six degrees of freedom (6DOF) tracking. It can also track people, known images and objects. It covers a variety of anchor types such as horizontal, vertical, image, and object in Reality Composer.
- ARBodyTrackingConfiguration: Track the human body.
- ARImageTrackingConfiguration: Track known images. Corresponds to Reality Composer’s image anchor.
- ARObjectScanningConfiguration: Scan objects and create high-fidelity 3D data for the object. The generated object data can be used in ARWorldTrackingConfiguration as the target object for tracking.
- ARFaceTrackingConfiguration: Track faces and facial expressions using the front camera. Corresponds to Reality Composer’s face anchor.
- ARPositionalTrackingConfiguration: Provides six degrees of freedom (6DOF) tracking, but unlike ARWorldTrackingConfiguration, in this scenario, the device does not collect and analyze images from the camera, but only tracks the movement of the device, which is suitable for some VR-like scenarios.
- ARGeoTrackingConfiguration: Use GPS and map data to achieve geolocation tracking.
Compared with Reality Composer, using code, we can create more anchor types to meet more complex AR scene requirements.
We need to control the size of the eyeballs according to the degree of mouth opening, so how to get the required information?
Every AR session (ARSession) will return different data information according to the type of ARConfiguration set after it is started. For example: ARGeoAnchor will return latitude, longitude and altitude information, while ARBodyAnchor will return the position information of the trunk and each joint. For our current scene, we need to get the movement information of each organ of the face through ARFaceAnchor.
This information will be returned to the developer through the ARSession configured Delegate. We only need to adjust the objects in the scene according to this information to achieve our needs.
Adjust our code further and add the following code to ARViewContainer:
func makeCoordinator() -> Coordiantor {
    Coordiantor(arViewContainer: self)
}

class Coordiantor: NSObject, ARSessionDelegate {
    var arViewContainer: ARViewContainer
    var face: GoldenEye.Eyes!
    init(arViewContainer: ARViewContainer) {
        self.arViewContainer = arViewContainer
        super.init()
    }

    // Called when the anchor information changes
    func session(_: ARSession,
                 didUpdate anchors: [ARAnchor])
    {
        guard let face else { return }
        var faceAnchor: ARFaceAnchor?
        for anchor in anchors {
            if let a = anchor as? ARFaceAnchor {
                faceAnchor = a
            }
        }
        // The identifier of a specific facial feature, used to describe the coefficient of the relative motion of these features
        let blendShapes = faceAnchor?.blendShapes

        // The coefficient of jaw opening is used to judge the size of mouth opening and closing
        if let jawOpen = blendShapes?[.jawOpen]?.floatValue {

            // Using the coefficient of jaw opening to adjust the size of the eyeball
            face.eyeL?.scale = SIMD3<Float>(1, 1, 1) * (0.3 + jawOpen / 2)
            face.eyeR?.scale = SIMD3<Float>(1, 1, 1) * (0.3 + jawOpen / 2)
        }
    }

    // Called when the anchor is removed
    func session(_: ARSession, didRemove _: [ARAnchor]) {
        print("didRemove")
    }

    // Called when the anchor is added
    func session(_: ARSession, didAdd _: [ARAnchor]) {
        print("didAdd")
    }
}
In the above code, we created a Coordiantor class that conforms to the ARSessionDelegate protocol. In the session(_: ARSession, didUpdate anchors: [ARAnchor]) method, we will adjust the size of the eyeball based on the data about the jaw movement provided by BlendShapeLocation in ARFaceAnchor.
BlendShapeLocation provides a wealth of facial movement details, including eyes, mouth, chin, eyebrows, cheeks, nose, etc. For more details, please refer to the official documentation.
Finally, in the makeUIView method, configure the delegate for ARSession.
...

// Set delegate
arView.session.delegate = context.coordinator
context.coordinator.face = arAnchor

return arView
By now, we have completed all the code and created an independent AR application that can change the size of the eyeball according to the size of the mouth.
We have retained and used most of the information in the Reality Composer project, including the name, sphere size, preset position, material, and behavior, which makes the code very simple. Even without adding code to handle gestures, the sphere already has the ability to play sound after clicking in the AR scene.
By combining Reality Composer and code, we have further opened the door to AR creativity. The original Reality Composer project assets are retained and played to the maximum extent, thereby greatly reducing the difficulty and workload of code development. We can expand the potential applications of AR on this basis, and explore a broader creative space.
Implement AR applications without relying on Reality Composer
Reading this, you may have a question: In the AR development process of Apple, do we have to use Reality Composer? Can other familiar engines (such as Unity, Unreal) or completely build scenes and interaction logic through code?
Be assured, the answer is obvious, these choices are equally open and feasible. Reality Composer is just an optional solution provided by Apple to simplify the AR development process and reduce the technical threshold. If you are already proficient in other engine tools or are very familiar with code development, Reality Composer is not necessary.
In Apple’s AR development process, only the ARKit framework is indispensable.
ARKit open the door for AR development, it is the foundation and core of building AR experience. Developers obtain scene data and interaction capabilities through it, and get tools and materials to turn AR concepts into reality. After that, developers can choose the appropriate framework or directly write code according to their interests and experience to create excellent AR effects.
Let’s take Unity as an example. The following figure is a technical framework diagram for mobile AR application development in Unity. Here we can actually see the importance of ARKit, because no matter what, we still need ARKit to provide basic AR capabilities at the bottom, such as SLAM, etc.

Here, we also provide a demonstration code for controlling GameObject position and rotation in Unity, which is a feeling of ARKit:
// Create ARSession and configuration
ARSession session = ARSession.instance;
ARWorldTrackingConfiguration config = new ARWorldTrackingConfiguration();
session.runWithConfig(config);

// Get camera image and render to screen
ARCameraBackground arCamera = FindObjectOfType<ARCameraBackground>();
if (arCamera != null)
    arCamera.enabled = true;

// Add ARAnchor object to scene
ARRaycastManager raycastManager = GetComponent<ARRaycastManager>();
List<ARRaycastHit> hits = new List<ARRaycastHit>();
if (raycastManager.Raycast(touches[0].position, hits, UnityARVideoFormat.kARFBCameraPosition))
{
    // Add Anchor and GameObject
    GameObject cube = GameObject.CreatePrimitive(PrimitiveType.Cube);
    cube.transform.position = hits[0].pose.position;
    cube.transform.rotation = hits[0].pose.rotation;
}

// Update Anchor position and posture
for (int i = 0; i < anchors.Count; i++)
{
    anchors[i].transform.position = anchors[i].anchor.transform.position;
    anchors[i].transform.rotation = anchors[i].anchor.transform.rotation;
}
Next, we will take the requirements of the previous section as an example to demonstrate how to create an application with the same function only by relying on code, without using Reality Composer.
Considering the length, this article only introduces the more important parts, and does not explain all the code. You can get the complete code here
RealityKit is a new generation of AR development framework launched by Apple in iOS 13. It is based on ARKit and has been further encapsulated and optimized on this basis to provide a higher-level AR development experience.
Comparing with ARKit, RealityKit is easier to use. It uses the Entity-Component method to organize the elements of AR experience. Developers can easily build interactive AR effects without paying too much attention to the details of the underlying implementation. At the same time, RealityKit has also made improvements in visual and interactive experience, adding environmental light, reflection and other effects, supporting rich gesture interaction, etc., making AR content more coordinated with the real scene and interaction more natural.
SceneKit provides RealityKit with 3D rendering capabilities, and Metal ensures high-performance implementation of Rendering. RealityKit uses these underlying frameworks to achieve high-quality 3D and 2D mixed rendering on the basis of ARKit data, bringing higher realism and experience to AR experience.
Compare to other frameworks, RealityKit is often the best choice for AR development. It provides a simpler and more direct development experience, and the technical threshold is also lower.
In Xcode, create a new AR application project, and then delete the Experience file in the template.
Please modify the makeUIView method to the following code:
func makeUIView(context: Context) -> ARView {
    let arView = ARView(frame: .zero)
    let arConfiguration = ARFaceTrackingConfiguration()
    arView.session.run(arConfiguration, options: [.resetTracking, .removeExistingAnchors])
    return arView
}
As introduced in the previous article, we created and enabled an AR session based on ARFaceTrackingConfiguration.
Add the following code to ARViewContainer:
func makeEyesAnchor() throws -> AnchorEntity {
    let eyesAnchor = AnchorEntity()
    let eyeBallSize: Float = 0.015 // The size of the ball
    let collisionBoxSize: Float = 0.03 // The size of the collision box, used to determine the click

    // Create a left eye ball and set the position
    let leftEyeBall = createEyeBall(scale: eyeBallSize)
    let leftEyeOffset = SIMD3<Float>(0.03, 0.02, 0.05) //The position of the left eye
    leftEyeBall.name = "leftEye" // The name of the left eye
    leftEyeBall.position = leftEyeOffset

    // Add a collision box to the left eye ball
    let leftEyeCollision = CollisionComponent(shapes: [ShapeResource.generateBox(size: [collisionBoxSize, collisionBoxSize, collisionBoxSize])])
    leftEyeBall.components.set(leftEyeCollision)

    eyesAnchor.addChild(leftEyeBall)

    // Create a right eye ball and set the position
    let rightEyeBall = createEyeBall(scale: eyeBallSize)
    let rightEyeOffset = SIMD3<Float>(-0.03, 0.02, 0.05) // The position of the right eye
    rightEyeBall.name = "rightEye" // The name of the right eye
    rightEyeBall.position = rightEyeOffset

    // Add a collision box to the right eye ball
    let rightEyeCollision = CollisionComponent(shapes: [ShapeResource.generateBox(size: [collisionBoxSize, collisionBoxSize, collisionBoxSize])])
    rightEyeBall.components.set(rightEyeCollision)

    eyesAnchor.addChild(rightEyeBall)

    return eyesAnchor
}

func createEyeBall(scale: Float) -> ModelEntity {
    let eyeBall = ModelEntity(
        mesh: .generateSphere(radius: scale),
        materials: [SimpleMaterial(color: .yellow, isMetallic: true)]
    )
    return eyeBall
}
In this part, we use code to complete the operations of creating spheres, placing spheres, setting materials, etc. that we previously created in Reality Composer.
Add the following code above return arView:
let arAnchor = try! makeEyesAnchor()
arView.scene.anchors.append(arAnchor)
Now, if we run the app, the spheres will not appear. This is because we have not yet bound their positions to the anchor points of the face.
Add the following code to ARViewContainer:
func makeCoordinator() -> Coordinator {
    Coordinator(arViewContainer: self)
}

class Coordinator: NSObject, ARSessionDelegate {
    var arViewContainer: ARViewContainer
    var face: AnchorEntity?
    var player: AVAudioPlayer?
    init(arViewContainer: ARViewContainer) {
        self.arViewContainer = arViewContainer
        super.init()
    }

    func session(_: ARSession, didUpdate anchors: [ARAnchor]) {
        guard let faceAnchor = anchors.first as? ARFaceAnchor,
              let face = face
        else {
            return
        }

        // Update the position and orientation of the head entity
        let facePosition = simd_make_float3(faceAnchor.transform.columns.3)
        let faceOrientation = simd_quatf(faceAnchor.transform)
        face.position = facePosition
        face.orientation = faceOrientation

        // Get the rotation value of the head node
        let faceRotation = face.orientation

        // Update the rotation of the left eye ball
        if let leftEye = face.children.first(where: { $0.name == "leftEye" }) as? ModelEntity {
            let parentRotation = faceOrientation
            let eyeLocalRotation = simd_mul(parentRotation.inverse, faceRotation)
            leftEye.orientation = eyeLocalRotation
        }

        // Update the rotation of the right eye ball
        if let rightEye = face.children.first(where: { $0.name == "rightEye" }) as? ModelEntity {
            let parentRotation = faceOrientation
            let eyeLocalRotation = simd_mul(parentRotation.inverse, faceRotation)
            rightEye.orientation = eyeLocalRotation
        }

        let maxScale: Float = 1.6 // The maximum scaling factor of the ball

        // Get the degree of mouth opening
        let blendShapes = faceAnchor.blendShapes

        if let jawOpen = blendShapes[.jawOpen]?.floatValue {
            // Adjust the scaling factor of the ball
            let scale = 1 + (jawOpen * maxScale)

            face.children.compactMap { $0 as? ModelEntity }.forEach { eyeBall in
                eyeBall.scale = SIMD3<Float>(repeating: scale)
            }
        }
    }
}
Same as the code in the previous section, in the session(_: ARSession, didUpdate anchors: [ARAnchor]) callback method, we continuously adjust the position of the two spheres according to the position of the face, and adjust the size of the spheres according to the degree of opening the mouth.
In the makeUIView method, add the following code below arView.scene.anchors.append(arAnchor) to set the delegate:
arView.session.delegate = context.coordinator
context.coordinator.face = arAnchor
Now run the app, the two golden balls have been bound to the position of the eyes, and can change the size according to the degree of opening and closing of the mouth.
Finally, we will add the function of clicking the ball to play sound. First, add a click gesture to the AR view in the makeUIView method.
let tapGesture = UITapGestureRecognizer(target: context.coordinator, action: #selector(context.coordinator.handleTap(_:)))
arView.addGestureRecognizer(tapGesture)
return arView
Add the following code to Coordinator to respond to gestures and play audio:
@objc func handleTap(_ gesture: UITapGestureRecognizer) {
    guard let arView = gesture.view as? ARView else { return }
    let touchLocation = gesture.location(in: arView)

    if let _ = arView.entity(at: touchLocation) {
        playSound()
    }
}

func playSound() {
    if player == nil {
        // Add any audio file to the project and replace the file name here
        let fileName = "mixkit-classic-click.wav"
        guard let url = Bundle.main.url(forResource: fileName, withExtension: nil) else {
            print("Sound file '\(fileName)' not found.")
            return
        }
        player = try! AVAudioPlayer(contentsOf: url)
        player?.prepareToPlay()
    }

    player?.play()
}
For now, we have created an AR application with the same function without relying on any Reality Composer resources. Of course, for the current needs, it is more efficient to combine Reality Composer than to use pure code. However, as long as you follow the above logic, you can combine ARKit with any tools you are familiar with to create the desired effect.
Conclusion
By reading this article, I believe you have a preliminary understanding of AR technology and the AR tools provided by Apple, and have experienced the novelty and creativity brought by AR.
The tools and technologies introduced in the article are only a small part of AR tools and technologies. Here, I just want to express a point of view: AR is no longer an unreachable future technology, it has quietly integrated into our lives and continues to change the world.
If you want to learn more about ARKit or develop AR applications, I strongly recommend that you read the AR Session in WWDC, the developer documentation provided by Apple, and professional books. In addition, XRealityZone will also launch tutorials on Apple AR in the near future, so stay tuned.
AR technology is not limited to games and entertainment. In the fields of education, medicine, engineering and production, it has great application potential. If you have the opportunity to work in these industries in the future, having AR skills will undoubtedly bring you greater advantages.
In the future, more and more powerful, intelligent and convenient AR tools and technologies will emerge to help everyone enjoy themselves in reality and fantasy.
Finally, let’s look forward to more surprises brought by AR together! Have fun and use the earth freely!
If you think this article is helpful for you, you are welcome to communicate with us on X, xreality.zone
Recommended Reading
- visionOS 2 HandMatcher HandVector Update to v2 and Add New FingerShape Function - A gesture matching framework that allows you to debug visionOS hand tracking function in emulator
- How to Use MPS and CIFilter to Achieve Special Visual Effects on visionOS
- Before developing visionOS, you need to understand the full view of Apple AR technology
- How to Quickly Create an MR Application on PICO 4 Ultra with AI? - Using Cursor to Speed Up Development
- Solving Nested Transparent Objects in RealityKit with Rendering Ordering - Part 1
- Far More Than Games: Review the Exciting MR Capabilities in PICO 4 Ultra
- What kind of sparks will be created when PICO 4 Ultra meets spatial video? - Mastering spatial video, PICO is also impressive!