Solving Nested Transparent Objects in RealityKit with Rendering Ordering
Intersecting Transparent Objects
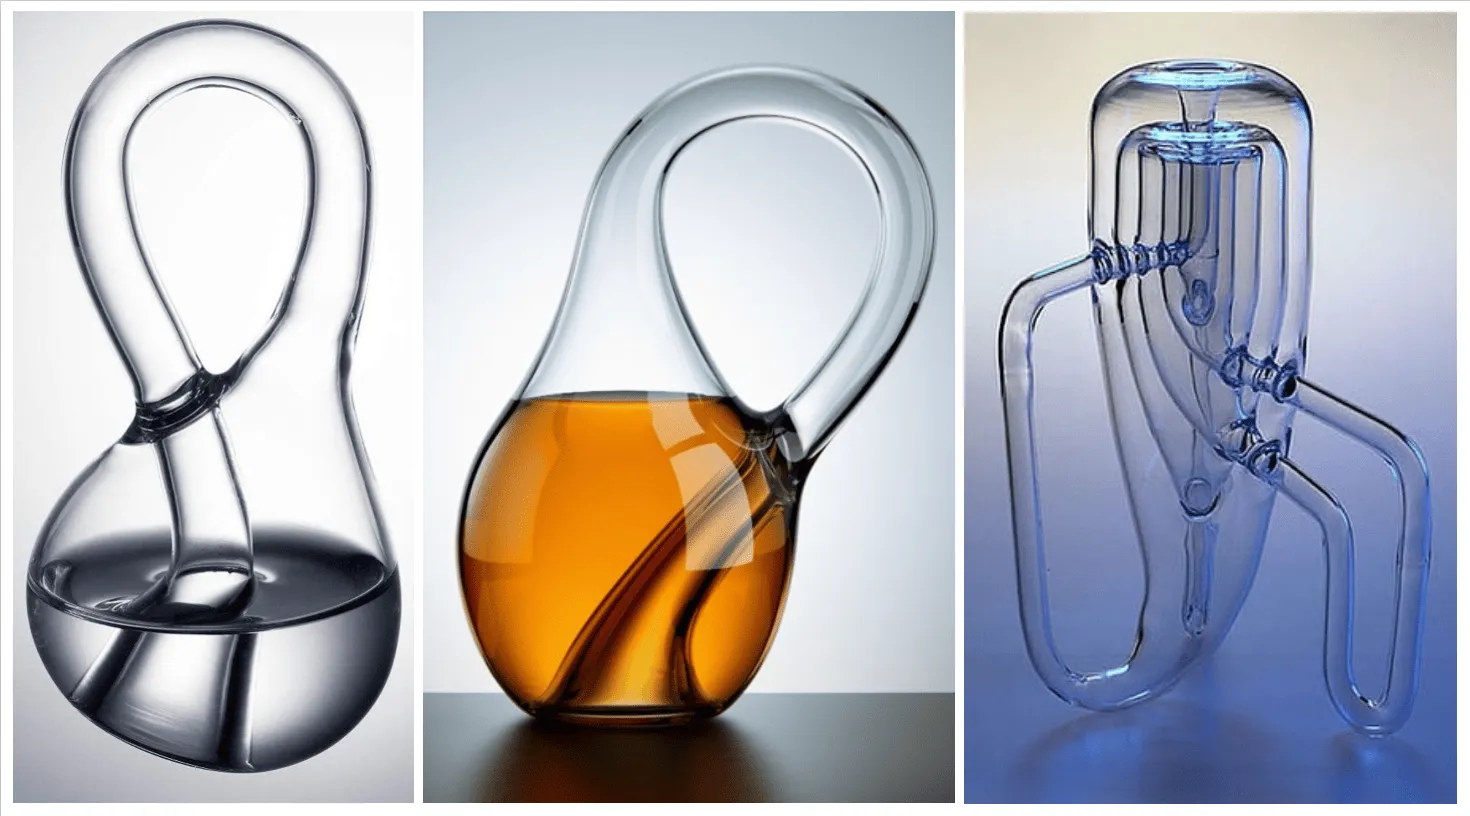
In Part 1, we solved the display issue of three nested semi-transparent spheres by using ModelSortingGroup to control rendering order. However, more complex situations still present display problems, such as a Klein bottle, especially if it contains water:
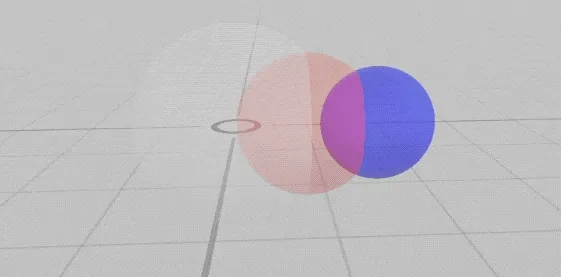
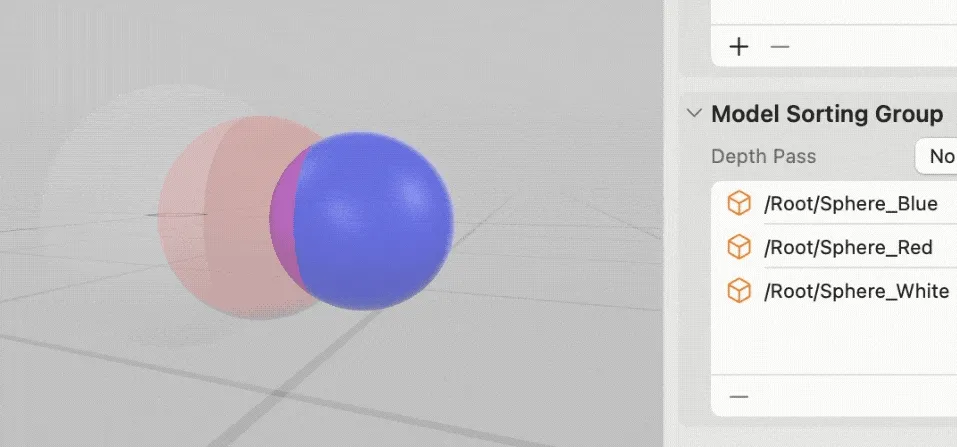
Let’s demonstrate again with three small spheres. Without specifying sorting order, in intersecting situations, the default behavior looks like this, with parts of the outlines disappearing and appearing as the viewing angle changes:
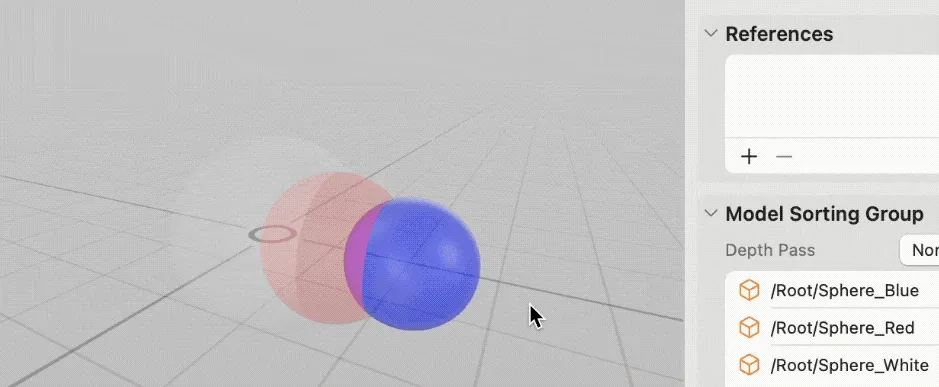
Even with specified object sorting, while it prevents flickering as the viewing angle changes, some outlines still “consistently” disappear, such as when objects behind the blue sphere have their outlines hidden:
Handling Static Model Segmentation
For relatively fixed models like a Klein bottle, we can split the intersecting internal parts into separate meshes to enable render sorting, resulting in better visual effects.
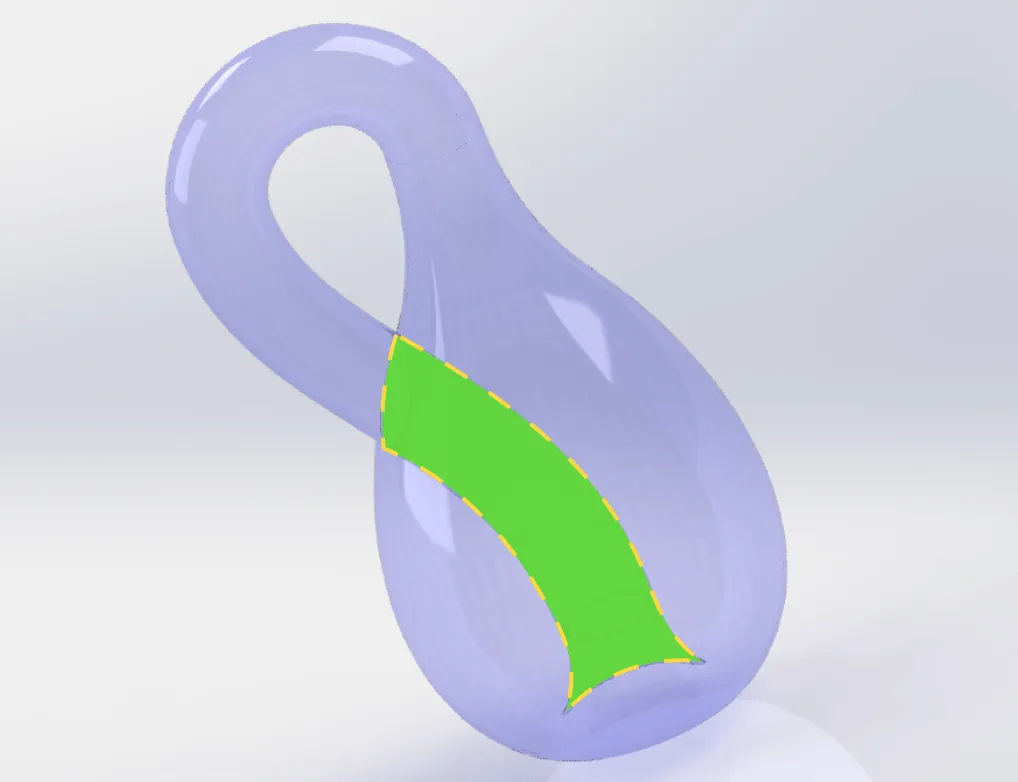
Clever readers might think: why not split transparent objects into thousands or tens of thousands of small parts and use the rendering engine’s built-in center-point distance sorting?
However, this is not feasible because:
- First, sorting numerous objects each frame consumes significant performance;
- Second, thousands of small meshes render much less efficiently than one large mesh;
- Third, edges of small meshes may exhibit flickering and artifacts due to precision issues;
- Finally, it greatly increases the workload of model creation;
Therefore, a complex transparent model should be split into no more than 3-5 pieces. After segmentation, we typically still need to use ModelSortingGroup for manual sorting, with the principle being: render the smallest, innermost parts first, and the largest, outermost parts last.
Motion or Animation
What if:
- Multiple transparent objects are in motion, changing positions
- Transparent objects have animations that change their shape and size
- Transparent objects are user-uploaded or from other sources, with unknown size and shape
In these cases, regardless of how we change the rendering order, for each object, some parts may be in front, others behind, and some in between. This leads to situations where later-rendered objects disappear. Using three transparent spheres as an example, it’s easy to see outlines being blocked during animation:
Is there a way to control the layering effects of different parts (each pixel)? Yes, this brings us to our next topic: Depth Pass
Approximating with Depth Pass
As mentioned earlier, the real-world semi-transparent color blending formula is:
- color = foreground.alpha * foreground.color + (1-foreground.alpha) * background.color
This means blending foreground and background colors based on each pixel’s depth. The Depth Pass option actually controls the color blending strategy. Of course, changing the color blending method will result in final colors that differ from the real world, but it can help us save performance costs and display object outlines.
ModelSortingGroup provides three Depth Pass options to control pixel-level color blending strategies. Let’s explain with pseudocode:
- Post Pass: Blend colors in specified order, forcing later rendered objects to blend as foreground colors
let objectList = specified order
var colorInXY = existing background color
var depthInXY = existing background depth

for object in objectList {
  for pixel in object {
    //Process pixel as foreground color, depthInXY is actually unused
    colorInXY = pixel.alpha * pixel.color + (1 - pixel.alpha) * colorInXY
  }
}
- Pre Pass: Order-independent, forces near pixels to occlude colors behind based on actual pixel depth, treating them like opaque objects
let objectList = specified or any order, doesn't affect result
var colorInXY = existing background color
var depthInXY = existing background depth

for object in objectList {
  for pixel in object {
    //Compare depth, directly override pixel color
    if pixel.depth < depthInXY {
       colorInXY = pixel.color
       depthInXY = pixel.depth
    } else {
      //Discard without processing
    }
  }
}
- None: Blend colors based on actual depth information, normally blend with background color if near, discard if far
let objectList = specified order
var colorInXY = existing background color
var depthInXY = existing background depth

for object in objectList {
  for pixel in object {
    //Compare depth, blend pixel color based on transparency
    if pixel.depth < depthInXY {
       colorInXY = pixel.alpha * pixel.color + (1 - pixel.alpha) * colorInXY
       depthInXY = pixel.depth
    } else {
      //Discard without processing
    }
  }
}
The three blending strategies result in different effects:
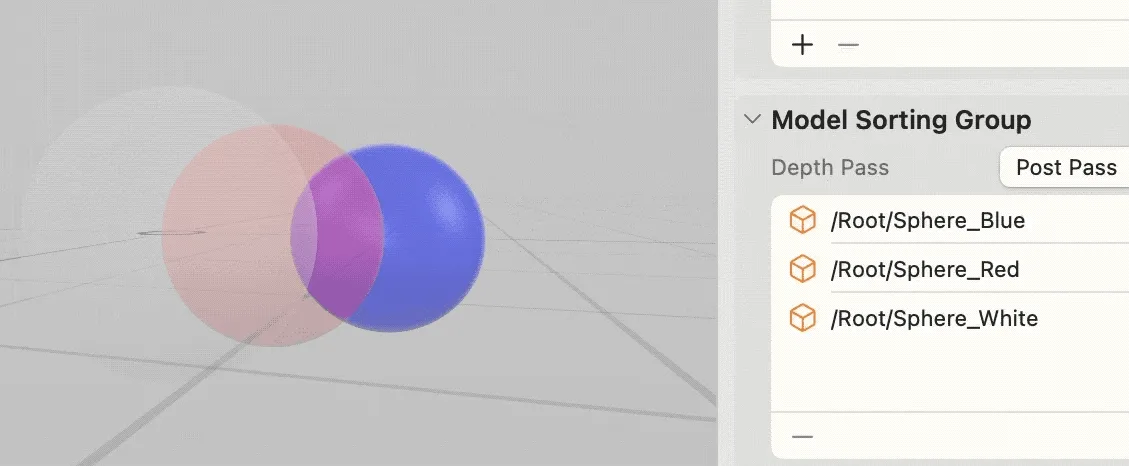
- Post Pass: All object outlines are visible, but final colors may be incorrect, and intersection lines disappear. Visually, the three objects appear to have no intersecting parts, with colors directly blending.
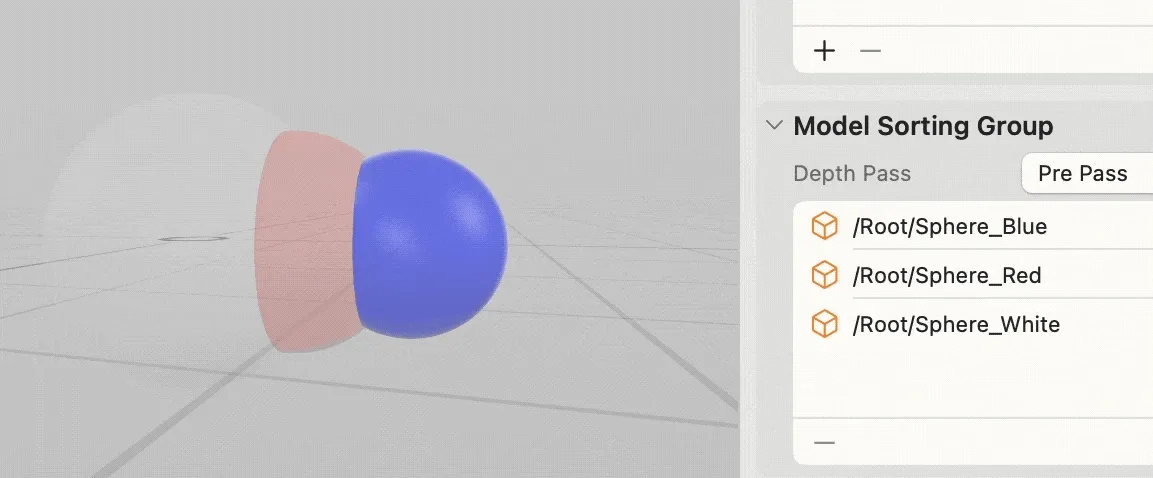
- Pre Pass: Blocked outlines won’t show, but intersection lines are visible, with no color blending effect. Visually, the three objects appear like opaque objects, with front colors blocking those behind.
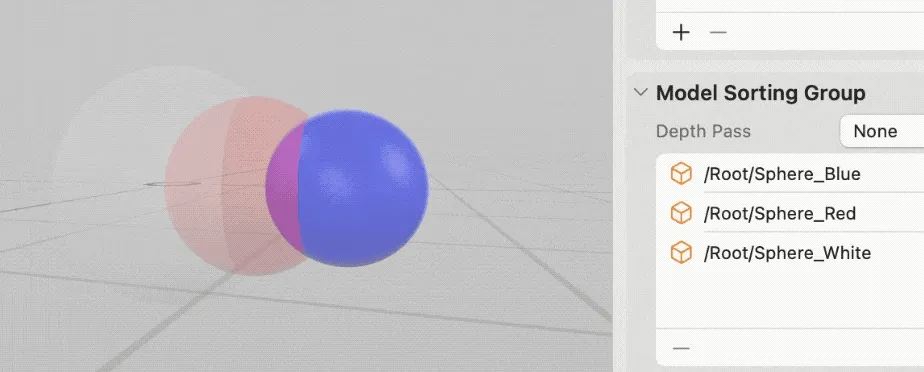
- None: Some semi-transparent outlines show, intersection lines are visible, final colors are correct, but later-rendered objects lose some outlines. Visually, the three objects intersect like real objects from some angles, while appearing like opaque objects from others.
Here are the three effects, showing Post, Pre, and None respectively:
No Silver Bullet, Only Trade-offs
Limited by rendering engine performance, we can only apply special handling to transparent objects to simulate real-world objects. However, there’s no perfect solution, and we must ultimately balance performance and visual effects.
Like other game engines, RealityKit provides ModelSortingGroup to control render sorting and Depth Pass to handle color blending strategies, allowing developers to choose different approximation strategies. We hope this article helps you understand the principles and make better choices.
Author

Recommended Reading
- How to Play Spatial Video On iOS 17.2
- If you are a developer of Apple Vision Pro, then you must pay attention to these points
- How to Quickly Create an MR Application on PICO 4 Ultra with AI? - Using Cursor to Speed Up Development
- Unlocking the Power of visionOS Particles: A Detailed Tutorial
- A 3D Stroke Effect: Getting Started with Shader Graph Effects on visionOS - Master Shader Graph Basics and Practical Skills
- What kind of sparks will be created when PICO 4 Ultra meets spatial video? - Mastering spatial video, PICO is also impressive!
- Advanced Spatial Video Shooting Tips
 XReality.Zone