A 3D Stroke Effect: Getting Started with Shader Graph Effects on visionOS
Introduction
This article is based on the presentation “Entering the World of visionOS Shaders: Implementing Advanced Visual Effects” at Let’s Vision 2025. The summary is divided into two parts: “A 3D Stroke Effect: Getting Started with Shader Graph Effects on visionOS” and “RealityShaderExtension: Converting Unity and Unreal Shaders to visionOS”.
What is a Shader?
A Shader is a small program that runs on the GPU. The code we usually write runs on the CPU, where the OS handles GPU operations for us.
Shaders run on the GPU, controlling the color and lighting effects of each vertex/pixel. Because Shaders run on the GPU, their syntax and logic may seem strange, and they have many restrictions.
Shaders on visionOS
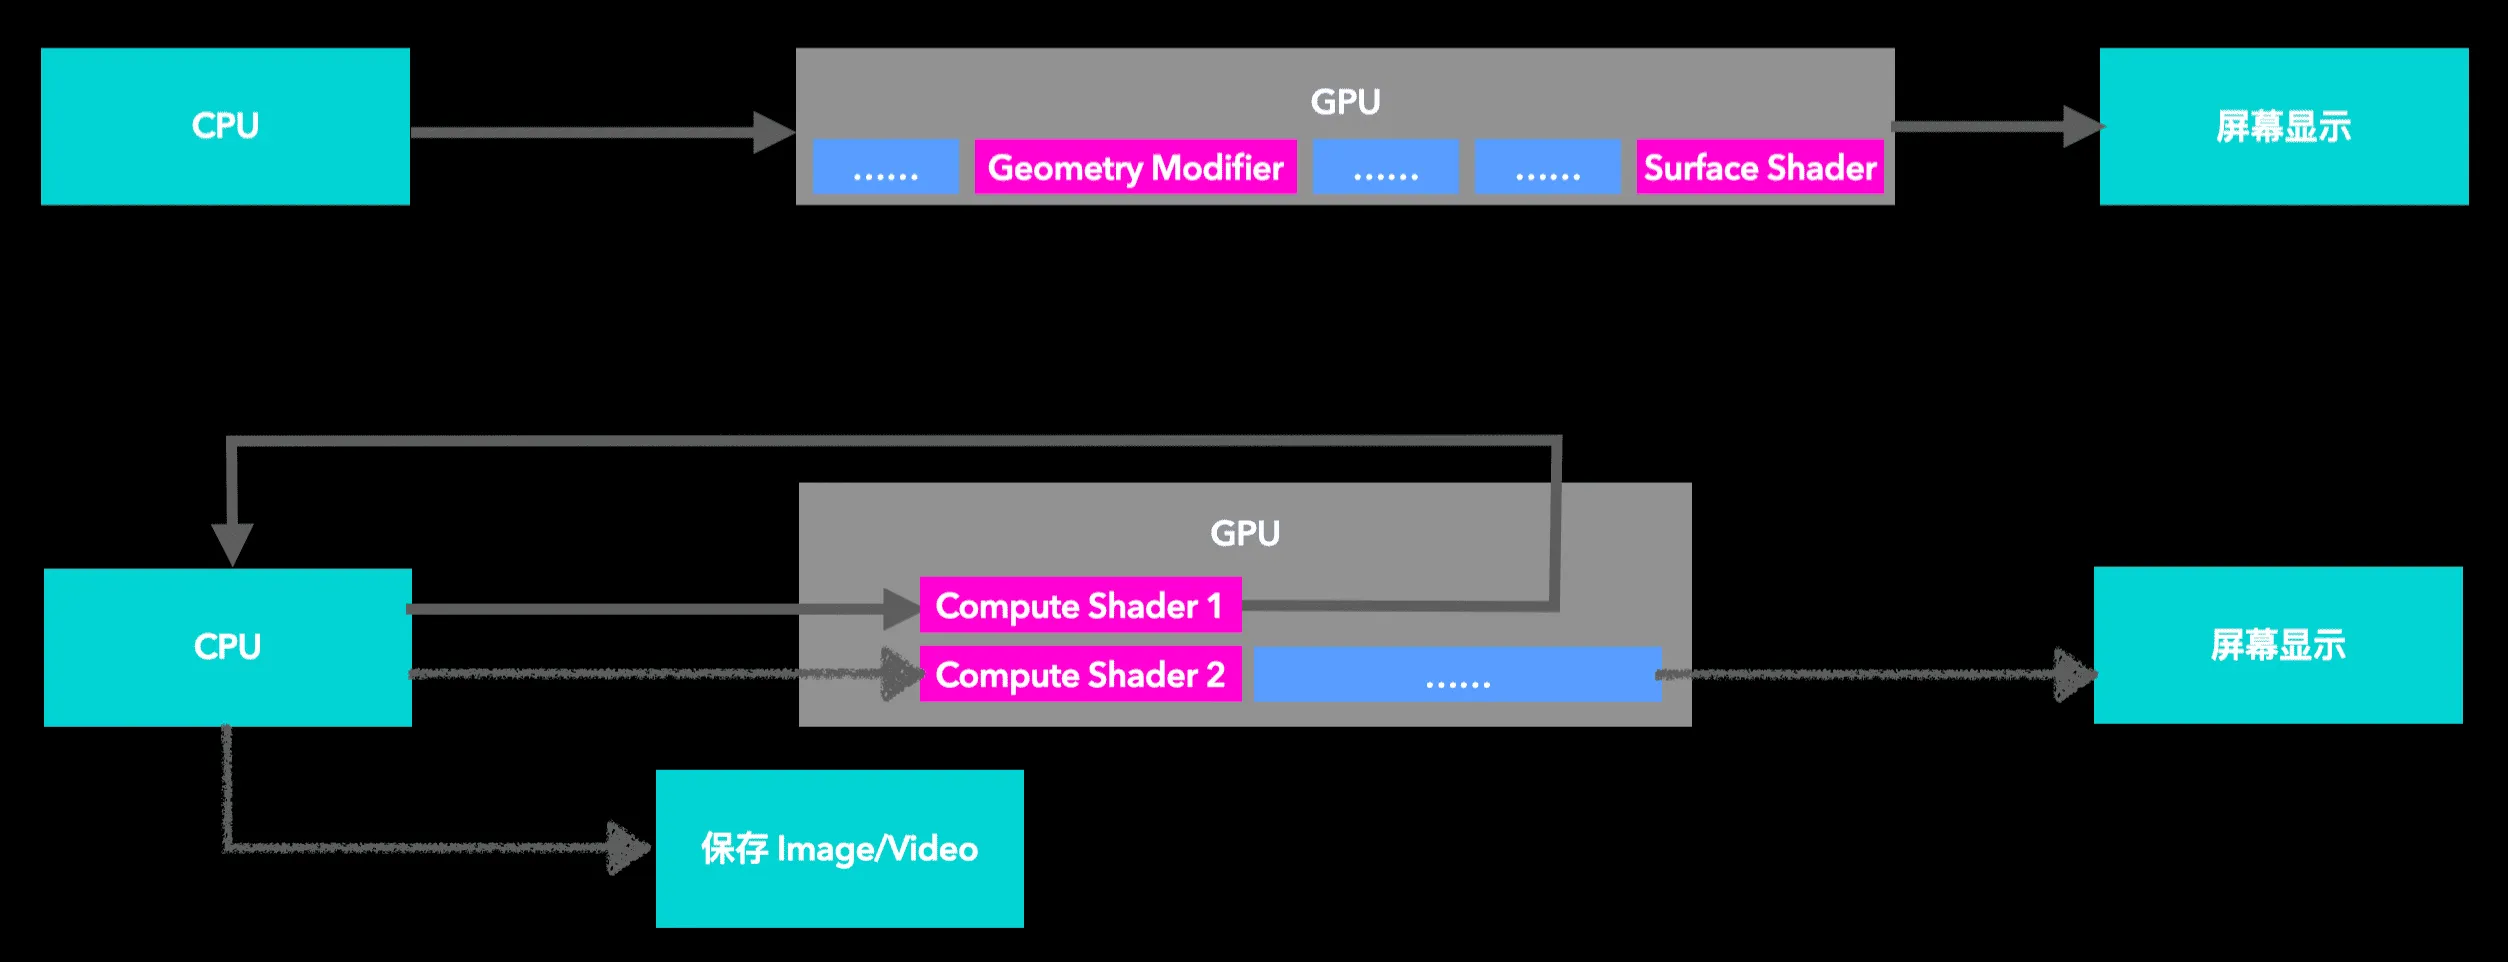
There are three types of Shaders in visionOS:
- The first two are written in Shader Graph form in RealityComposer Pro
- Compute Shaders are written in Metal code, typically used with LowLevelMesh and LowLevelTexture, but require writing a lot of auxiliary code
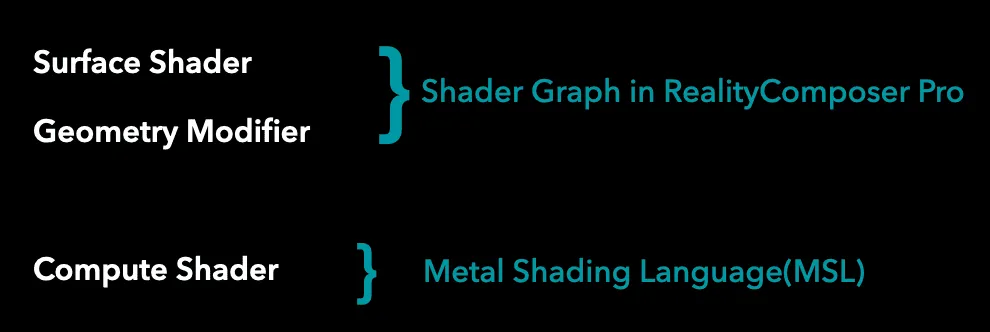
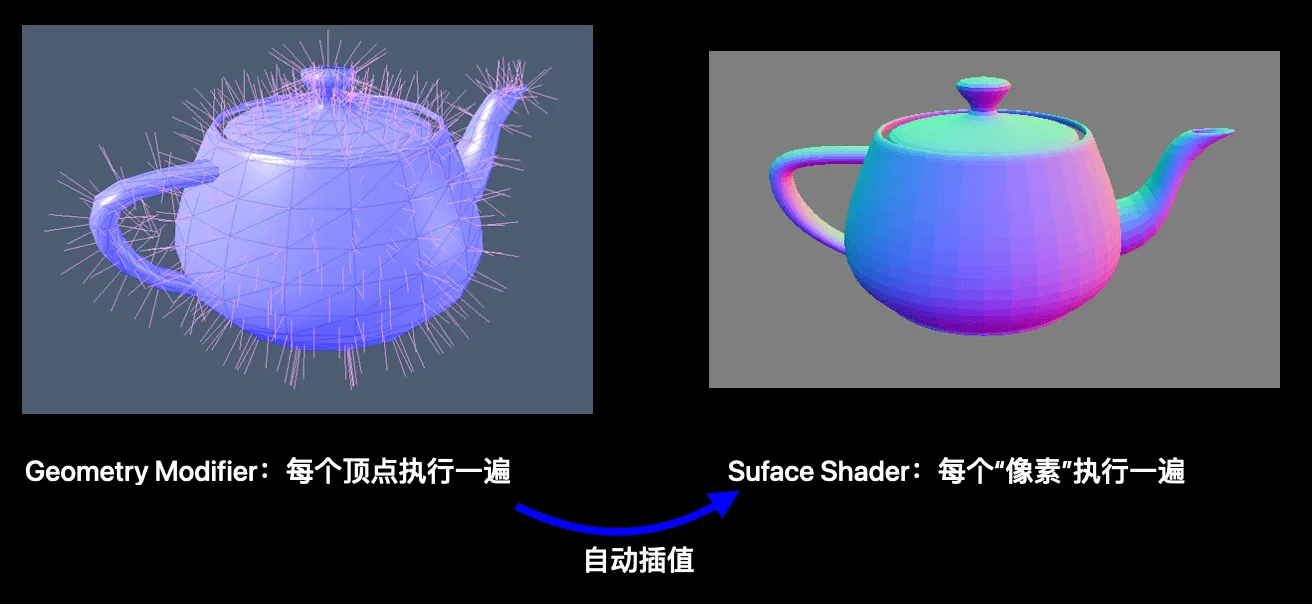
On visionOS, we can treat the GPU as a black box, and Shader Graph only allows us to control two things: Geometry Modifier and Surface Shader.
Compute Shaders are more flexible and can synchronize data with the CPU. Once the data is back on the CPU, it can be used for any operation: saving or displaying.
visionOS Shader Examples
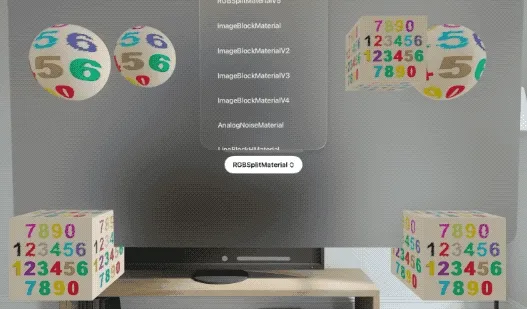
- Surface Shader controls surface color, creating special glitch effects
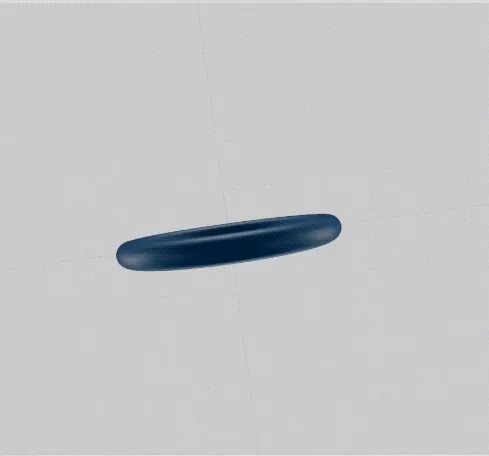
- Geometry Modifier controls shape, transforming a ring into the Meta Logo. Since the Shader only controls GPU display, the original shape outline remains when selected.
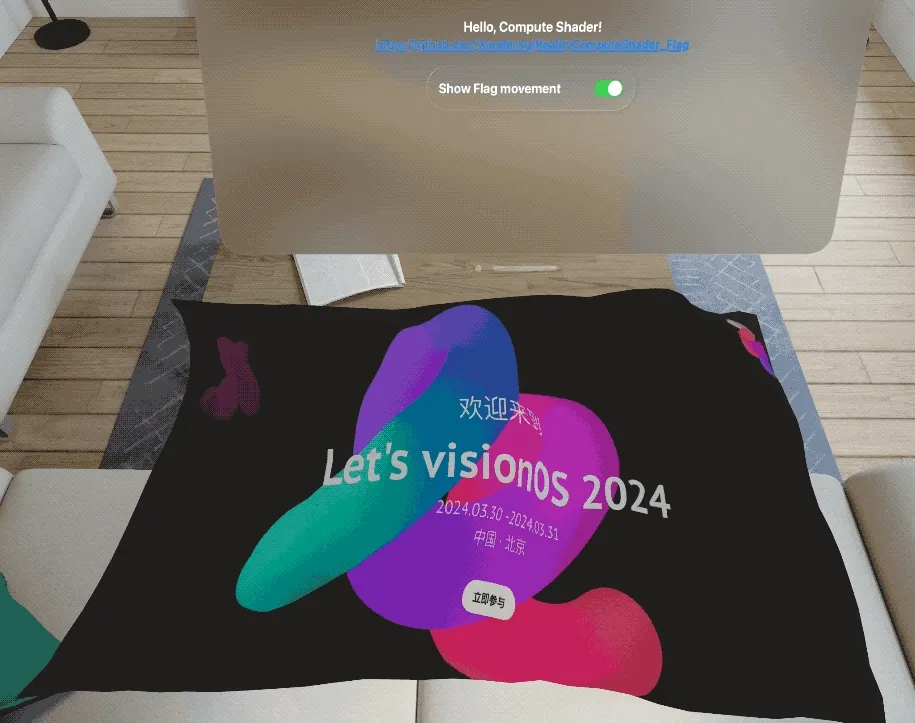
- Compute Shaders excel at GPU parallel computing and CPU data synchronization, suitable for physics simulation. Here, last year’s conference page is transformed into a flag waving in the wind.
Shader Graph is Perfect for Beginners
ShaderGraph is the best choice for beginners.
Using ShaderGraph in RealityComposer Pro offers these advantages:
- Visual editing interface
- Drag-and-drop connections with instant preview
- Built-in components (Nodes) with built-in input parameters, no manual parameter passing needed
Prerequisites for Shader Development
Before starting the demonstration, we need to understand some basic knowledge. Many people struggle with Shader development because they don’t understand these concepts.
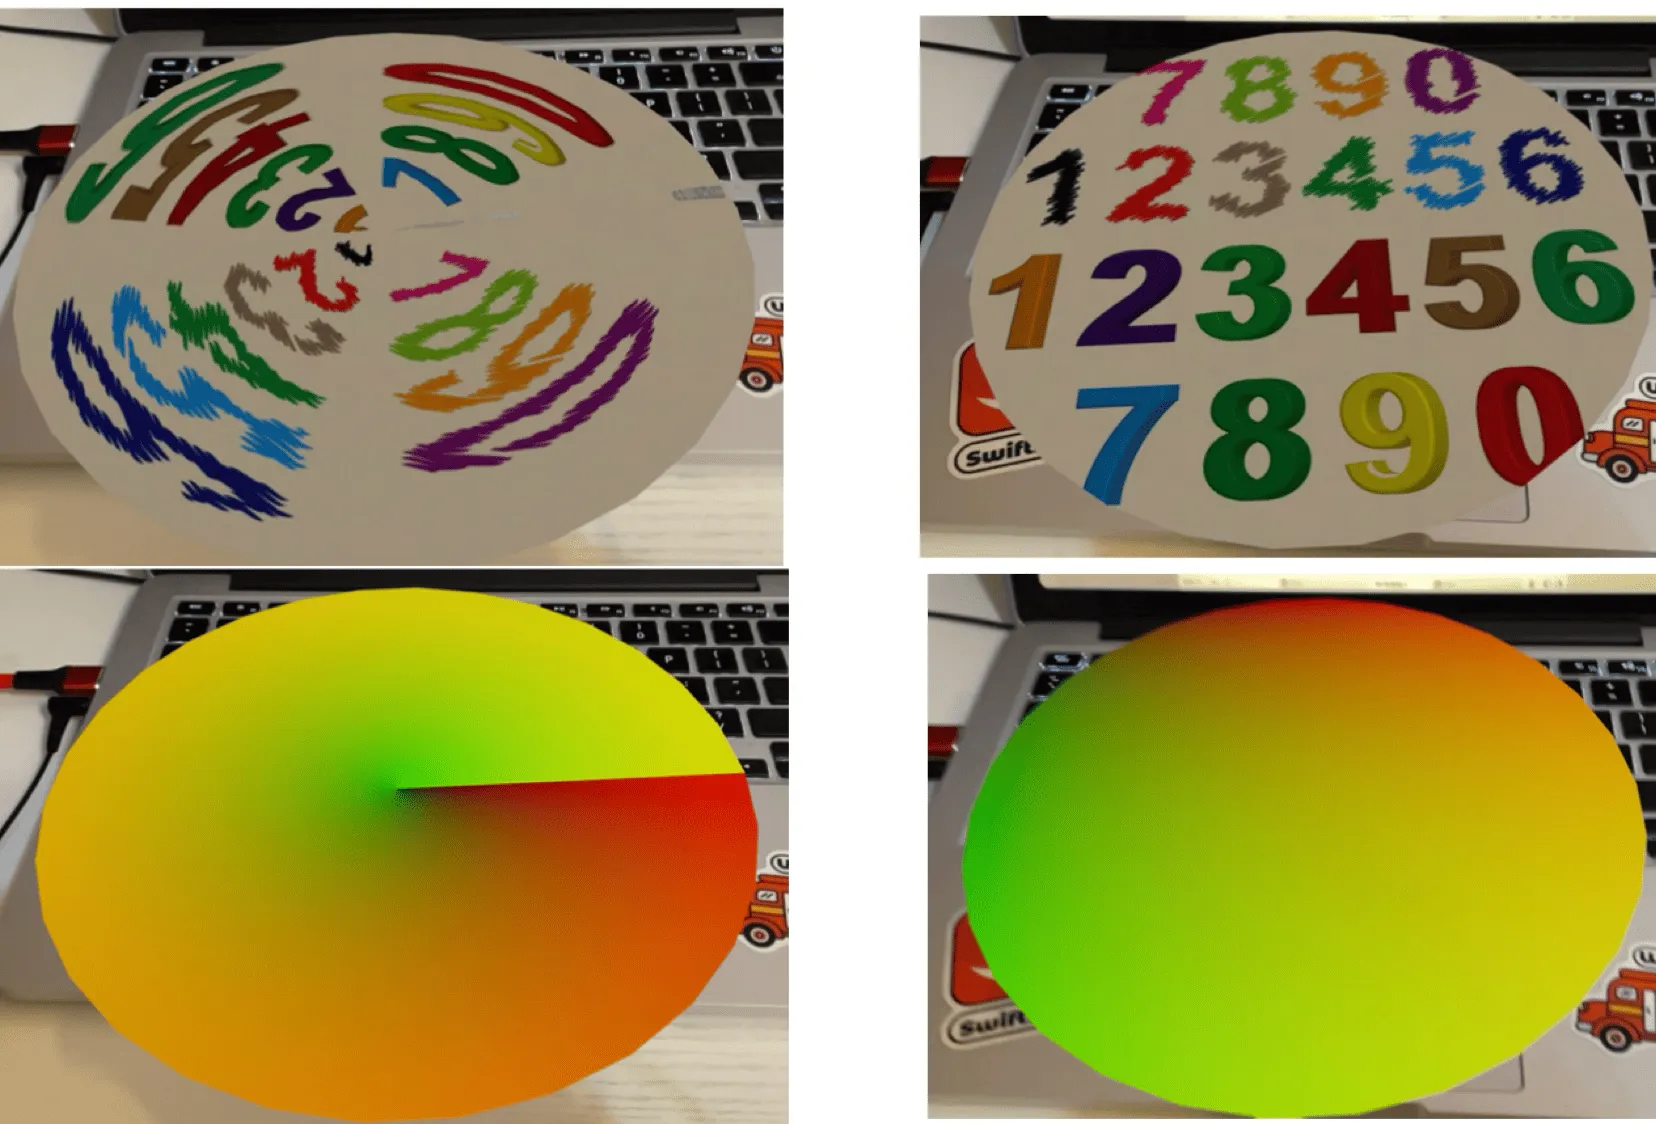
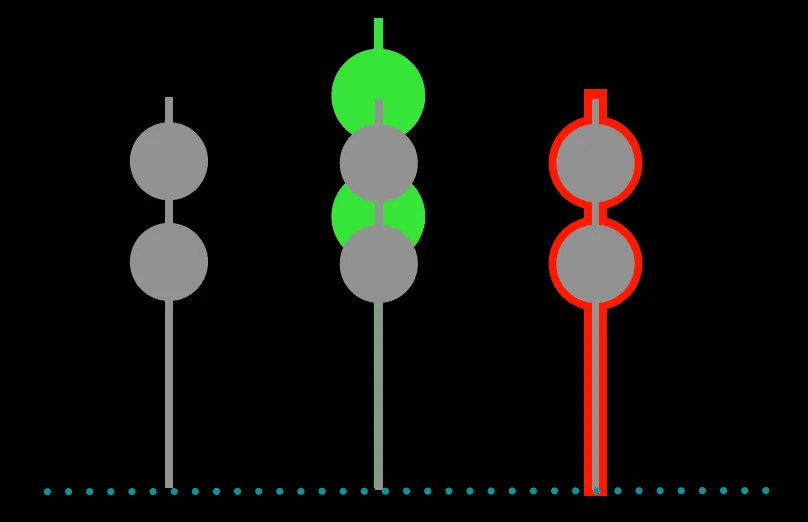
First, let’s look at what inputs we can get in a Shader: position, normal, and texture coordinates. In the left image below, the “spikes” represent normals, and the intersection points of lines are vertex positions. The right image shows another representation of normals: converting xyz coordinates to RGB colors.
The image below shows different UV mapping methods, converting 2D coordinates xy to colors RG, where each point corresponds to a UV coordinate. We can see that the same shape can have multiple mapping methods.
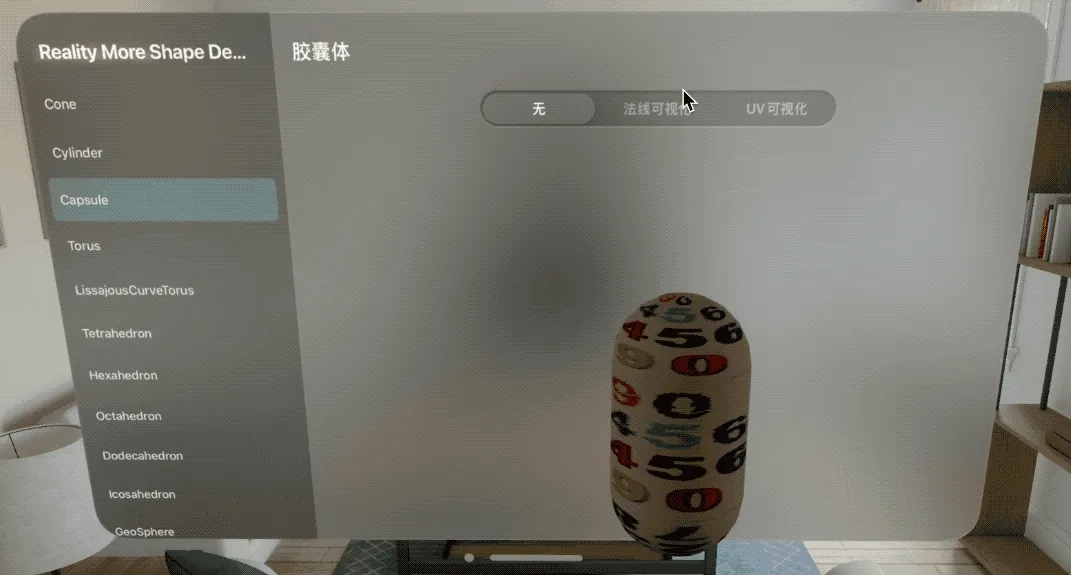
If you want to learn more about 3D models, check out the RealityMoreShape open-source framework. It implements vertex, normal, and UV construction for 3D models using Swift code.
What Can Shaders Do?
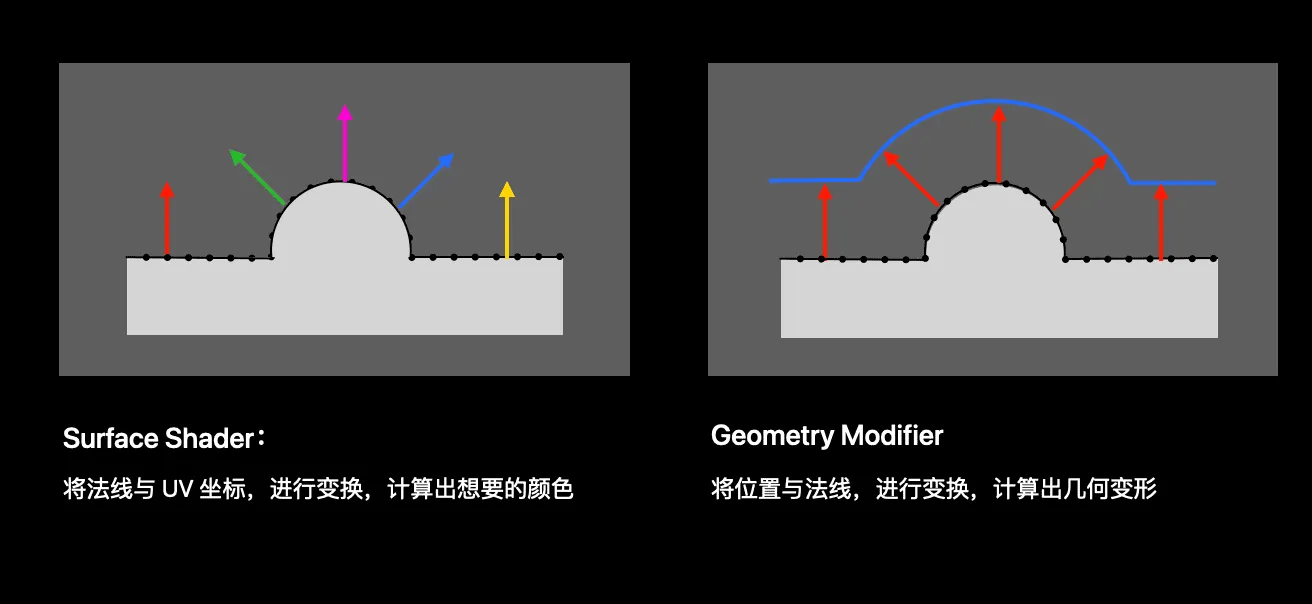
Simply put: Geometry Modifier adjusts object shape, while Surface Shader adjusts surface color. The GPU automatically handles interpolation between them:
Shader Graph Usage Demo
Normal Expansion
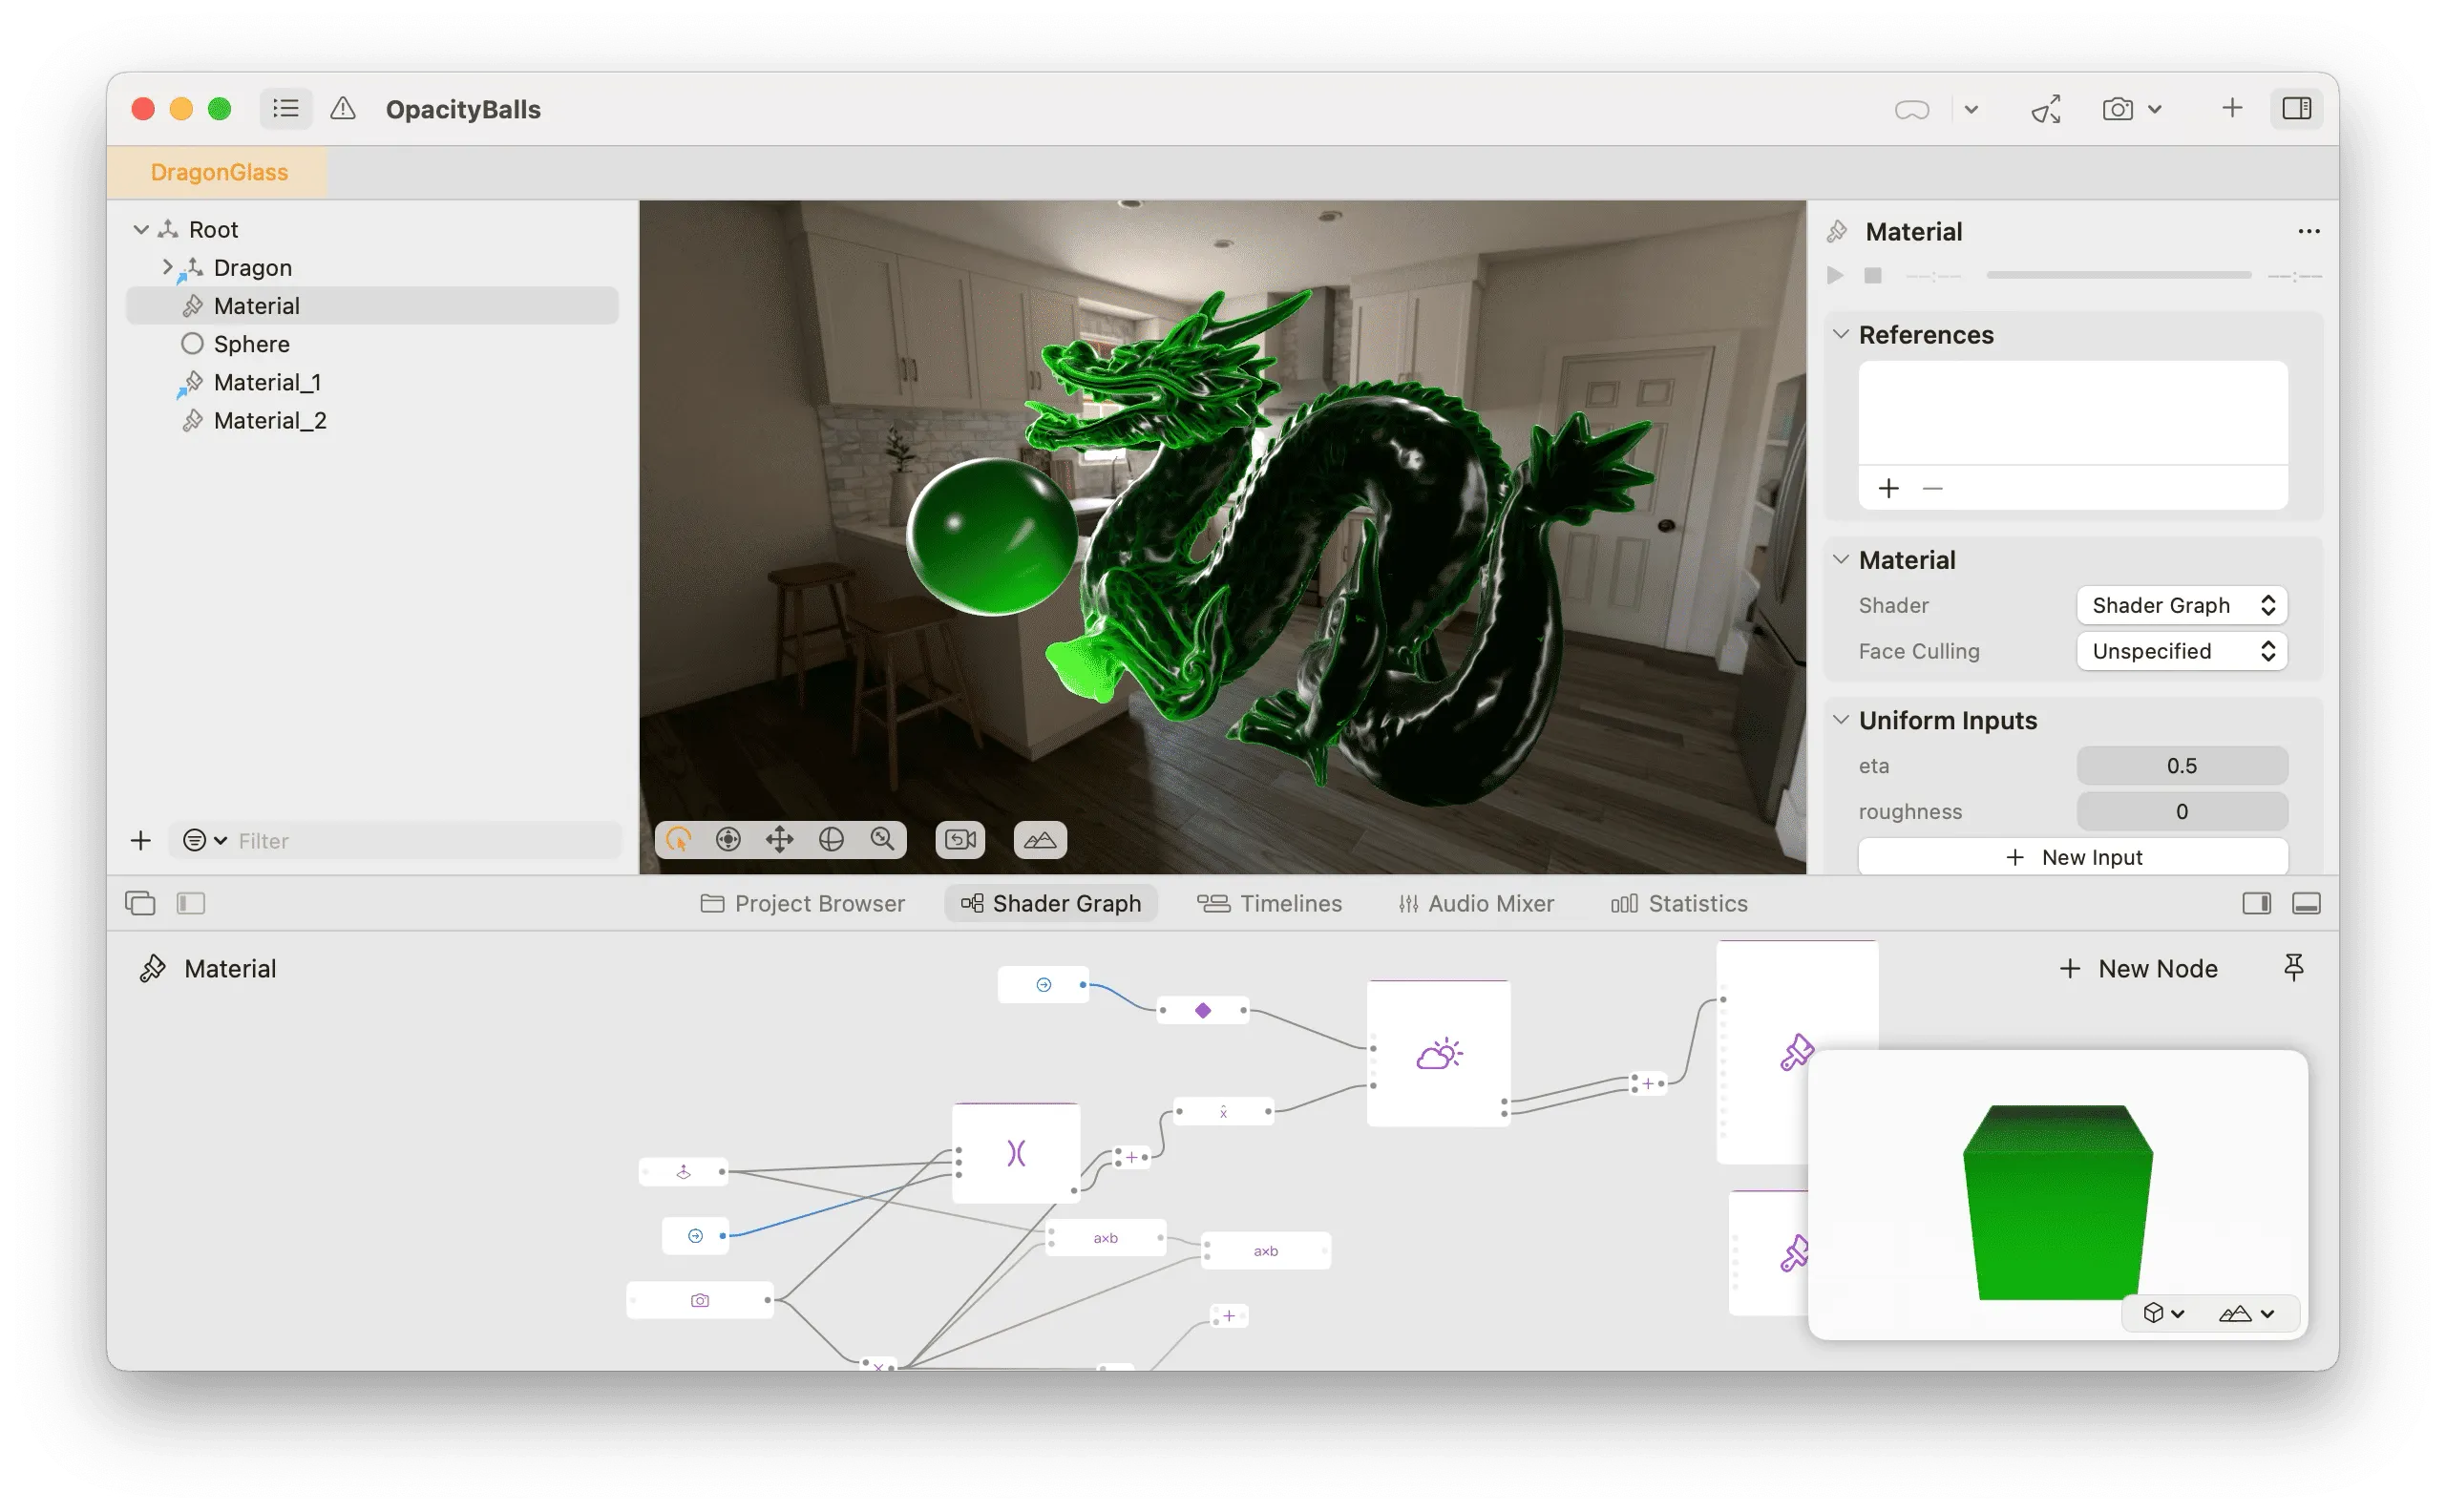
First, we’ll expand the normals to create a “fattening” effect. We’ll duplicate the model and adjust the material of the copy:
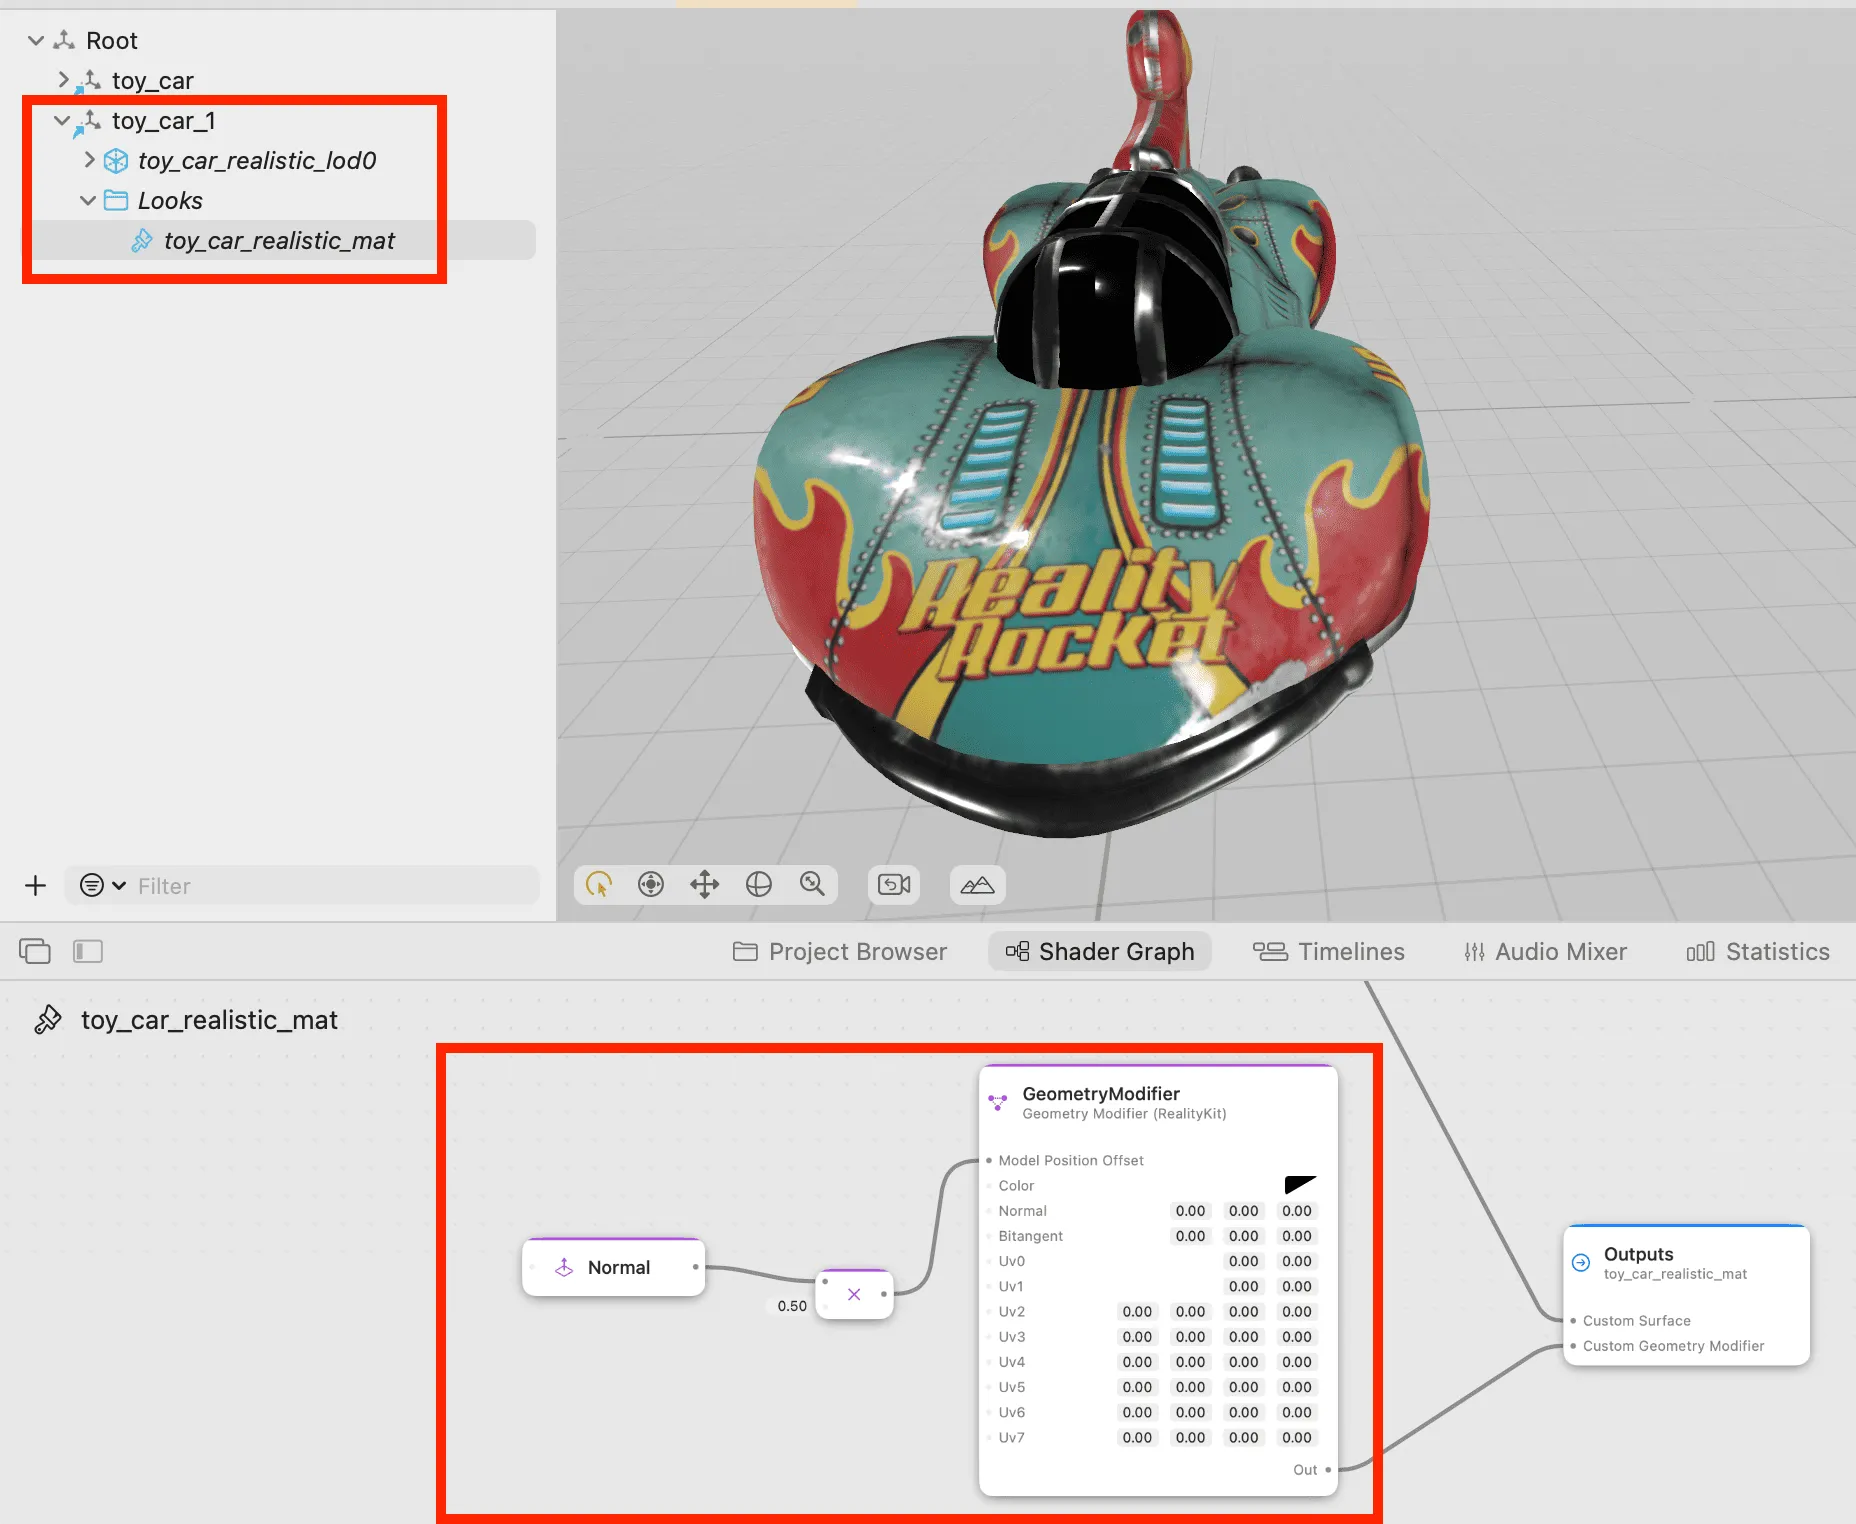
The image below shows the comparison: left is the original model, middle is the model scaled by 0.2, and right is the effect after moving vertices along normals by 0.5.
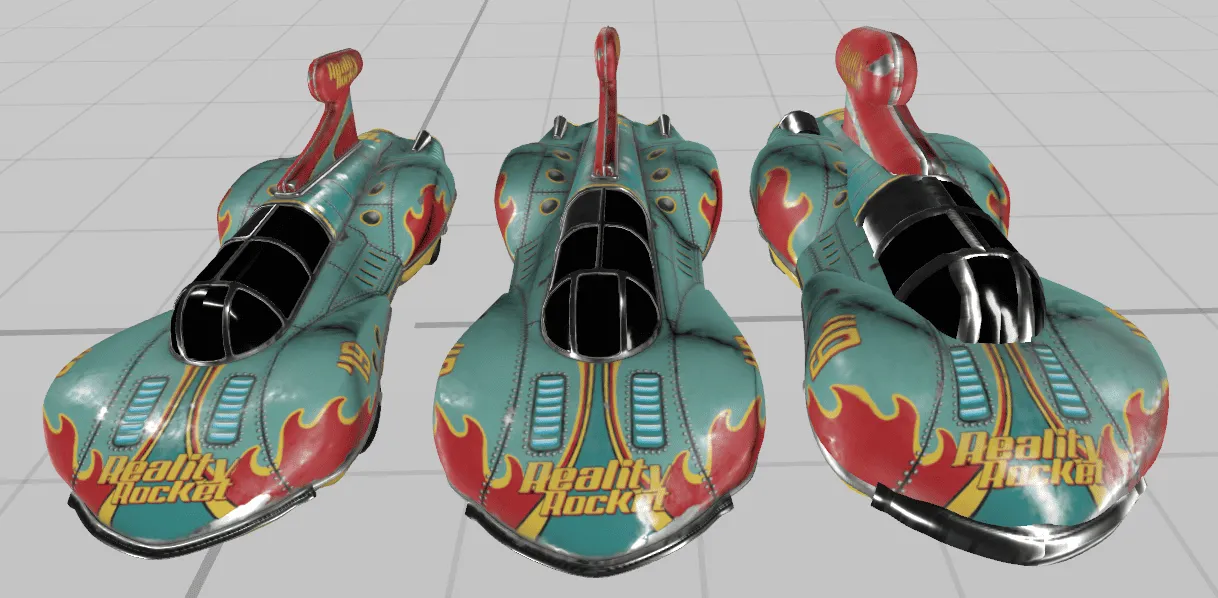
We can see that direct scaling differs from normal expansion. Assuming the model’s origin is at the bottom, direct scaling causes parts further from the origin to offset more, while normal expansion creates a “uniform fattening” effect. This can be used for stroke effects, called the Normal Expansion Stroke Method.
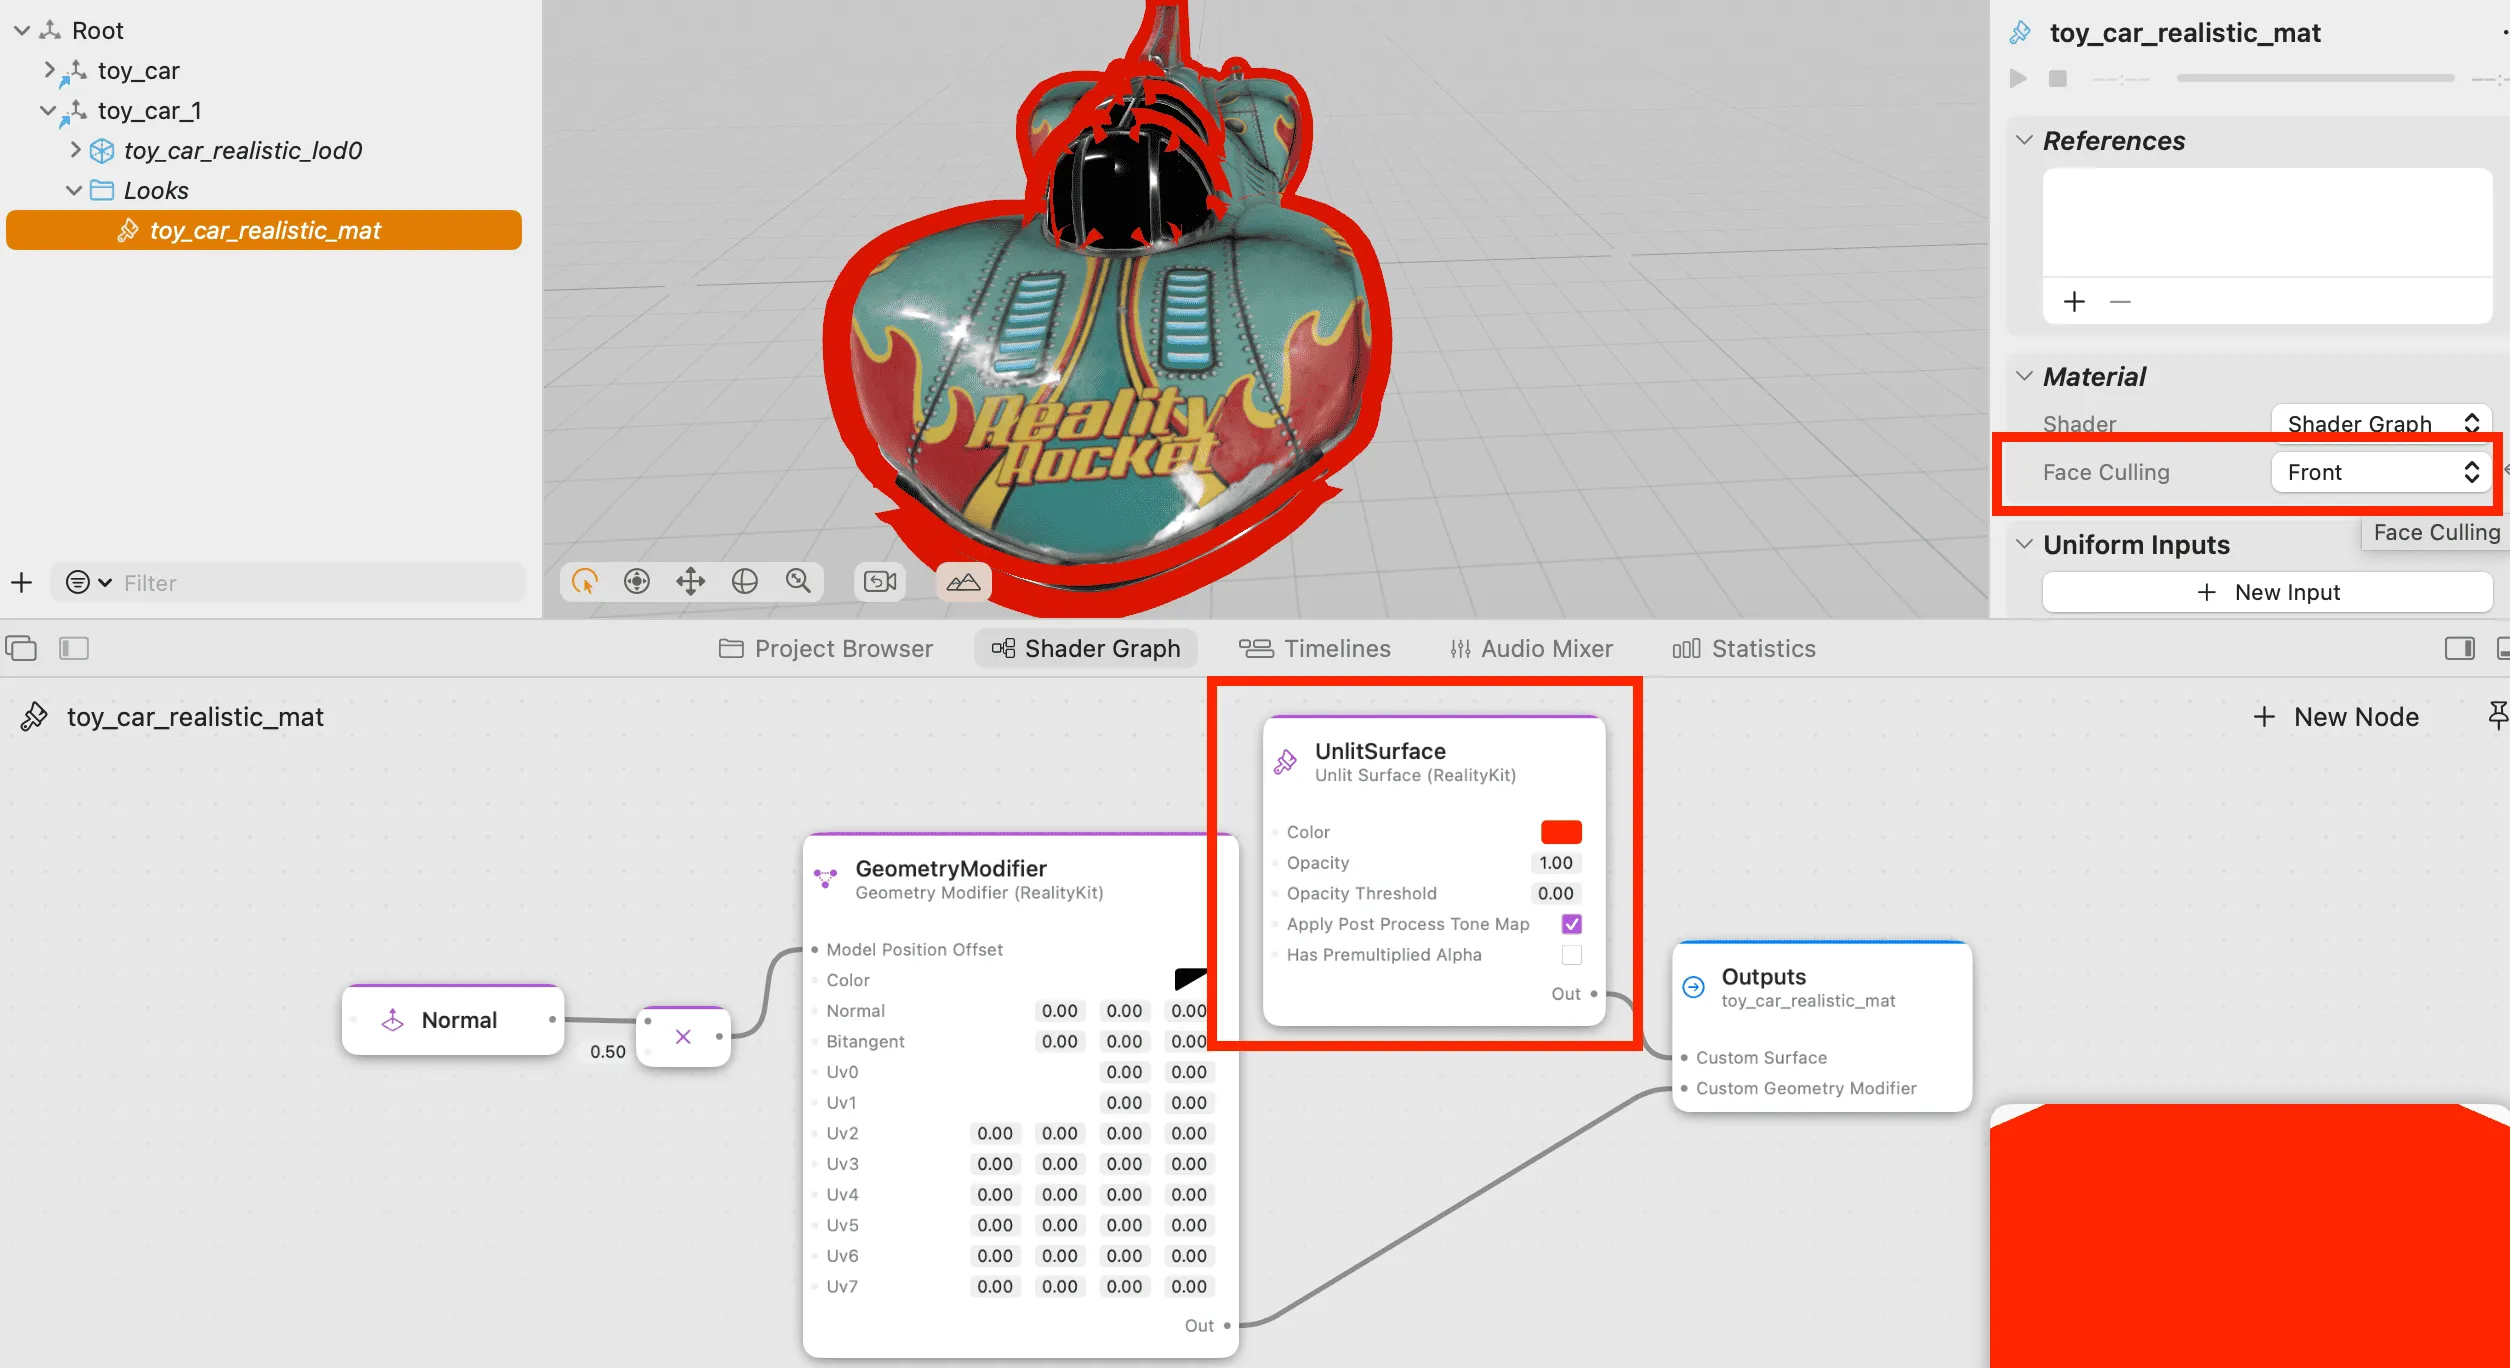
Cull Front Faces to Show Stroke
We’ll modify the material of the “fat model” by changing the face culling (the Face Culling on the right) to Front, which reveals the original model inside. Then we’ll change the Surface Shader color to red to create a stroke effect:
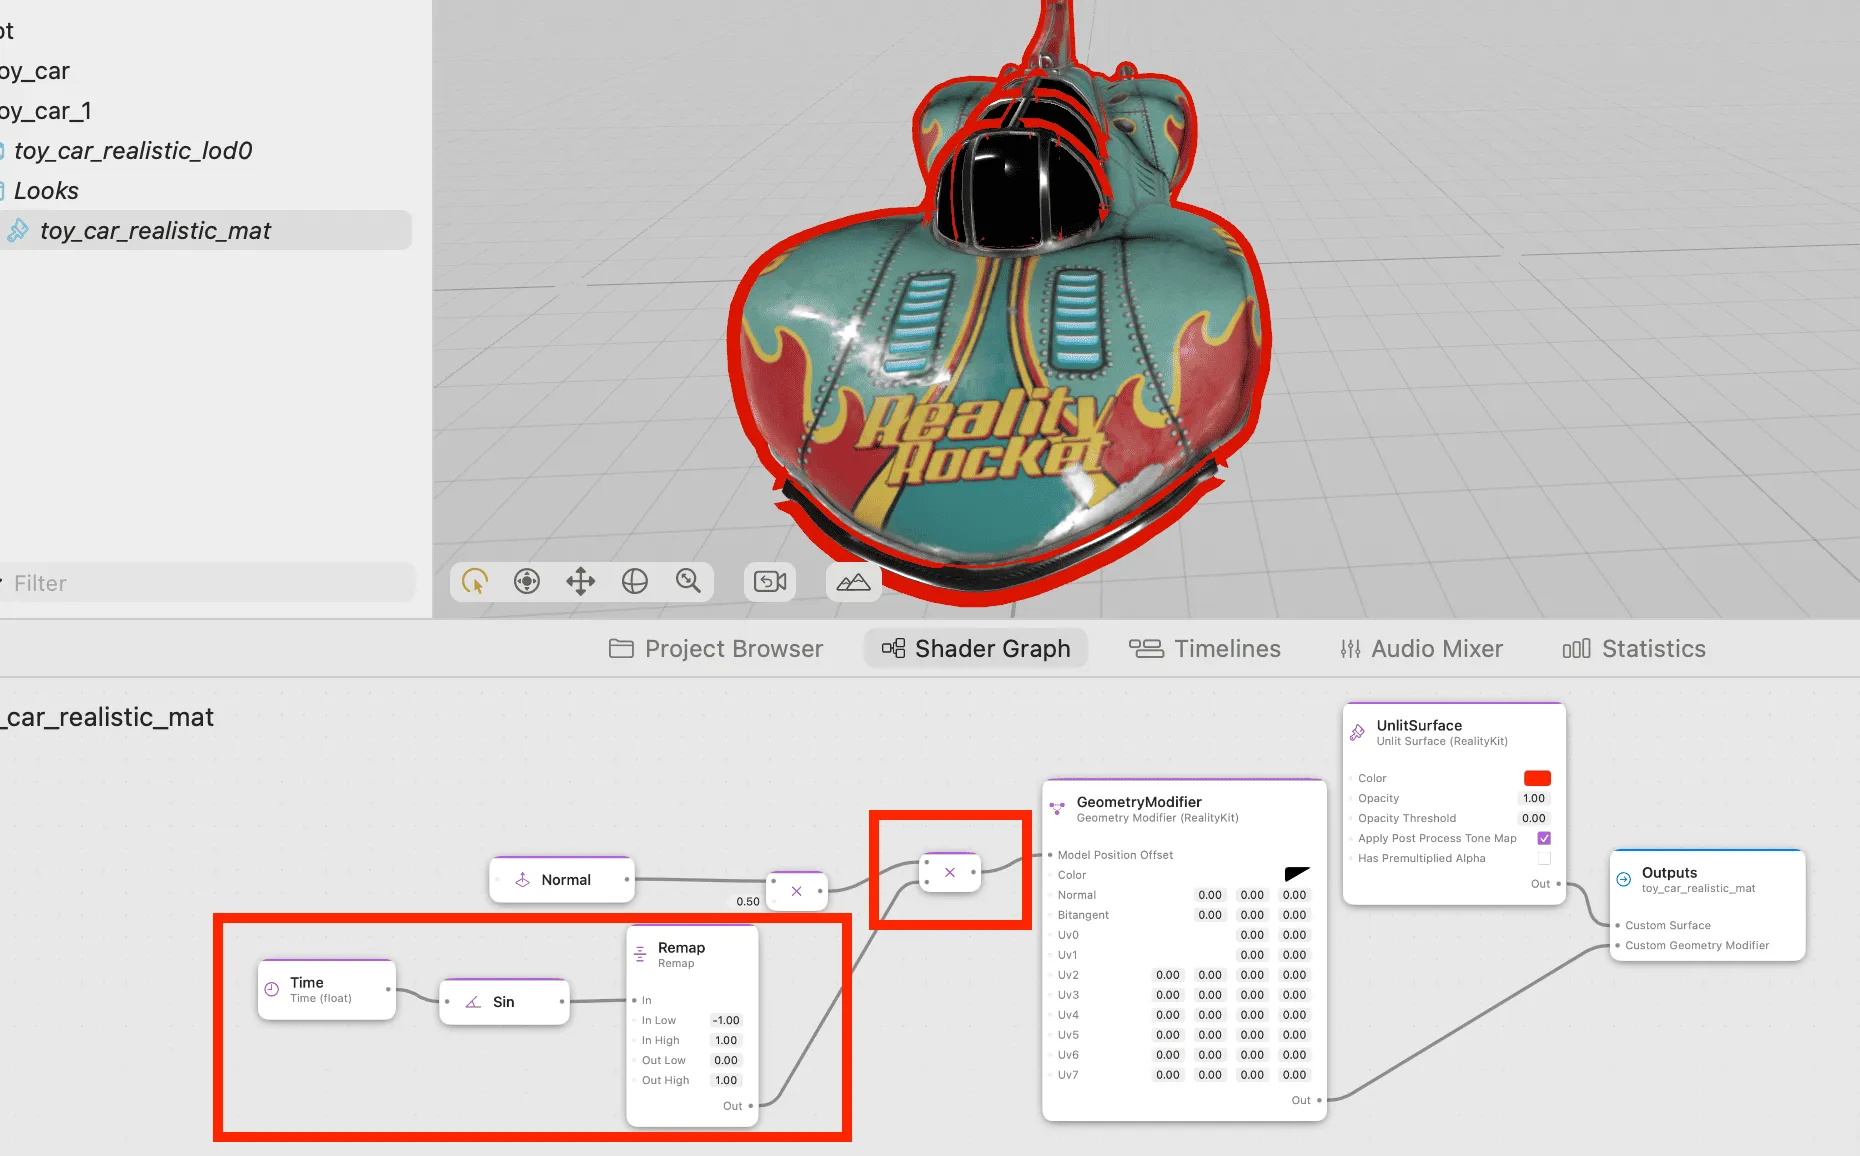
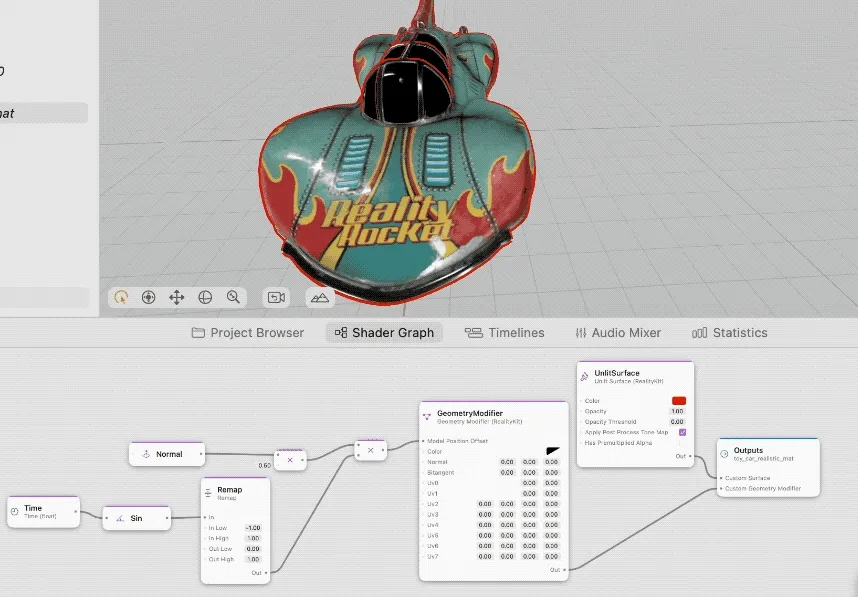
Create Periodic Changes
This effect seems a bit monotonous. We can make the stroke dynamic, creating a size-changing effect over time. First, add a Time node, then use the Sin function to create periodic changes, and finally Remap the range from -1~1 to 0~1, then multiply it with the expansion amount:
Edge Gradient Effect
Finally, let’s add a gradient effect to the stroke, making it fade near the edges. We’ll use the Power function to adjust the fade speed, making it decay faster:

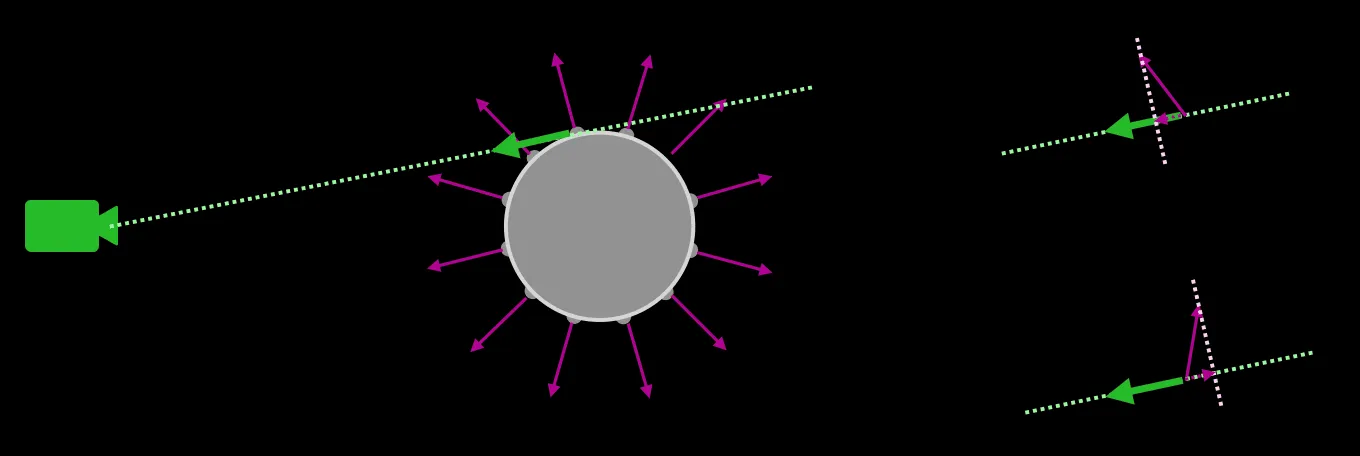
Why can vector dot product create gradient effects? This is related to the normal distribution of the model. At the edges of the model, the normals are almost perpendicular. When dot producted with the ViewDirection vector, we can determine if we’re at the edge, which is used to create the gradient effect.
Disadvantages
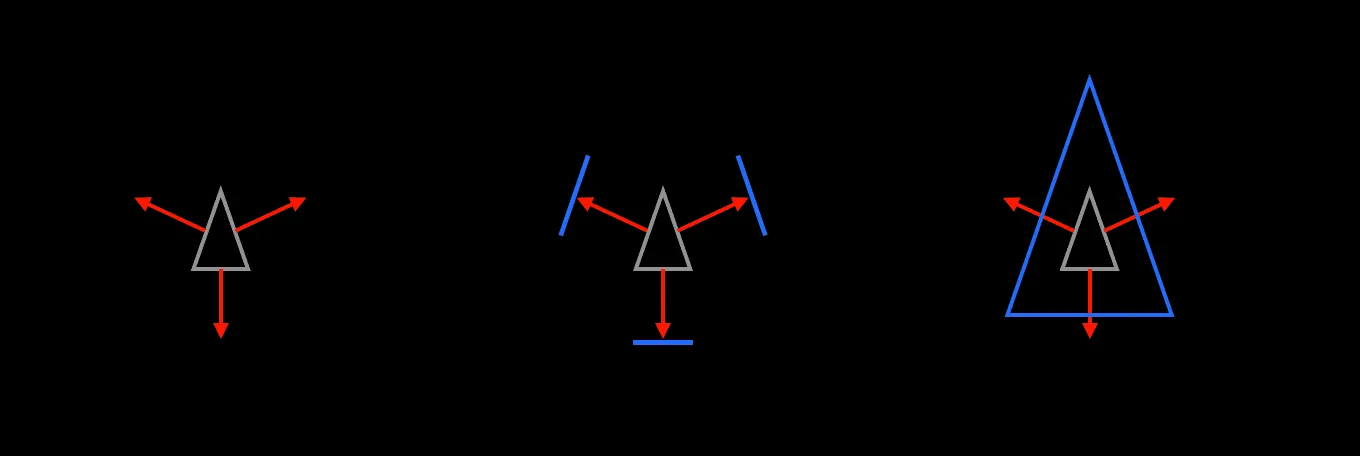
It should be noted that the normal expansion method also has disadvantages: discontinuities in normals will cause breaks.

When model normals are discontinuous, we need to smooth them, usually by processing the 3D model on the CPU through code, or handling it in modeling software.
If the shape is very simple, we can also handle it simply: scale the point positions proportionally (direct scaling).
Mathematical Methods Summary
To summarize, this Demo uses these mathematical methods:
- Normal expansion stroke
- Vector dot product for gradient
- Sin function for periodic changes
- Power function for exponential decay
Attempts at Using AI to Write Shaders
For Compute Shader MSL code, AI tools understand it well and can write code successfully.
For USD files containing Shader Graph, AI can also read Shader-related logic, but understanding and modification are more difficult.
References
- RealityMoreShape
- RealityShaderExtension
- RealityGlitchArt
- RealityComputeShader_Flag
- RealityShaderExtension: Converting Unity and Unreal Shaders to visionOS
Author

Recommended Reading
- Solving Nested Transparent Objects in RealityKit with Rendering Ordering - Part 2
- What kind of sparks will be created when PICO 4 Ultra meets spatial video? - Mastering spatial video, PICO is also impressive!
- Breaking down the details of Meta Quest 3's upgrades to MR technology
- How to Quickly Create an MR Application on PICO 4 Ultra with AI? - Using Cursor to Speed Up Development
- Far More Than Games: Review the Exciting MR Capabilities in PICO 4 Ultra
- What Is Spatial Video On iPhone 15 Pro And Vision Pro
- Magical! Using Opaque Objects in RealityKit Looks More Like Glass? - Quickly Implement Glass Effects in visionOS