If you are a developer of Apple Vision Pro, then you must pay attention to these points
Apple Vision Pro is about to be delivered to the first batch of customers! According to a report by “front reporter”, some Apple Stores are even working overtime for renovations. If you have bought the first release device, you are about to experience and fall in love with the charm of spatial computing! But if you are a developer, Emmmm… things start to get interesting…
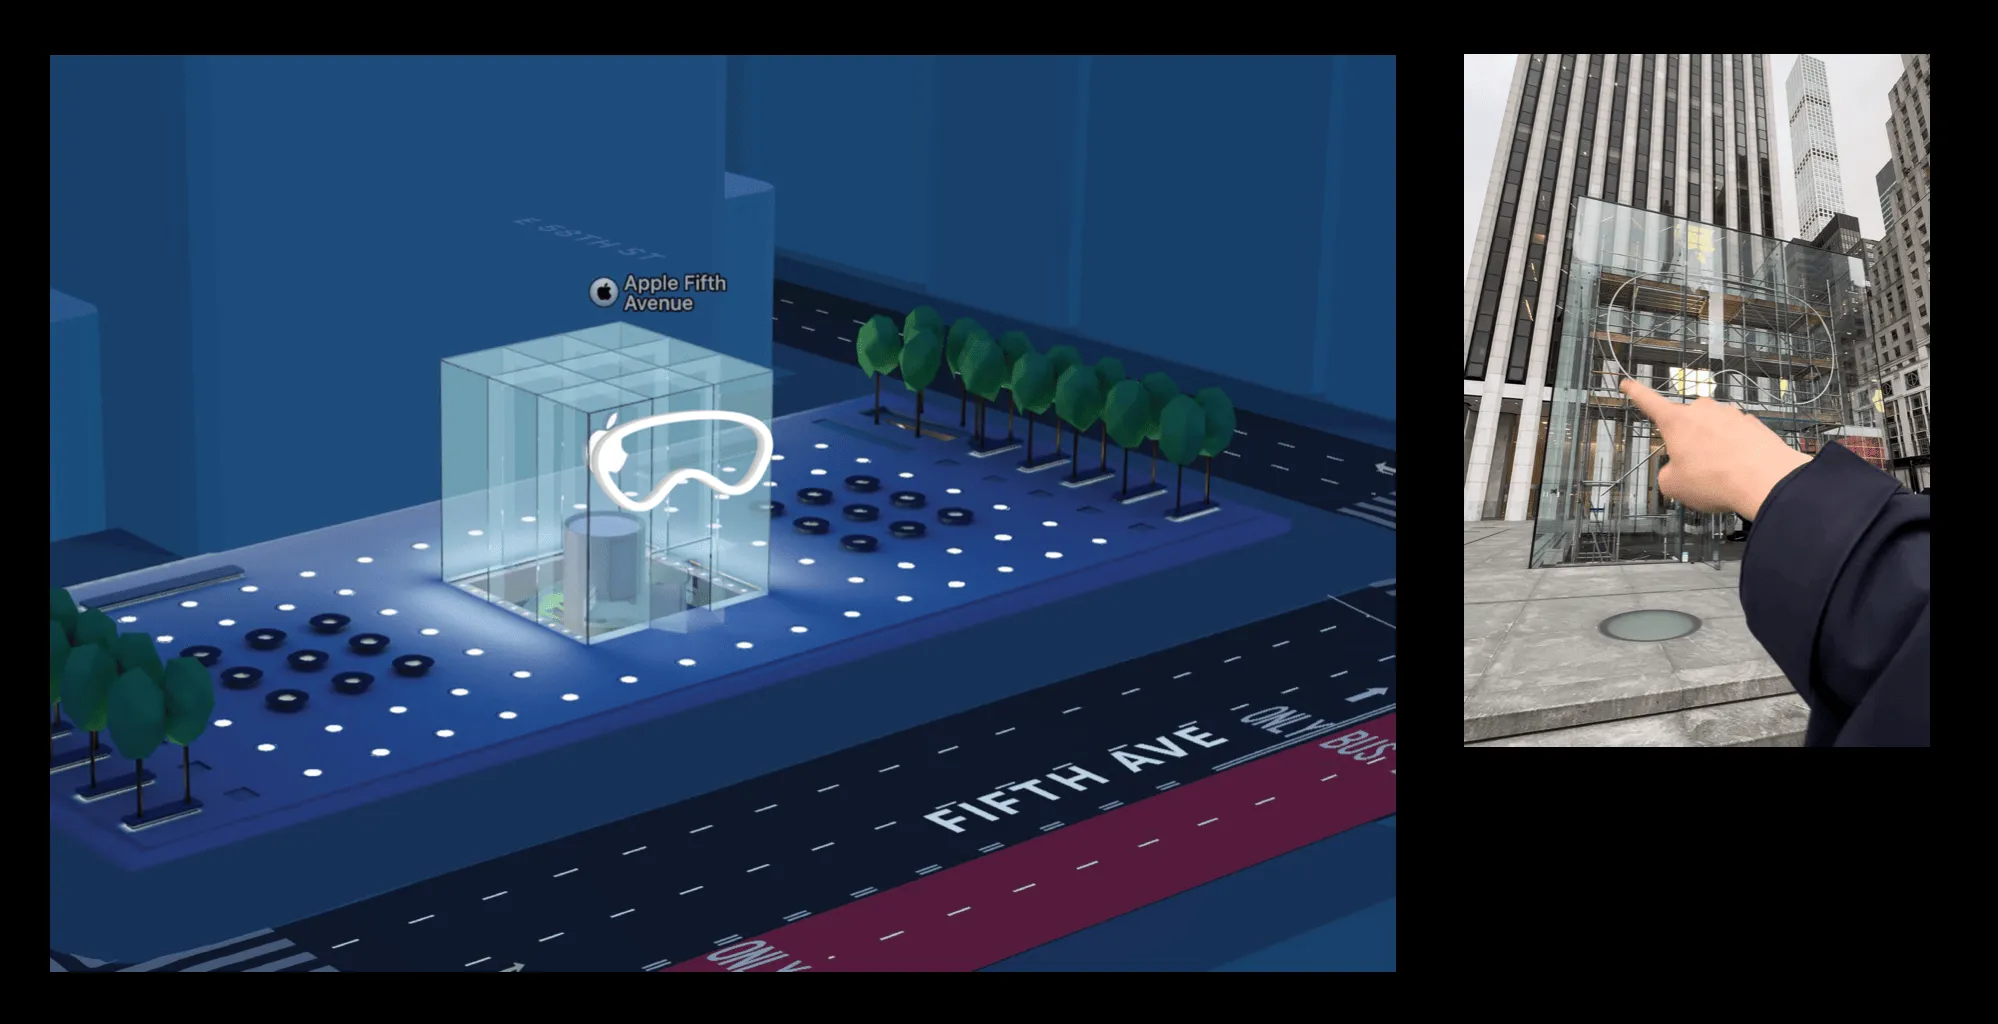
3D Map image source is Apple Maps
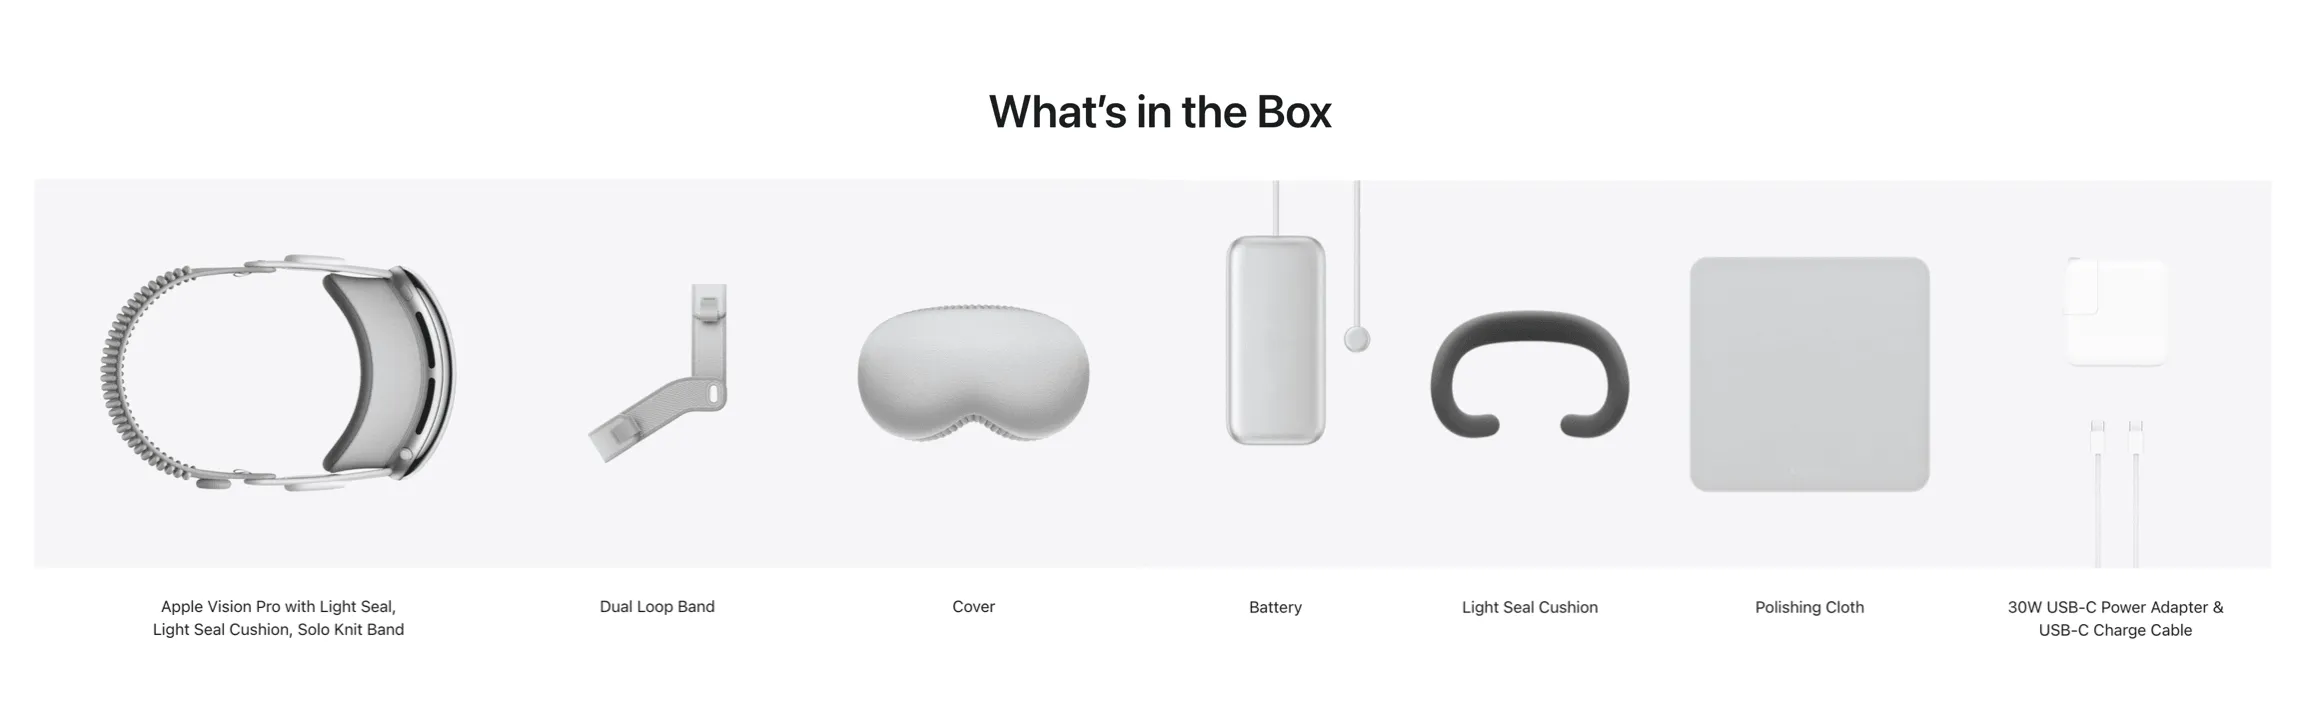
As we mentioned in Newsletter 17, if you, like us, attended the Apple Vision Pro Developer Lab, you will be surprised to find that in the retail version of Apple Vision Pro’s packaging list, there is no interface that allows developers to connect Apple Vision Pro to Mac😱.
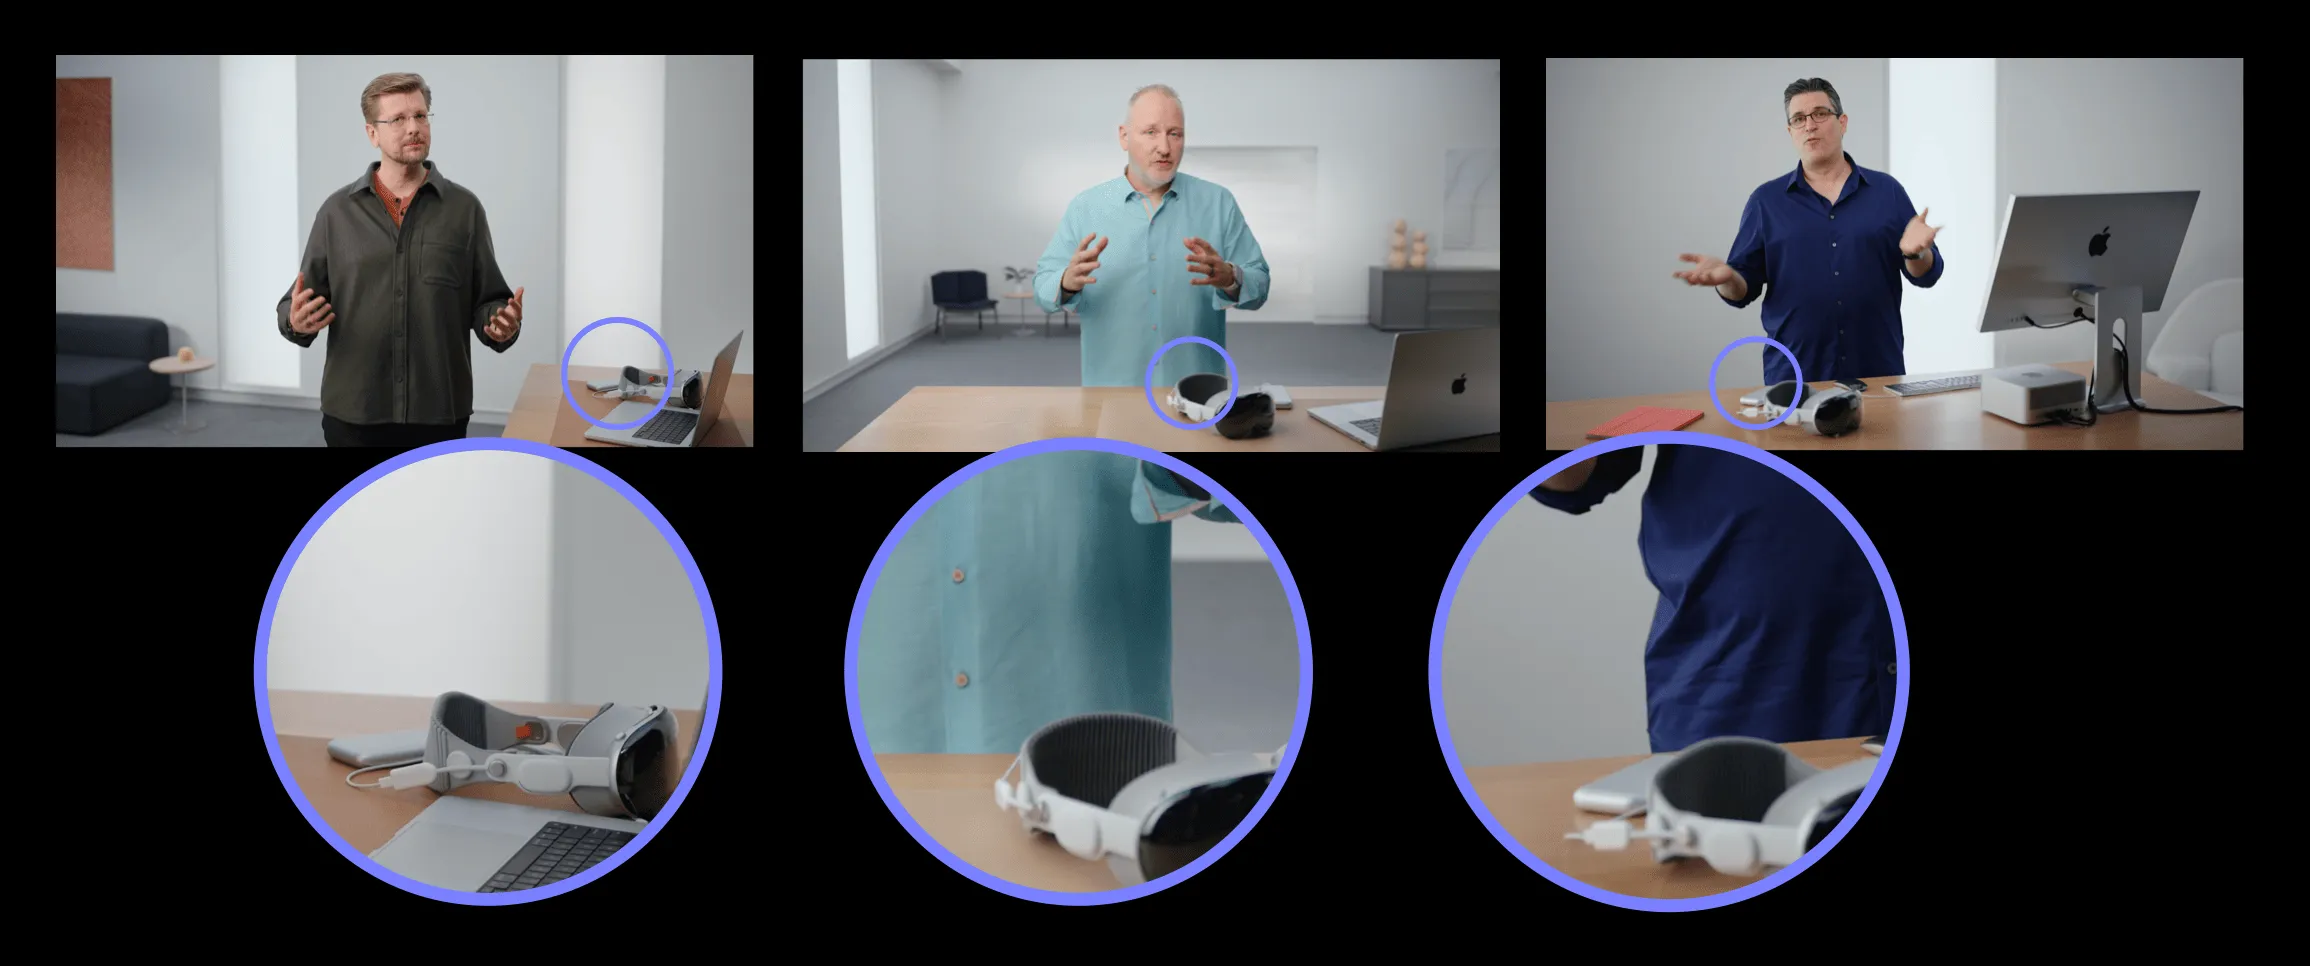
If you haven’t been to the Lab, it’s okay, the interface we mentioned also appeared several times in the WWDC 2023 Platforms State of the Union video:
Update:
Further news on the Apple Developer website, if you want to use USB-C to connect to your Apple Vision Pro, then you need to spend $299 to buy this adapter:

How to debug on a real device?
Does it mean that, the Apple Vision Pro in hand can’t be debugged? Don’t panic, in Apple’s official documentation, we can find the steps for debugging using a wireless connection. Specifically, we need to:
- Ensure that our Apple Vision Pro and Mac are in the same WIFI, and in this WIFI your devices (such as your Mac and iPhone) should be able to discover each other via AirDrop (this is because the technology that Apple Vision Pro communicates with Mac is the same as AirDrop, which is based on Bonjour to discover devices)
- In Settings -> General -> Remote Devices, broadcast Apple Vision Pro to your own Mac
- In Xcode’s Devices and Simulators window, select the corresponding Apple Vision Pro device for pairing, which will prompt a verification code on Apple Vision Pro
- Enter the verification code in Xcode to complete the pairing with Apple Vision Pro.
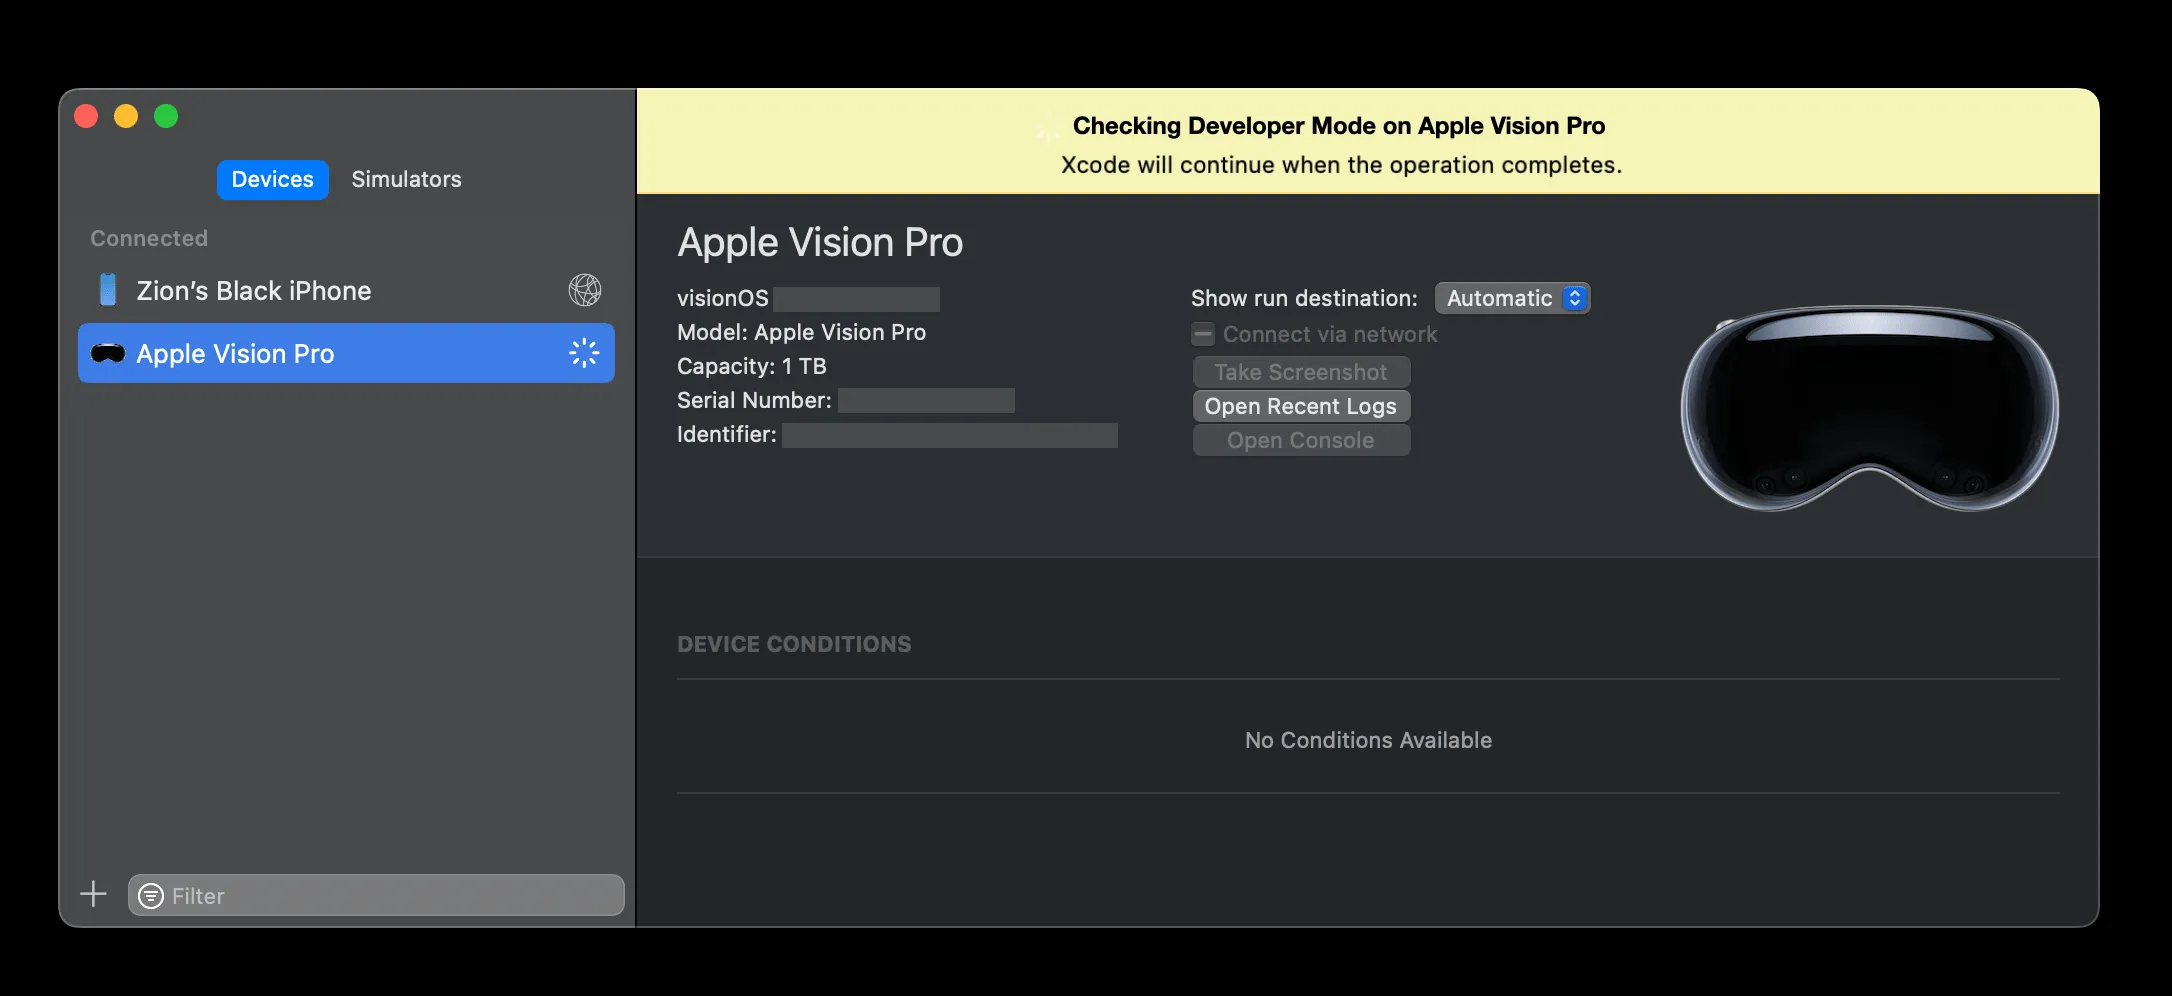
Screenshot taken from Xcode 15.3 Beta 1
Next, before you can install the App to the Apple Vision Pro, you need to enable developer mode, and the device will restart after it’s enabled.
Now everything is ready, and you can happily develop! Some features not supported by the simulator (such as hand tracking) can be conveniently verified, tested, and debugged on the actual device.
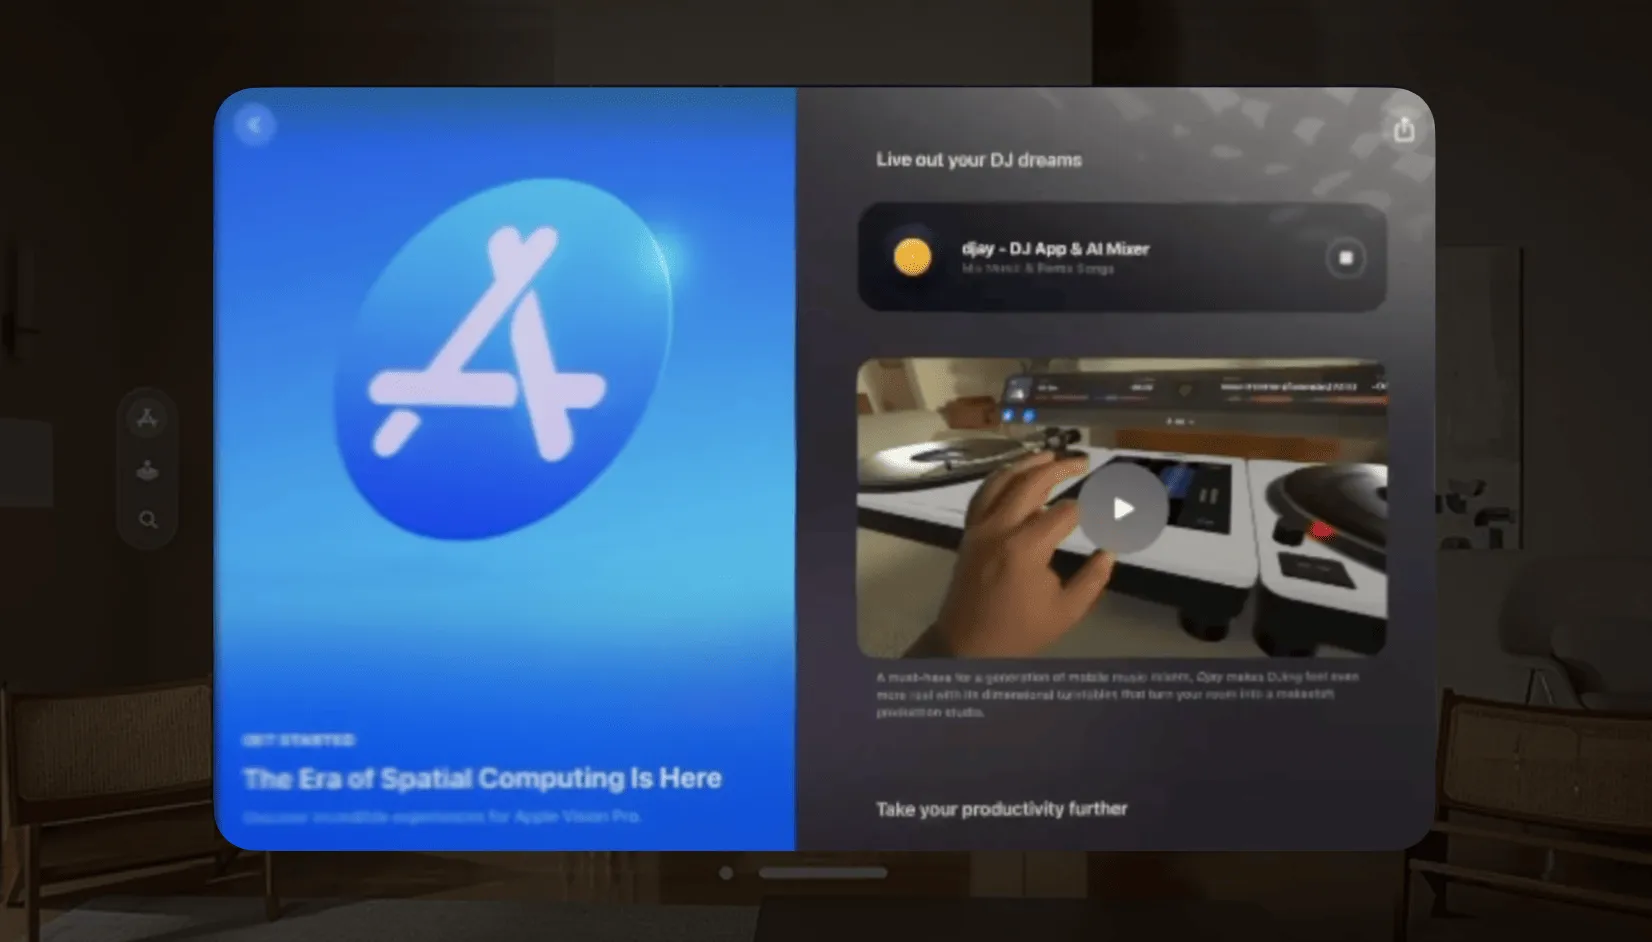
Image from Apple Store
Before you test the code and prepare to submit it to the App Store to share your idea with the world, wait! There are some things to be aware of.
How to prepare App Store videos and screenshots that meet Apple’s requirements?
Like submitting apps on other Apple platforms, we need to prepare preview videos and screenshots of our App. A good preview video and running screenshot are important premises for attracting users to purchase the application, especially since the requirements of visionOS are slightly different from other platforms. If this is your first time submitting an app, don’t worry, we’ll walk you through this last step before submitting to AppStore.
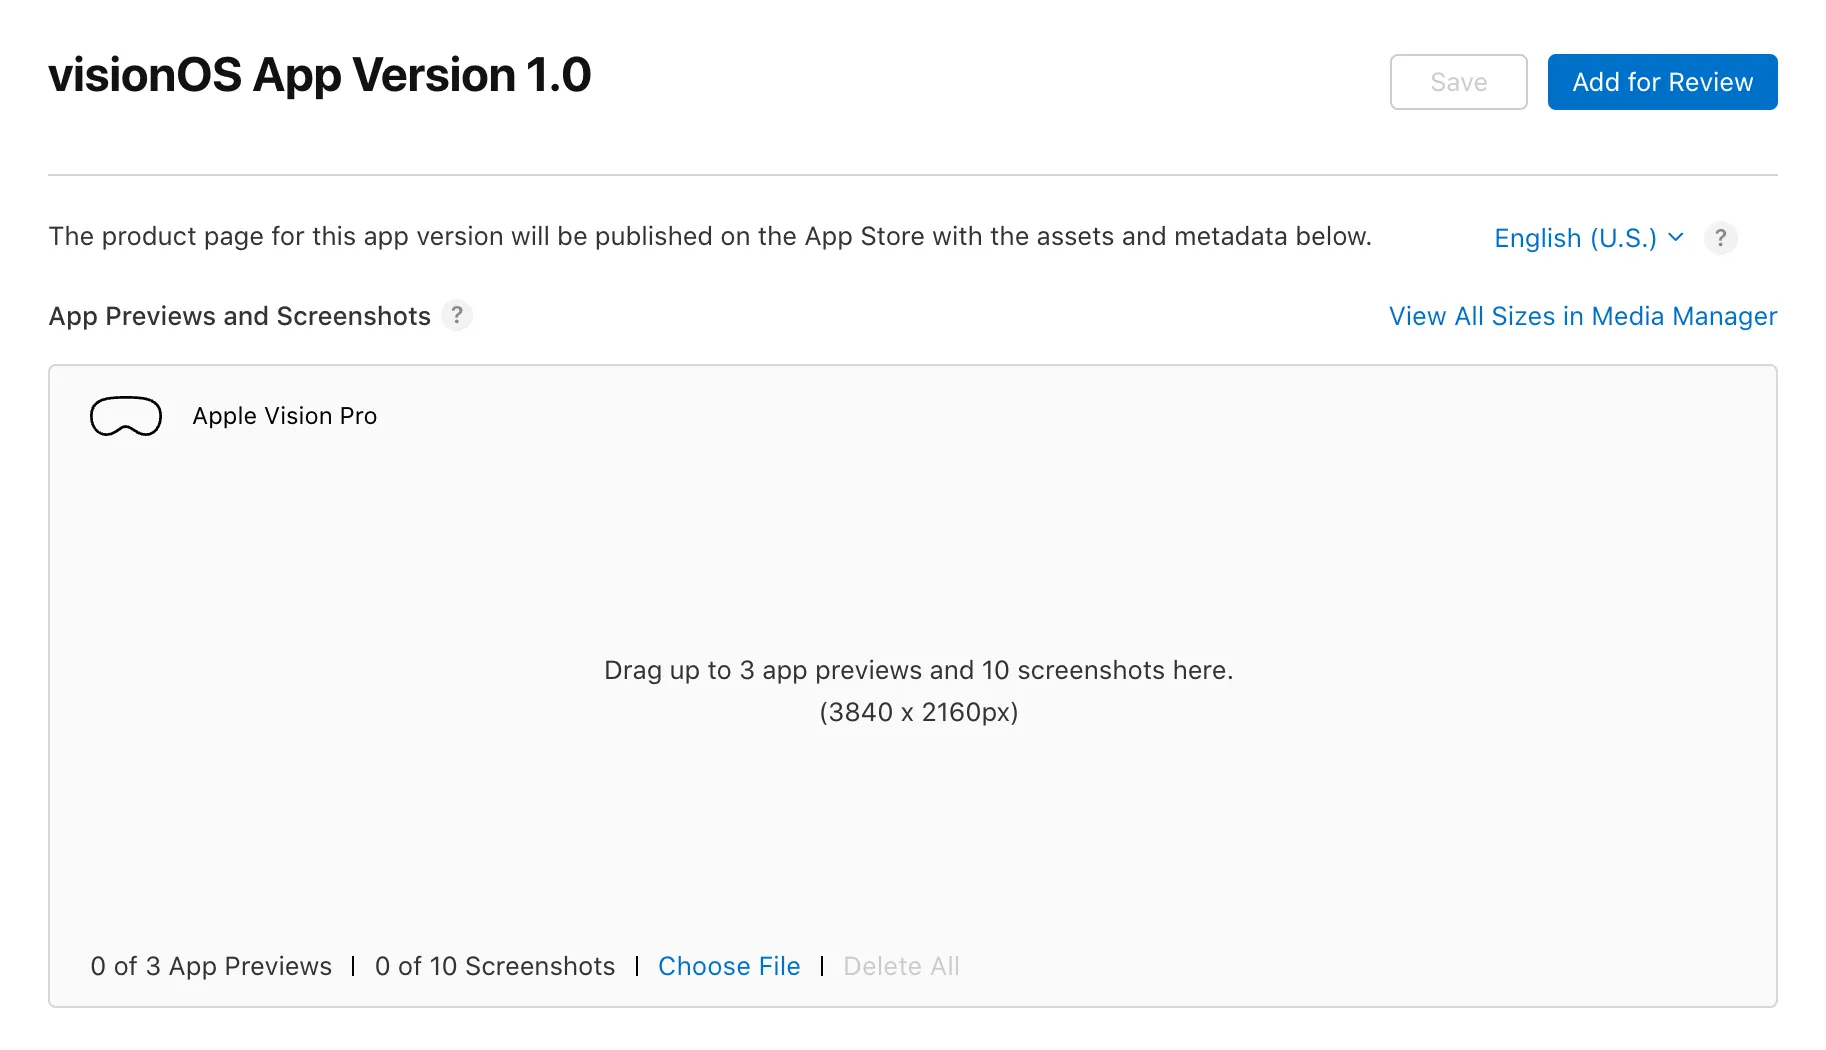
First, let’s take a look at Apple’s official requirements:
- Resolution of preview videos and running screenshots: 3840 x 2160
- Quantity limit: up to 10 screenshots and 3 app previews
So how do you create screenshots and videos that meet the requirements?
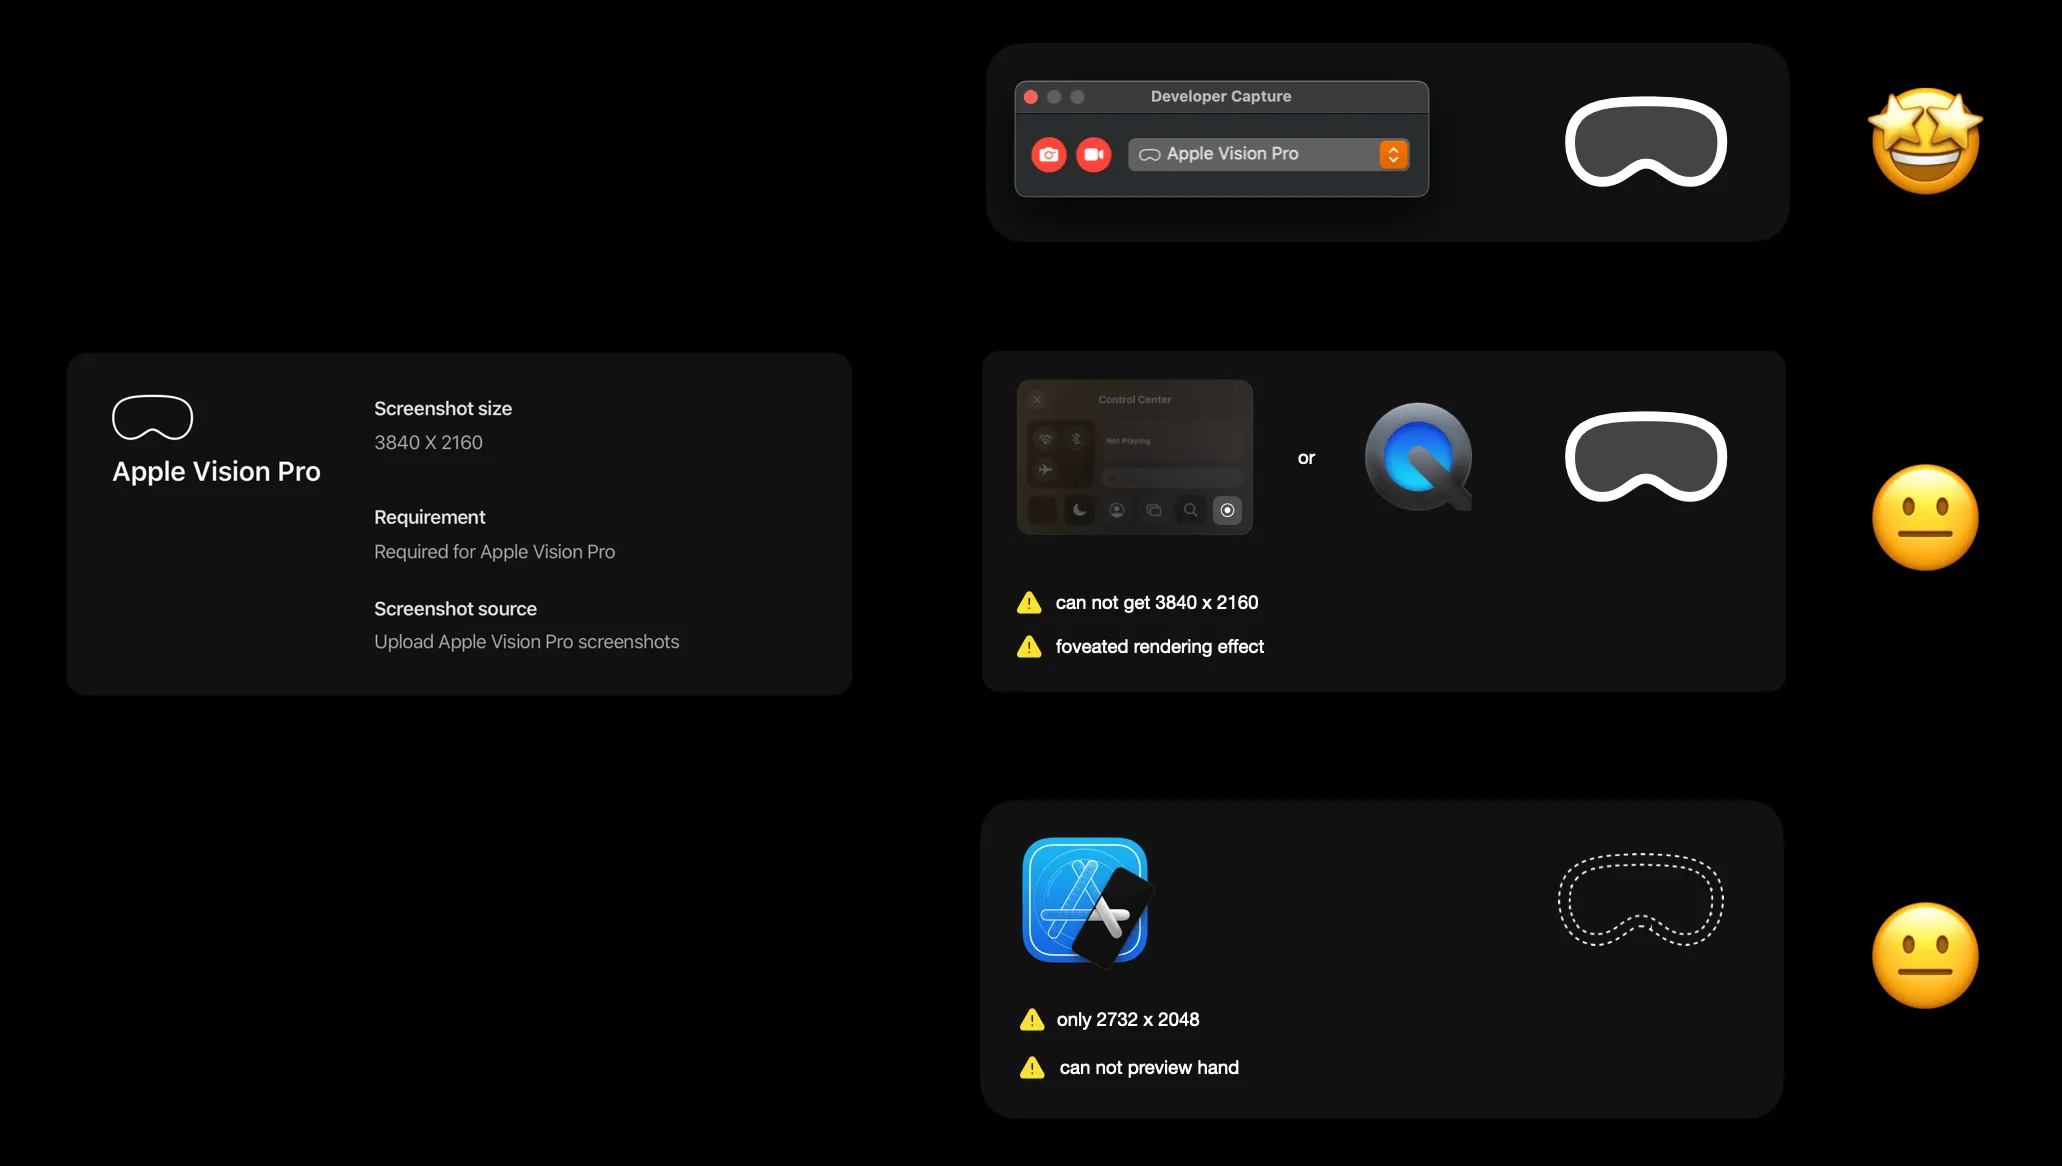
Three recording methods
Currently, there are three ways to record videos and screenshots on Apple Vision Pro:
- If you don’t have Apple Vision Pro yet, you can record running screenshots and videos through the simulator, but
- The size of screenshots or videos recorded by the simulator is only 2732 x 2048, which does not meet the minimum resolution requirement and requires post-processing
- If the app has highlights of hand interaction, it cannot capture the hand interaction process on the simulator
Tips
For friends without physical devices, it is recommended to pay attention to the schedule of Apple Vision Pro Developer Lab, choose a suitable time and place for development and debugging,
- If you already have Apple Vision Pro, you can use the recording button in the Control Center on the device, or record using QuickTime on Mac, but we do not recommend using this method to produce videos and screenshots because:
- The resolution of the recorded video does not meet the minimum requirement of 3840 x 2160
- It can only record images processed after gaze point rendering (i.e., the non-gaze point area shows a blurred image)
- If you already have Apple Vision Pro, use Reality Composer Pro’s Developer Capture to record, which we recommend more because:
- The resolution of the recorded video meets the 3840 x 2160 requirement and can include effects such as hand occlusion
- The recorded image is a clear video image that is not processed after gaze point rendering
- But note that a single recording can only last for 60 seconds
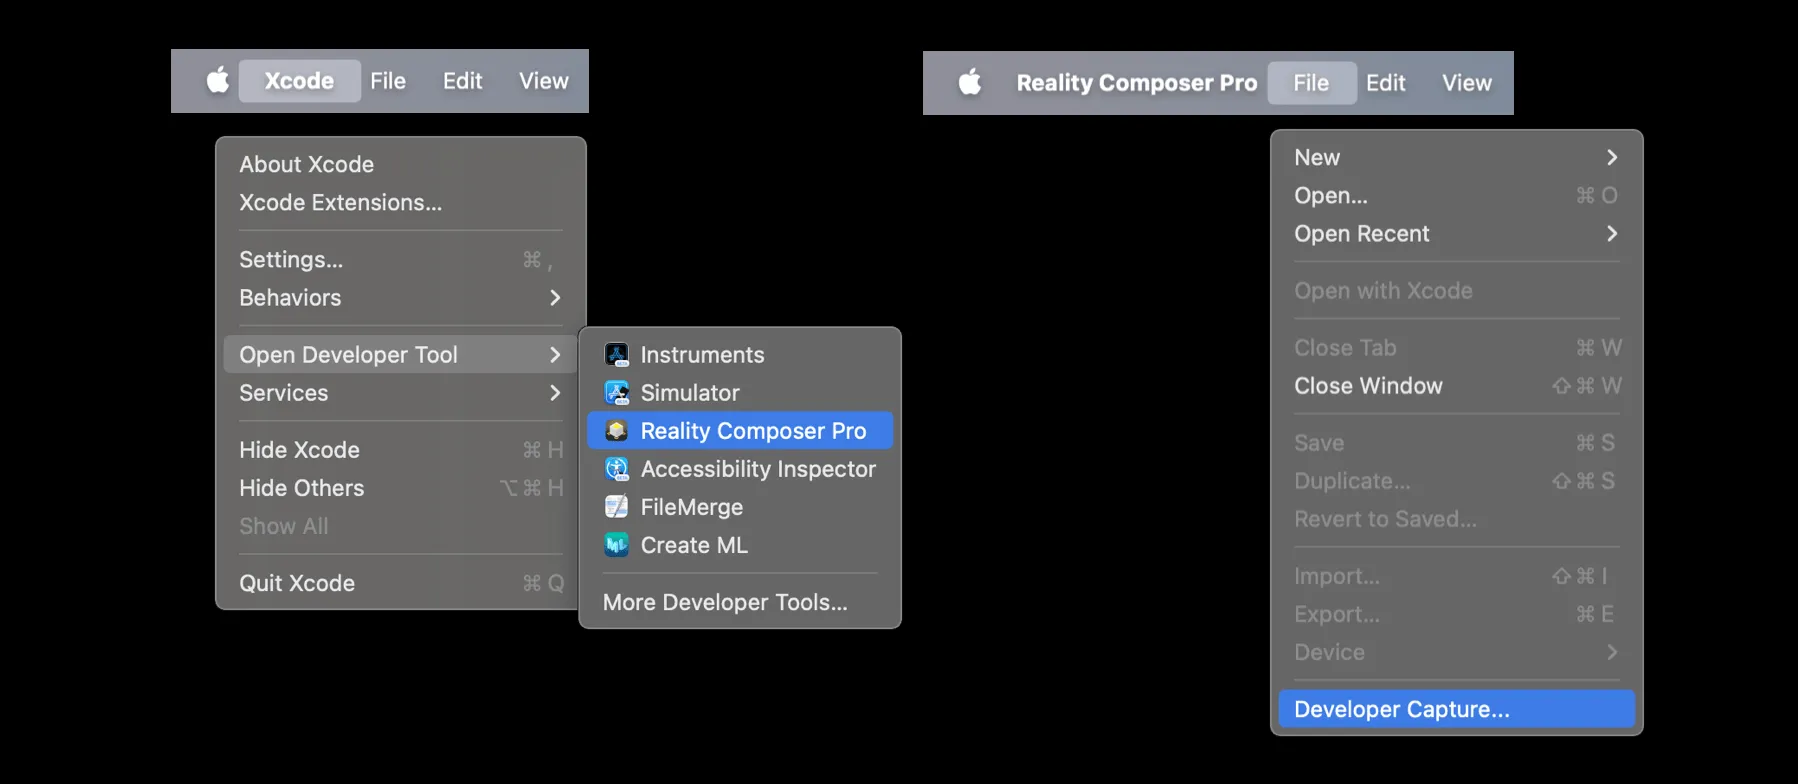
Points to note when recording with Reality Composer Pro
If you have decided to record with Reality Composer Pro, you can find Reality Composer Pro through Xcode. After opening Reality Composer Pro, you don’t need to create any projects, just find the Developer Capture button directly under File.
When Apple Vision Pro has turned on “Developer Mode” and has completed wireless connection with Mac through Xcode, Developer Capture will display the recording program screen. It shouldbe noted that:
- Device response speed will decrease in the first few seconds after starting video recording (as the device allocates more computing resources to ensure the quality of presentation and recording)
- Single recording duration is 60 seconds, screen projection is not possible during recording, and others cannot see what the recorder is seeing, there is no obvious indication on Apple Vision Pro when recording starts and ends
- The final recorded video format is:
- FPS: 30 frames/second
- Resolution: 3840 x 2160
- Color space: HDTV Rec. 709
- Encoding format: 10-bit HEVC
- Audio: 32-bit floating-point linear PCM recorded system audio
- File format: QuickTime Movie (.mov) file
- After recording, the video will be automatically saved on the desktop of the recording Mac, it is recommended to record 10 to 15 segments of video for post-editing
- When recording images or videos, it is recommended to keep the head in a stable position, and use slow and steady movement to change the focus of the device if necessary. Because subtle head movements will be magnified, which may make App Store users feel uncomfortable

Of course, there may be some problems during the recording process, and we have also summarized some common problems and solutions:
- If a 101 error occurs, please make sure that Apple Vision Pro has turned on “Developer Mode” and try again
- Multiple recordings will cause the device to overheat, and you need to wait for the device temperature to lower before continuing to record

What should be noted during recording?
Having discussed the recording tools, what about the environment and the people and objects involved in the recording?
I. Focus on the App
The App is always the core of the video and running screenshots. To avoid distractions from the surrounding environment and to avoid infringing on others’ portrait rights or intellectual property rights, the background and surrounding environment should be kept tidy during shooting, without sensitive content, personal information, or items or materials without intellectual property rights appearing.
Screenshot from iJustine Channel
II. Choose the Right Recording Environment
Because indoor scenes are more controllable and recording with Reality Composer Pro requires the cooperation of a Mac, we recommend recording in indoor scenes. If the app includes a desktop spatial experience, a tidy table can be set up in front of the photographer. It is recommended that the shooting scene covers a wall surface of 4 to 5 meters wide, with the recorder’s chair 2 to 3 meters from the wall. It should be noted that there is no obvious indication on Apple Vision Pro when recording starts and ends, so it is recommended to find a partner to cooperate with the recording at the computer.
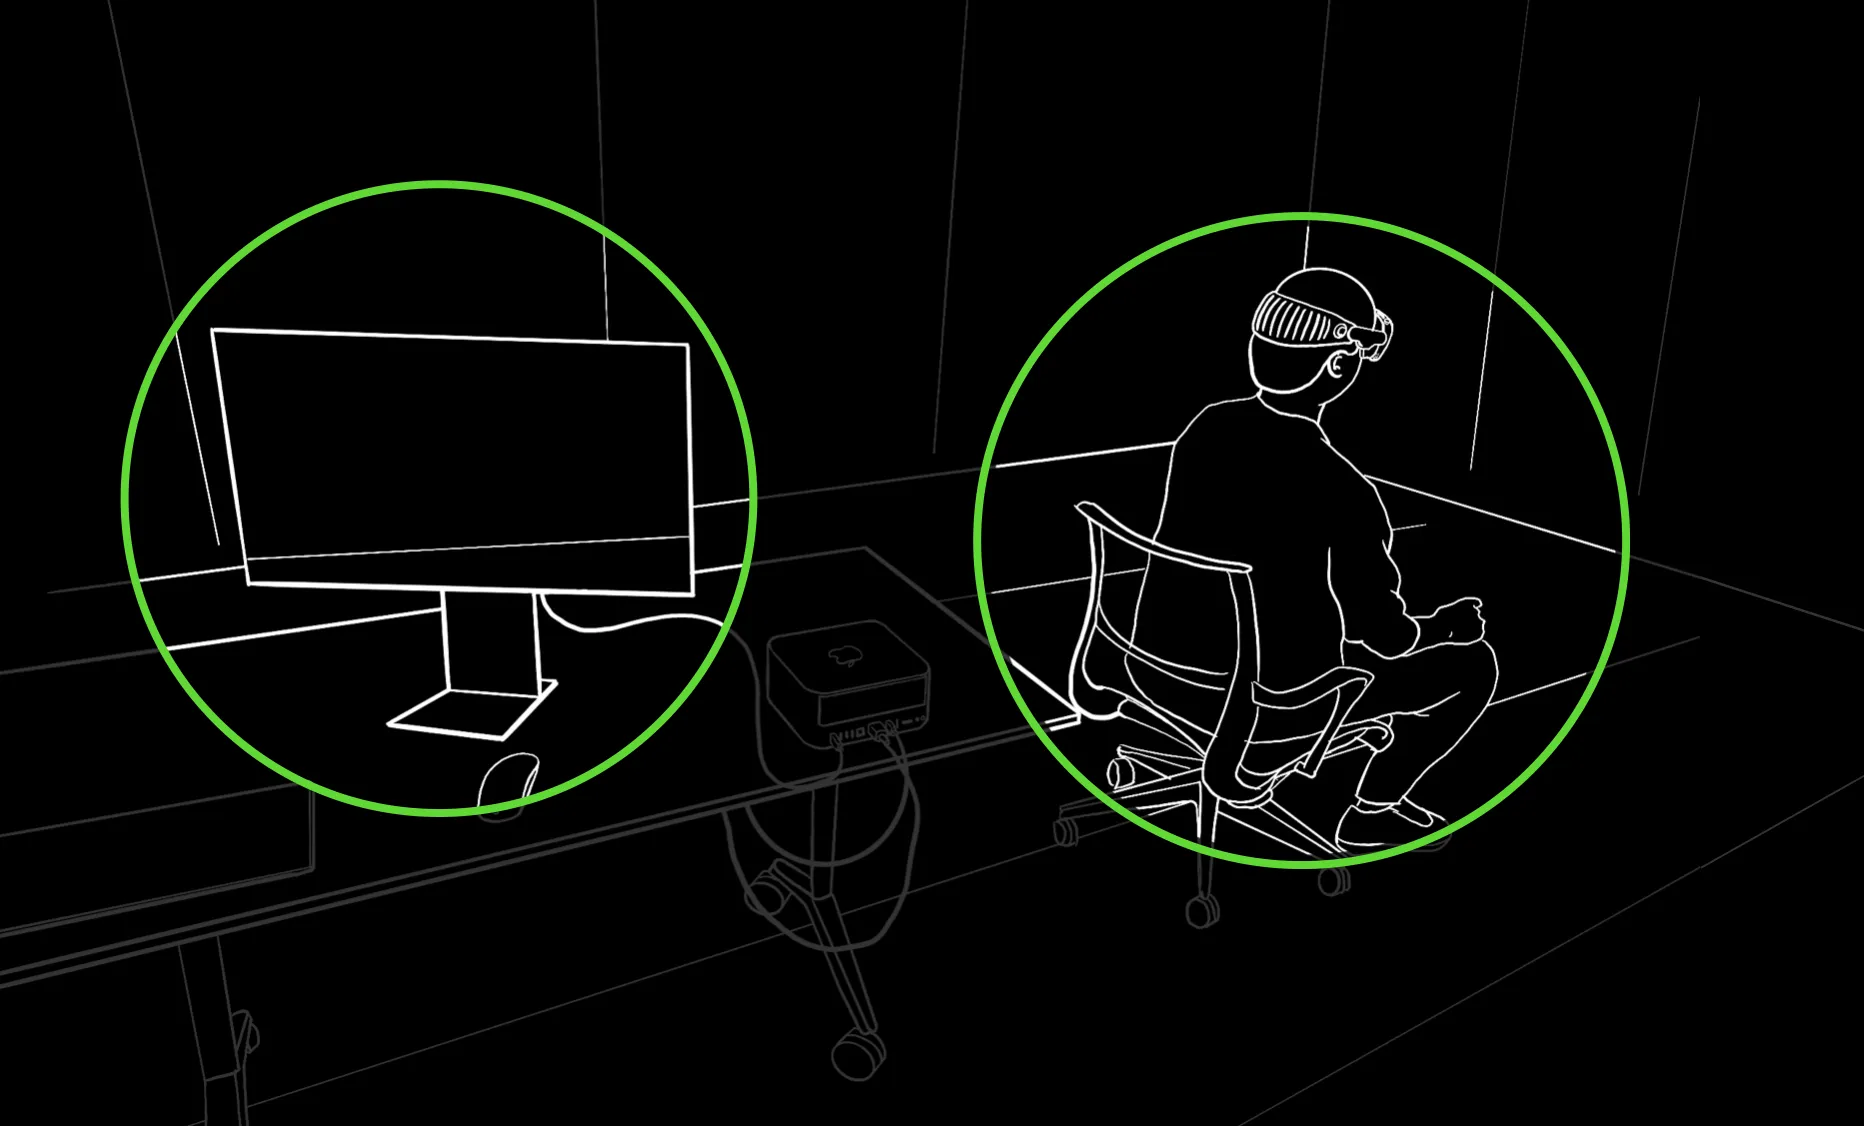
III. Choose the Right Recording Posture
To reduce blurring caused by rapid movement, we suggest:
- The recorder wears Apple Vision Pro and sits steadily on the chair, feet flat on the floor, and the direction of sight should be parallel to the ground (the line connecting the floor and wall can be used as a horizontal reference) to avoid tilting of the App window due to head tilt.
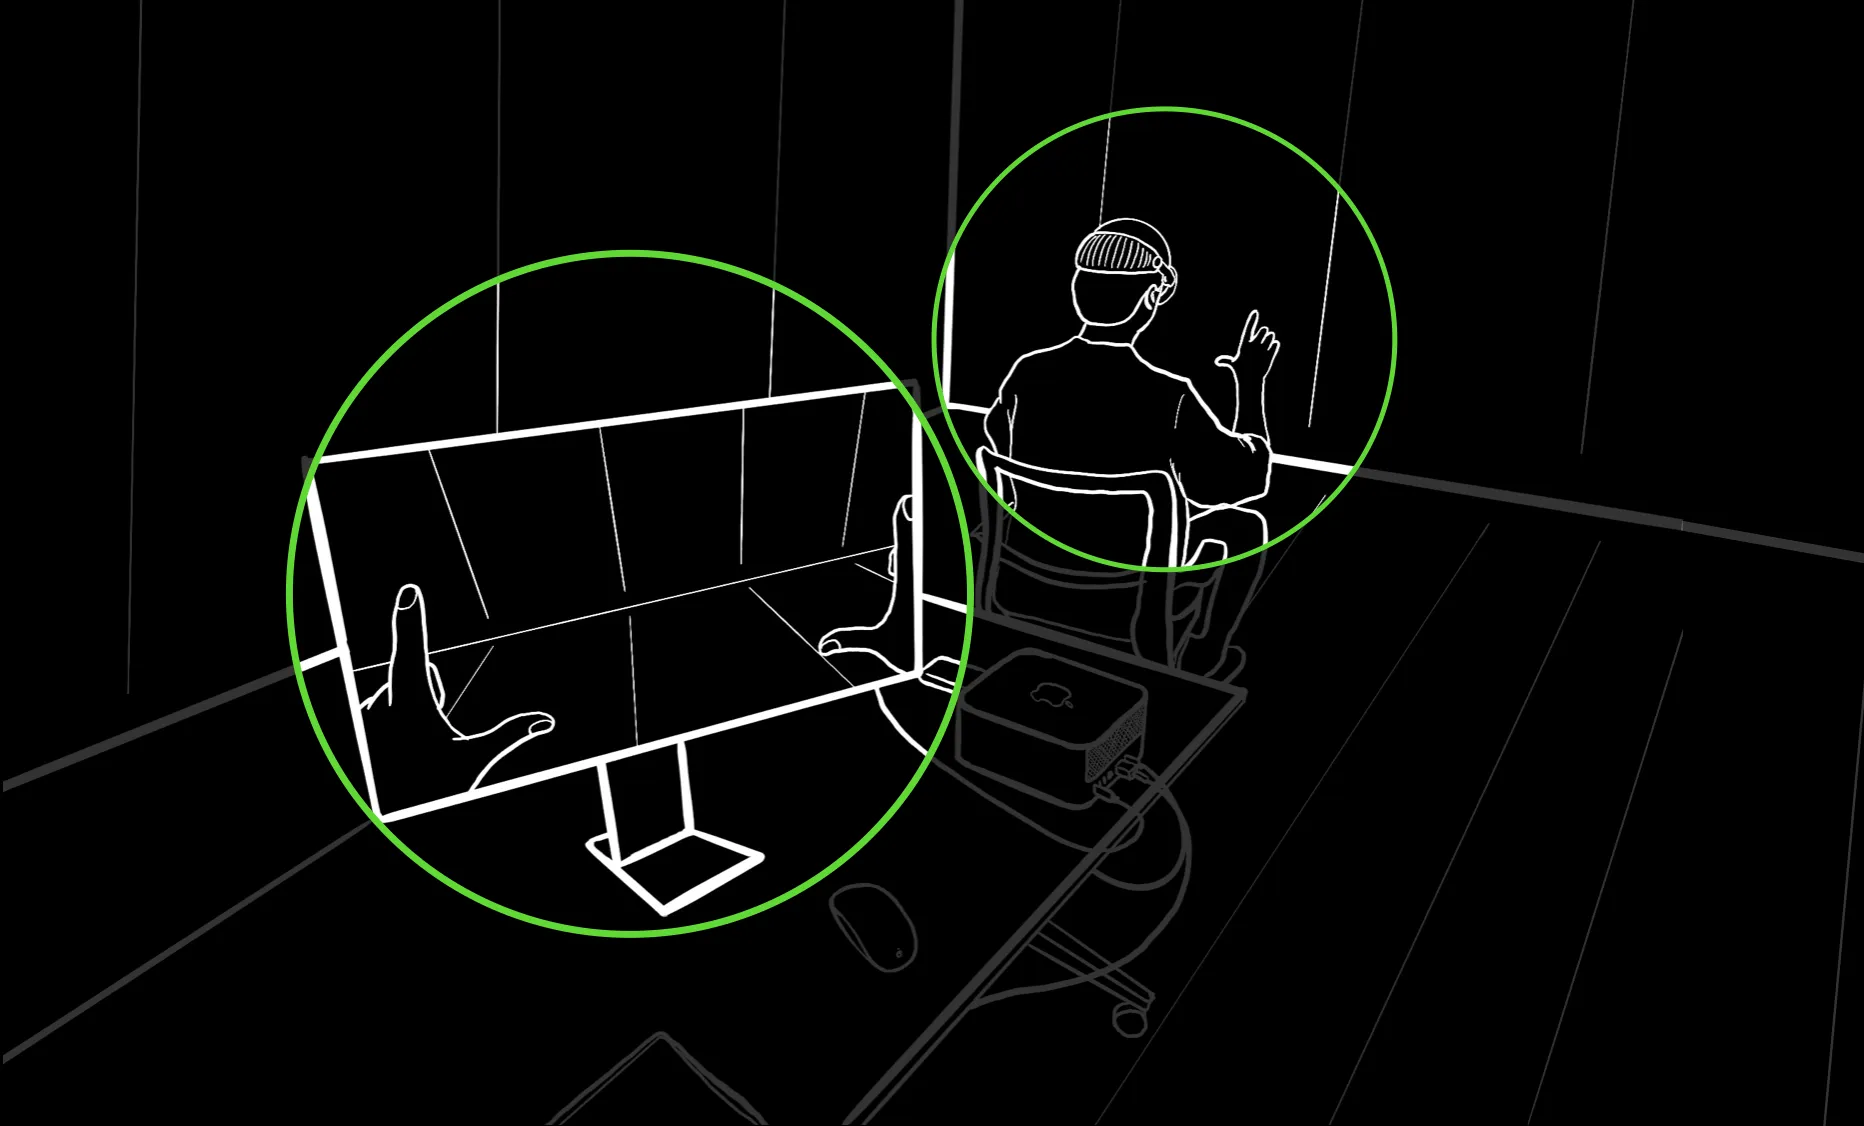
- During the recording process, only hands can appear in the recording screen, and there should be no jewelry, tattoos, or sleeves on the hands. (It should be noted that sitting too low will expose the knees, and the appearance of other body parts should be avoided to prevent audit failures)
- Since screen projection sharing is not possible during the recording process, it is recommended to use a right angle gesture formed by the thumbs and index fingers of both hands before the recording starts to roughly confirm the range of hand movement.
IV. Editing, Review, and Publishing
After recording, it is recommended to review the video before submission to ensure it contains all the planned content and does not include any illegal elements. Of course, we can use video editing tools to trim, splice, edit, and post-process the video to ensure smooth transitions and animation effects, consistent frame rates, and thus create a high-quality app preview. You can also extract video frames and process them with image editing tools to produce high-quality screenshots.
Tips
Although Reality Composer Pro’s recording tool can take screenshots, based on our practice, we suggest taking screenshots directly from the video, which is relatively more efficient.
Practice Suggestion: Rehearsal
A lot of practical experience tells us that it is difficult for even professional actors to get it right in one take. To reduce the “pain” of post-recording, we can make the recording process smoother through rehearsals. First, we need to clarify that the main purpose of rehearsal recording is to determine whether the overall process is reasonable, whether the recorder’s posture needs to be corrected, whether the speed of hand movement during the demonstration of specific functions is appropriate, etc. Therefore, we can use QuickTime Player or AirPlay for quick preview to get rid of the 60-second recording limit.
The AirPlay rehearsal process is as follows:
- Open system screen recording on the recording Mac with Shift + Command + 5, and start full-screen video recording
- Open AirPlay on Apple Vision Pro through the Control Center and screen project to the display of the recording Mac
- Record the rehearsal process directly, without time limit.
- After completion, adjust the details of the official recording by previewing the rehearsal video on the Mac.
How to Submit to the App Store
Congratulations on completing the recording of the application. The very last step is to submit your App! To make it to the Top list, you also need to pay attention to the following:
-
Choose an impressive name. The app name on visionOS can contain up to 30 characters, and the subtitle can also contain up to 30 characters, but neither can include the three words Apple Vision Pro.
Tips
Although currently, apps on the main screen of Apple Vision Pro are arranged in alphabetical order and cannot be customized for now, avoid adding meaningless letters for the sake of ranking earlier.
-
Design a unique app icon. Native app icons on visionOS are displayed as a round 3D object, consisting of a background layer and one or two additional layers, while compatible apps are displayed as rounded rectangles.
-
Appropriately describe the app’s features. Pay attention to the English writing standards for Apple-related products, operating systems, services, and avoid translating these proper nouns.
-
Set a reasonable price. If you wish to offer a specific visionOS app as a separate paid app, just set it as a new app record in App Store Connect (see official website).
We look forward to seeing more interesting and innovative apps distributed in the App Store and stay tuned for our XRealityZone’s hands-on video of Apple Vision Pro!
Contributors to this article
| Link | Image |
|---|---|
| Zion |  |
| Onee |  |
| SketchK |  |
Recommended Reading
- How to Quickly Create an MR Application on PICO 4 Ultra with AI? - Using Cursor to Speed Up Development
- Solving Nested Transparent Objects in RealityKit with Rendering Ordering - Part 2
- Solving Nested Transparent Objects in RealityKit with Rendering Ordering - Part 1
- Open Source Framework RealityShaderExtension: Transfer Shaders from Unity and Unreal to visionOS - Writing Shaders on visionOS Made Easy
- Far More Than Games: Review the Exciting MR Capabilities in PICO 4 Ultra
- A 3D Stroke Effect: Getting Started with Shader Graph Effects on visionOS - Master Shader Graph Basics and Practical Skills
- Before developing visionOS, you need to understand the full view of Apple AR technology